How to Run and Review the Ads List Report
The Ad List Report provides a focused, one-month view of all ad activity, helping you and your team stay organized and on target for each publication deadline. By running this report, you can confirm that ads are submitted, sized, and placed according to client agreements, ensuring everything is on track. Reviewing ad statuses shows where each ad stands in production, making it easy to spot any that need attention. Additionally, the report tracks monthly ad revenue, design service usage, and billing accuracy, offering a clear snapshot of operational and financial health for each issue. This organized view supports smooth production, reliable client relationships, and effective deadline management.
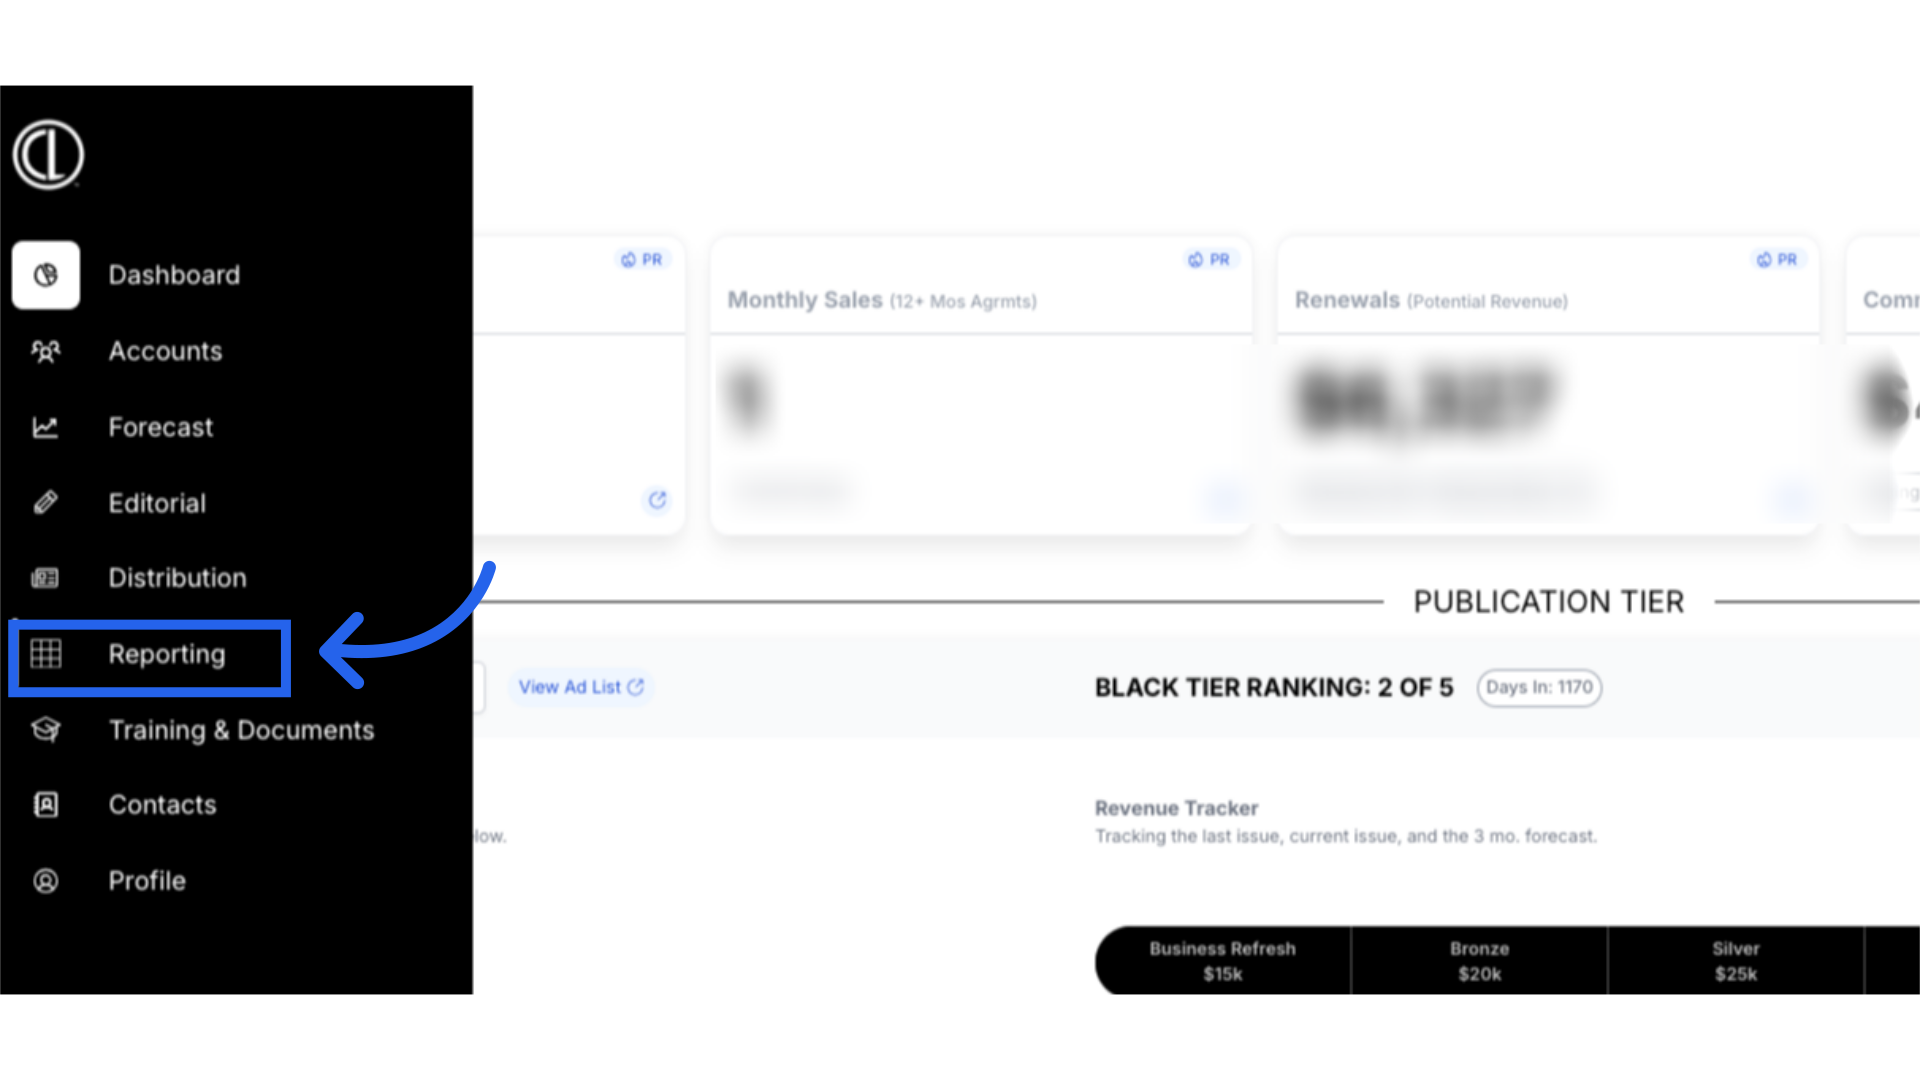
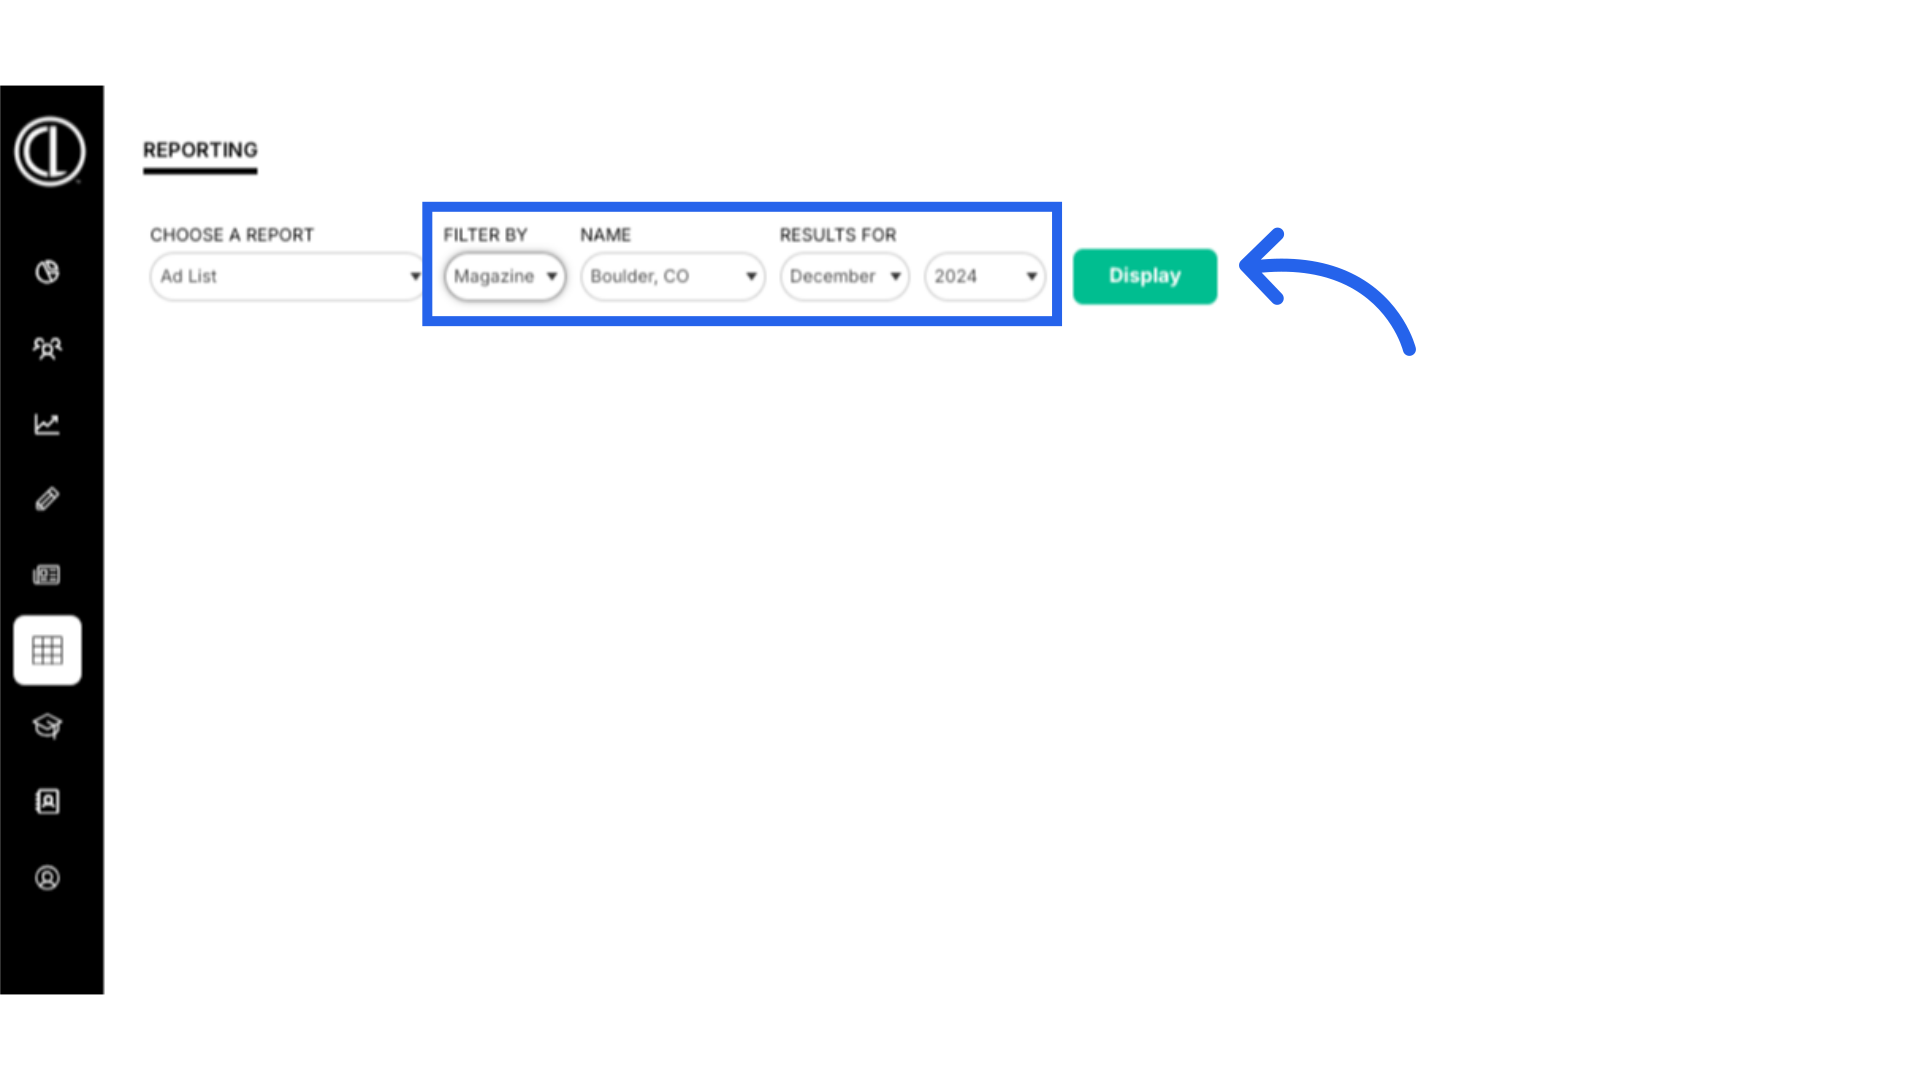
- In ARC, select the Reporting page found in the Menu on the left side of the screen.
- Under “Choose a Report” select Ad List from the drop down menu.
- Under “Filter By” select Magazine from the drop down menu.
- Under “Name” select the name of your Publication from the dropdown menu.
- Under “Results For” select the month and year of the ad list you want to view.
- Click “Display”.
Understanding the Report:
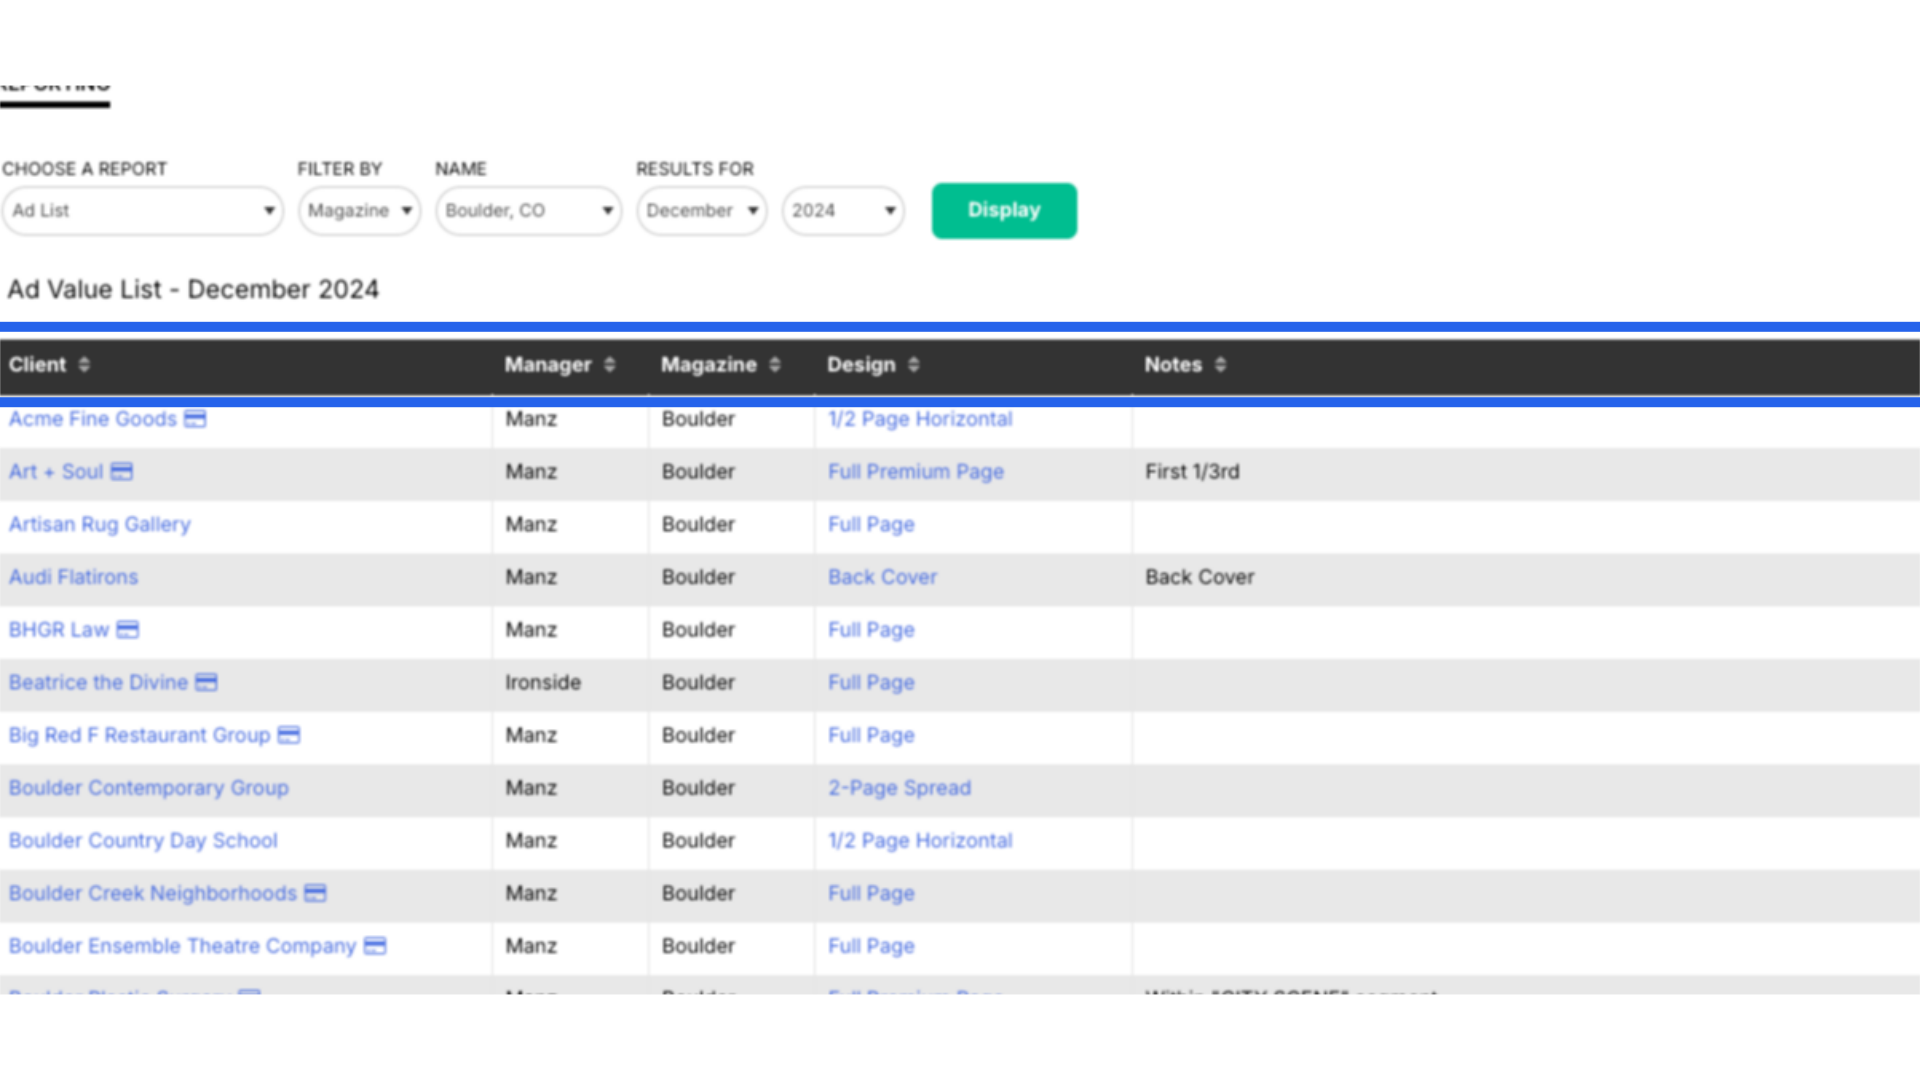
Your Ad List Report will display 9 different columns.
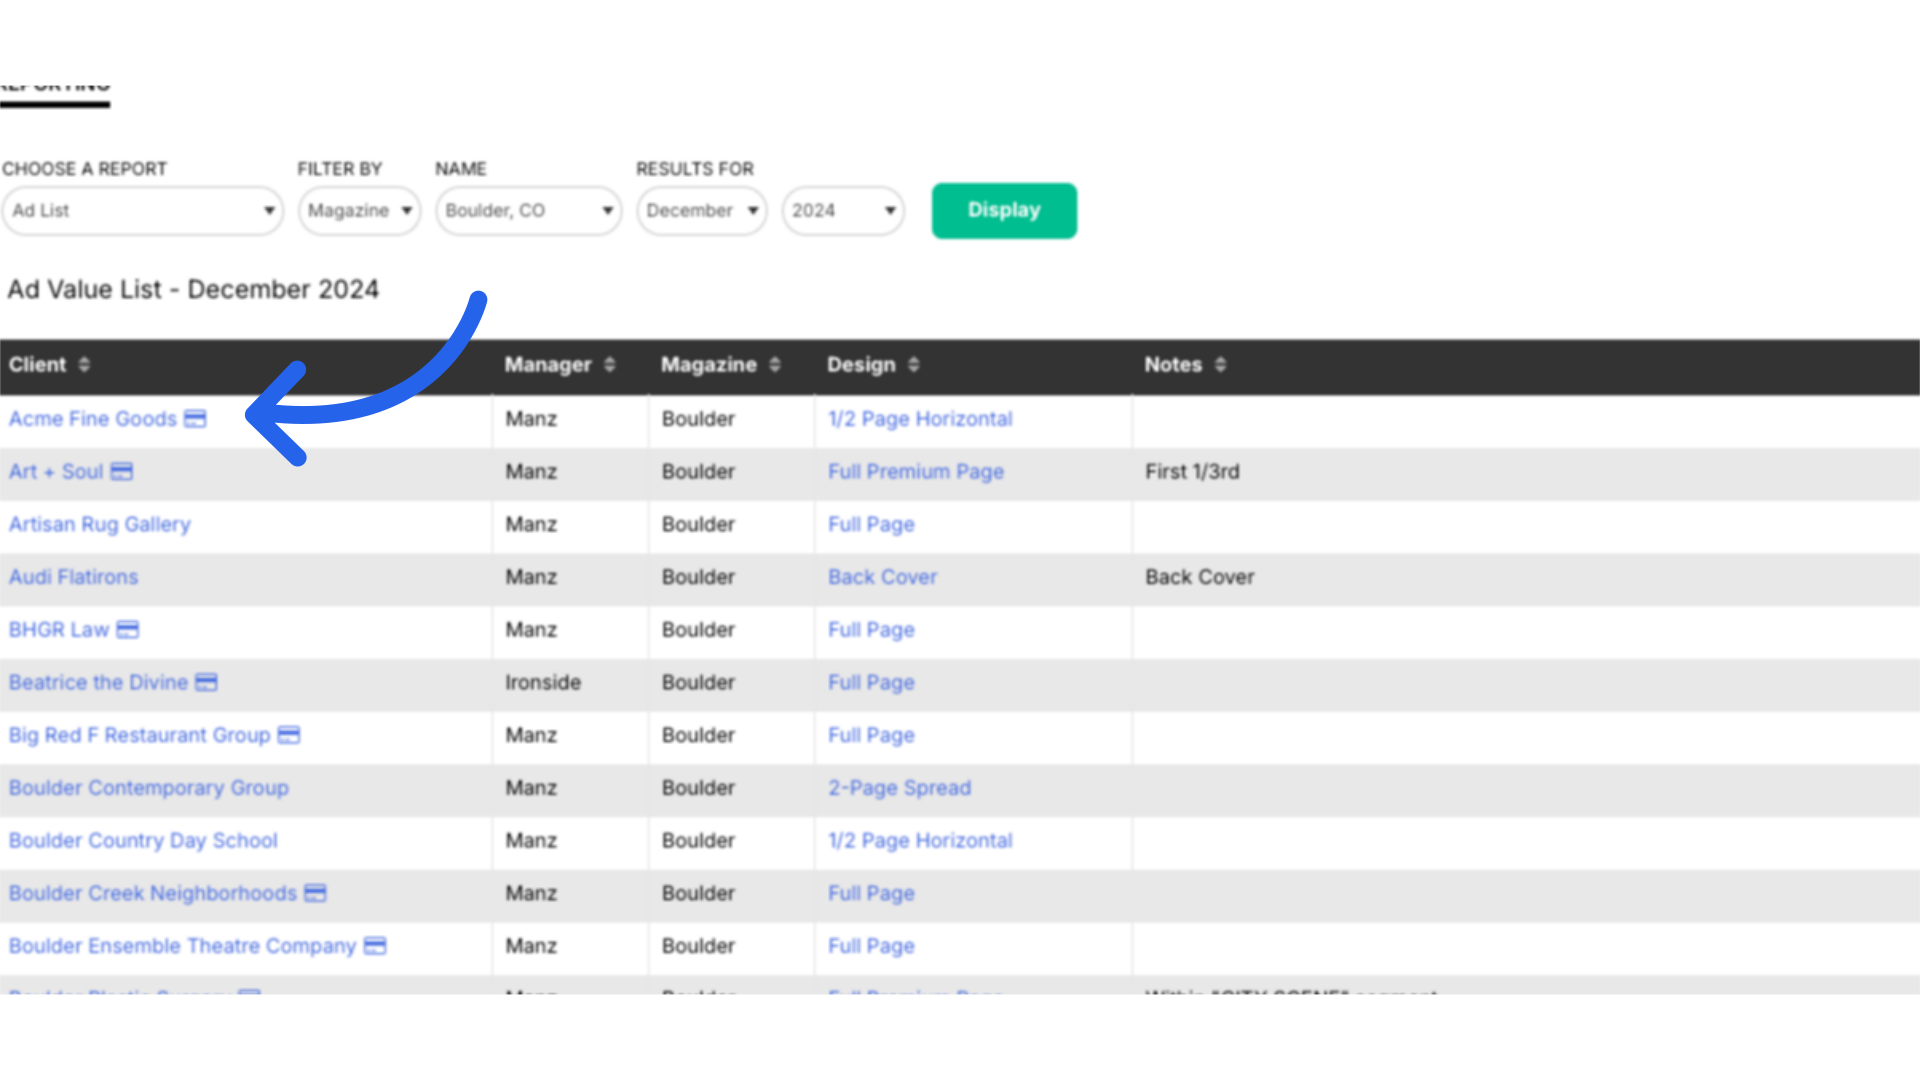
- The "Client" column will show the clients whose ads are featured in the selected month's issue.
- You can easily view your client’s account if necessary, by clicking on their name
- Any company with a small credit card icon to the right of it indicates a company that has a credit card or ACH payment method on file.
- Those without the credit card icon are clients who are invoiced.
- The “Manager” column displays the last name of the individual who the agreement was signed under.
- The “Magazine” column displays the name of the magazine that the insertions will be printed in.
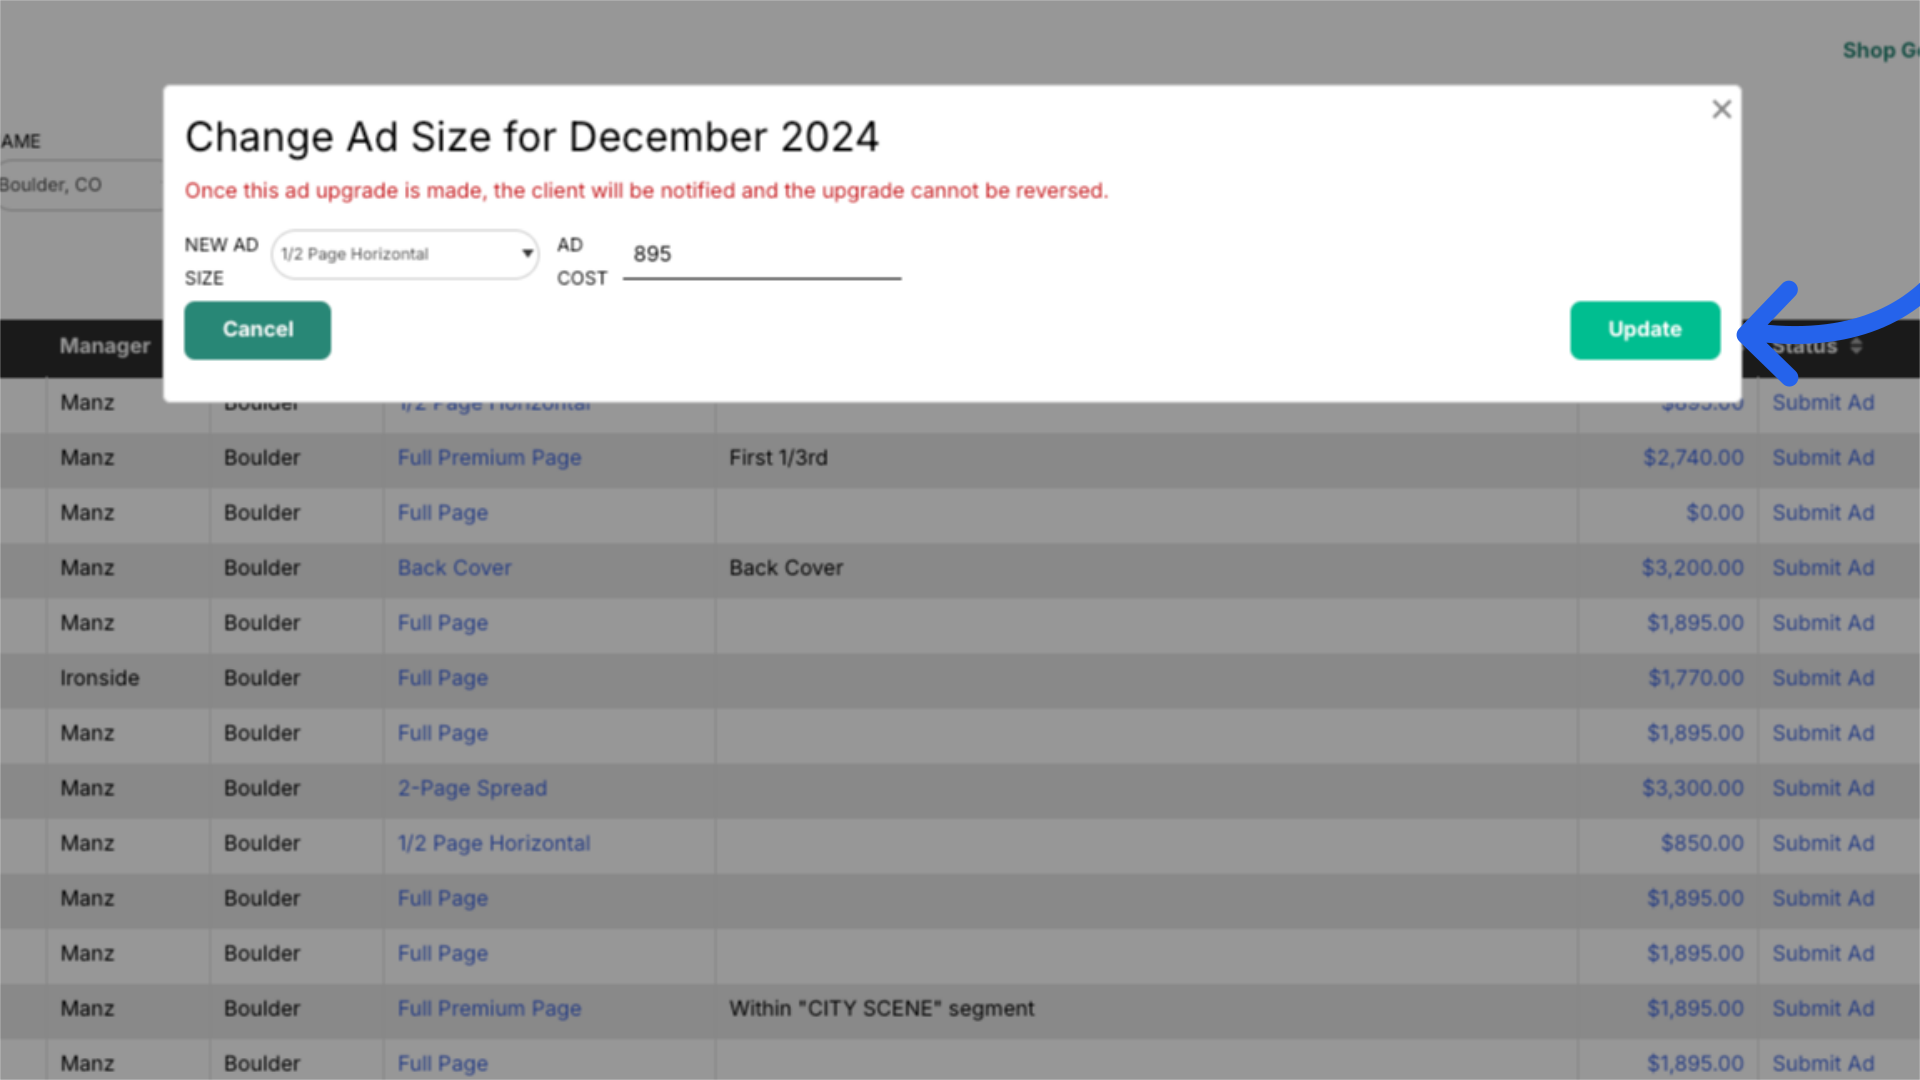
- The “Design” column displays the size of the client's ad for that specific issue.
- By clicking on the ad size, you can change the size and cost of the ad for that specific issue by
- Selecting a different size from the dropdown menu
- Entering in a different amount for ad cost
- Clicking the green update button
- **Once the upgrade is made, the client will be notified and the upgrade CANNOT be reversed.
- By clicking on the ad size, you can change the size and cost of the ad for that specific issue by
- The “Notes” column displays the ad insertion placement notes the Publisher made in the agreement.
- The "Amount" column indicates the agreed-upon monthly rate that the client pays for that specific ad size.
- The "Status" column shows the current stage of the production process for the ad at the time of viewing.
- Clicking on the status will open a new screen where you can view further details regarding the ad's current production status.
- The "Rate Card Rate" column shows the actual monthly value for that specific ad size as listed in the Media Kit.
- The "Issue" column shows the month of the ad list you are currently viewing.
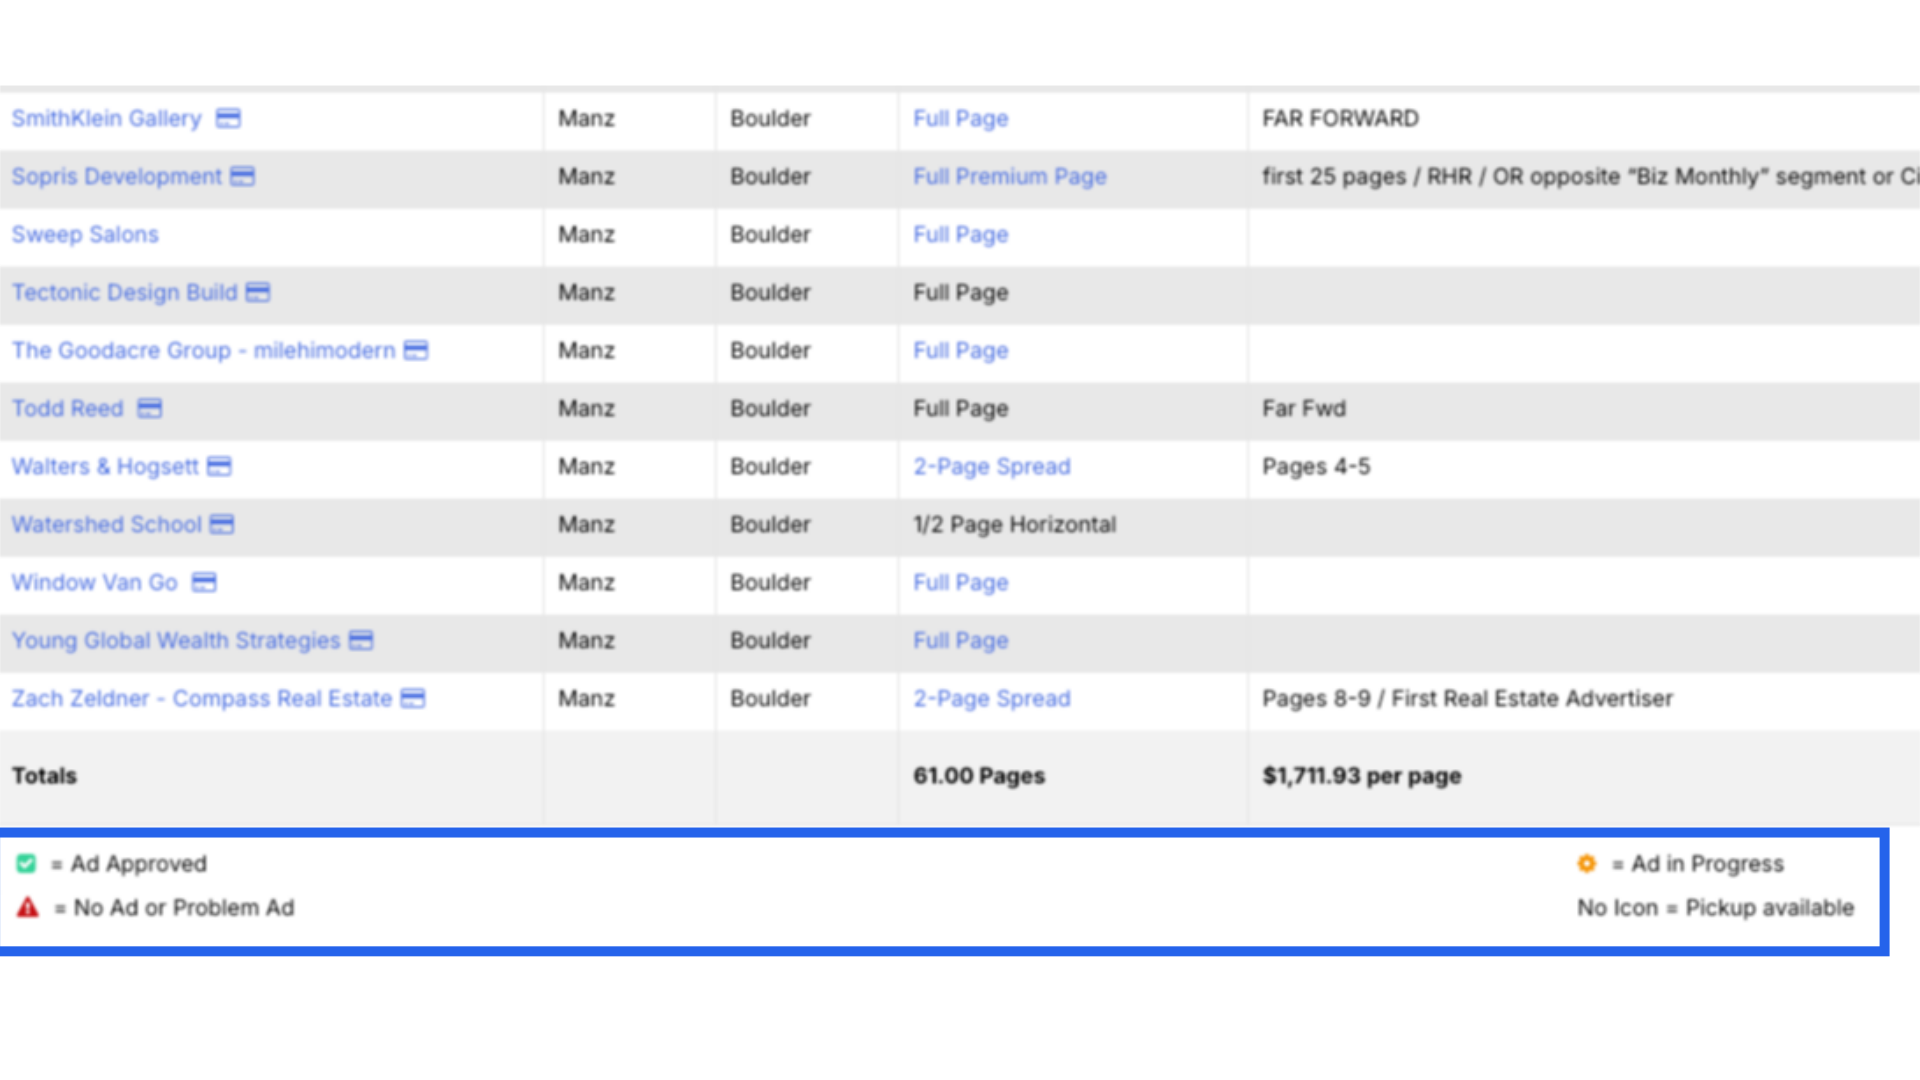
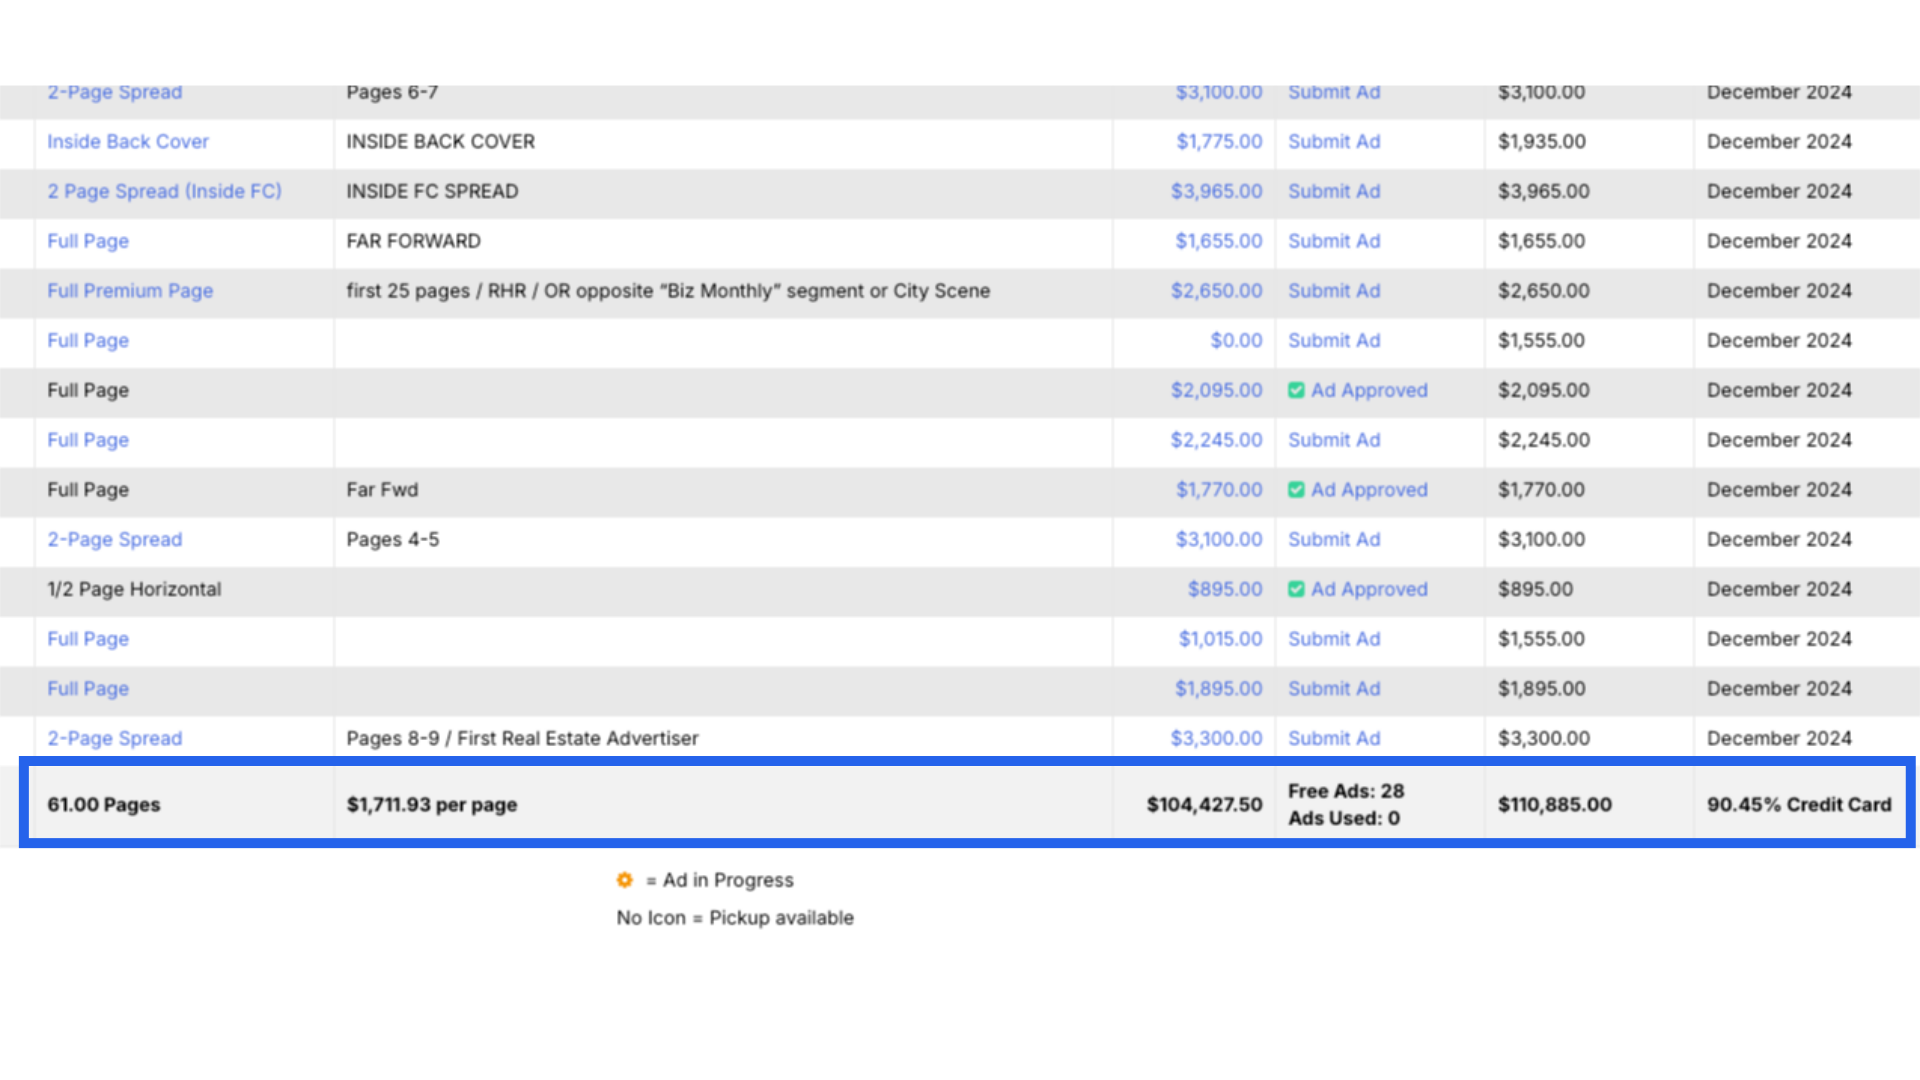
At the bottom of the Ad List Report page you will see a list of total numbers for the specific issue you ran the report for. There is also a key for the various symbols that appear in the “Status” column and their meaning.
- The number listed under the “Design” column is the total number of pages containing ads.
- The number listed under the “Notes” column is the total ad value per page. This is calculated only on the pages containing ads.
- The number listed under the “Amount” column is the total amount of ad revenue for that issue.
- The number listed under the “Status” column is the total number of free ad design services you are allowed and how many you have used that issue.
- The number listed under the “Rate Card Rate” column is the total ad revenue based on the actual monthly value for that specific ad size as listed on the Media Kit.
- The number listed under the “Issue” column is the percentage of clients on that ad list who pay by credit card.
How to Run and Understand the Ads List Report
Go to citylifestylehq.com
1. Running and Understanding the Ad List Report
2. Click "Reporting"
3. Select the "Ad List" Report
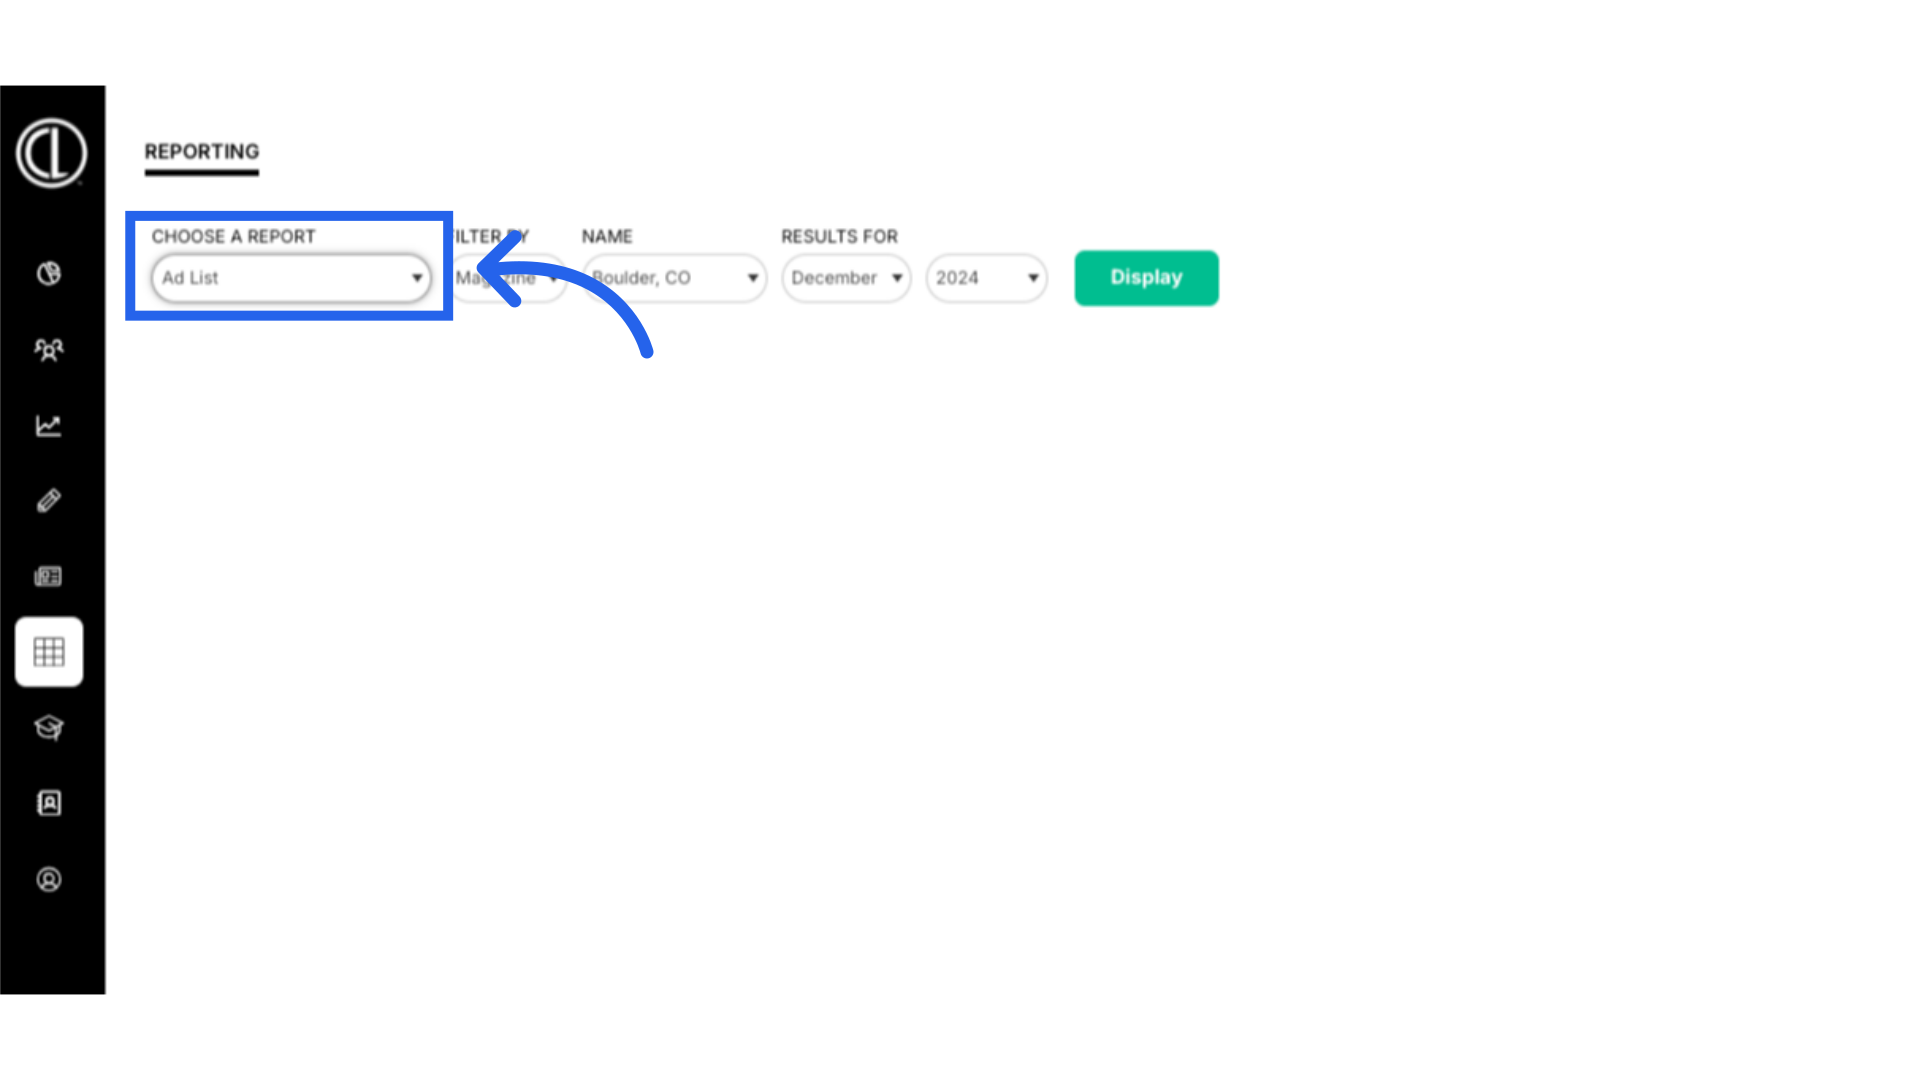
4. Filter by Magazine, select your Publication and the Month/Year for the Ads List
5. View Client, Manager, Magazine, Design and Notes
6. View Client Account and Payment Type
7. Changing an Ad Size or Cost for a Client
8. View Ad Amount, Status, Rate Card Rate and Issue

9. Ad List Totals
10. Ad Status Key