Creating a Digital Promo in the Customer Portal
Premium digital package services offer promos that are an effective tool to engage audiences, capture valuable leads, and drive traffic to your website or special landing pages. By selecting the right promo type, you can enhance your marketing efforts to meet specific business goals, such as increasing leads or driving sales.
- Log in to your customer portal via https://citylifestylehq.com.
- On the left-hand side, click the “Digital” tab.
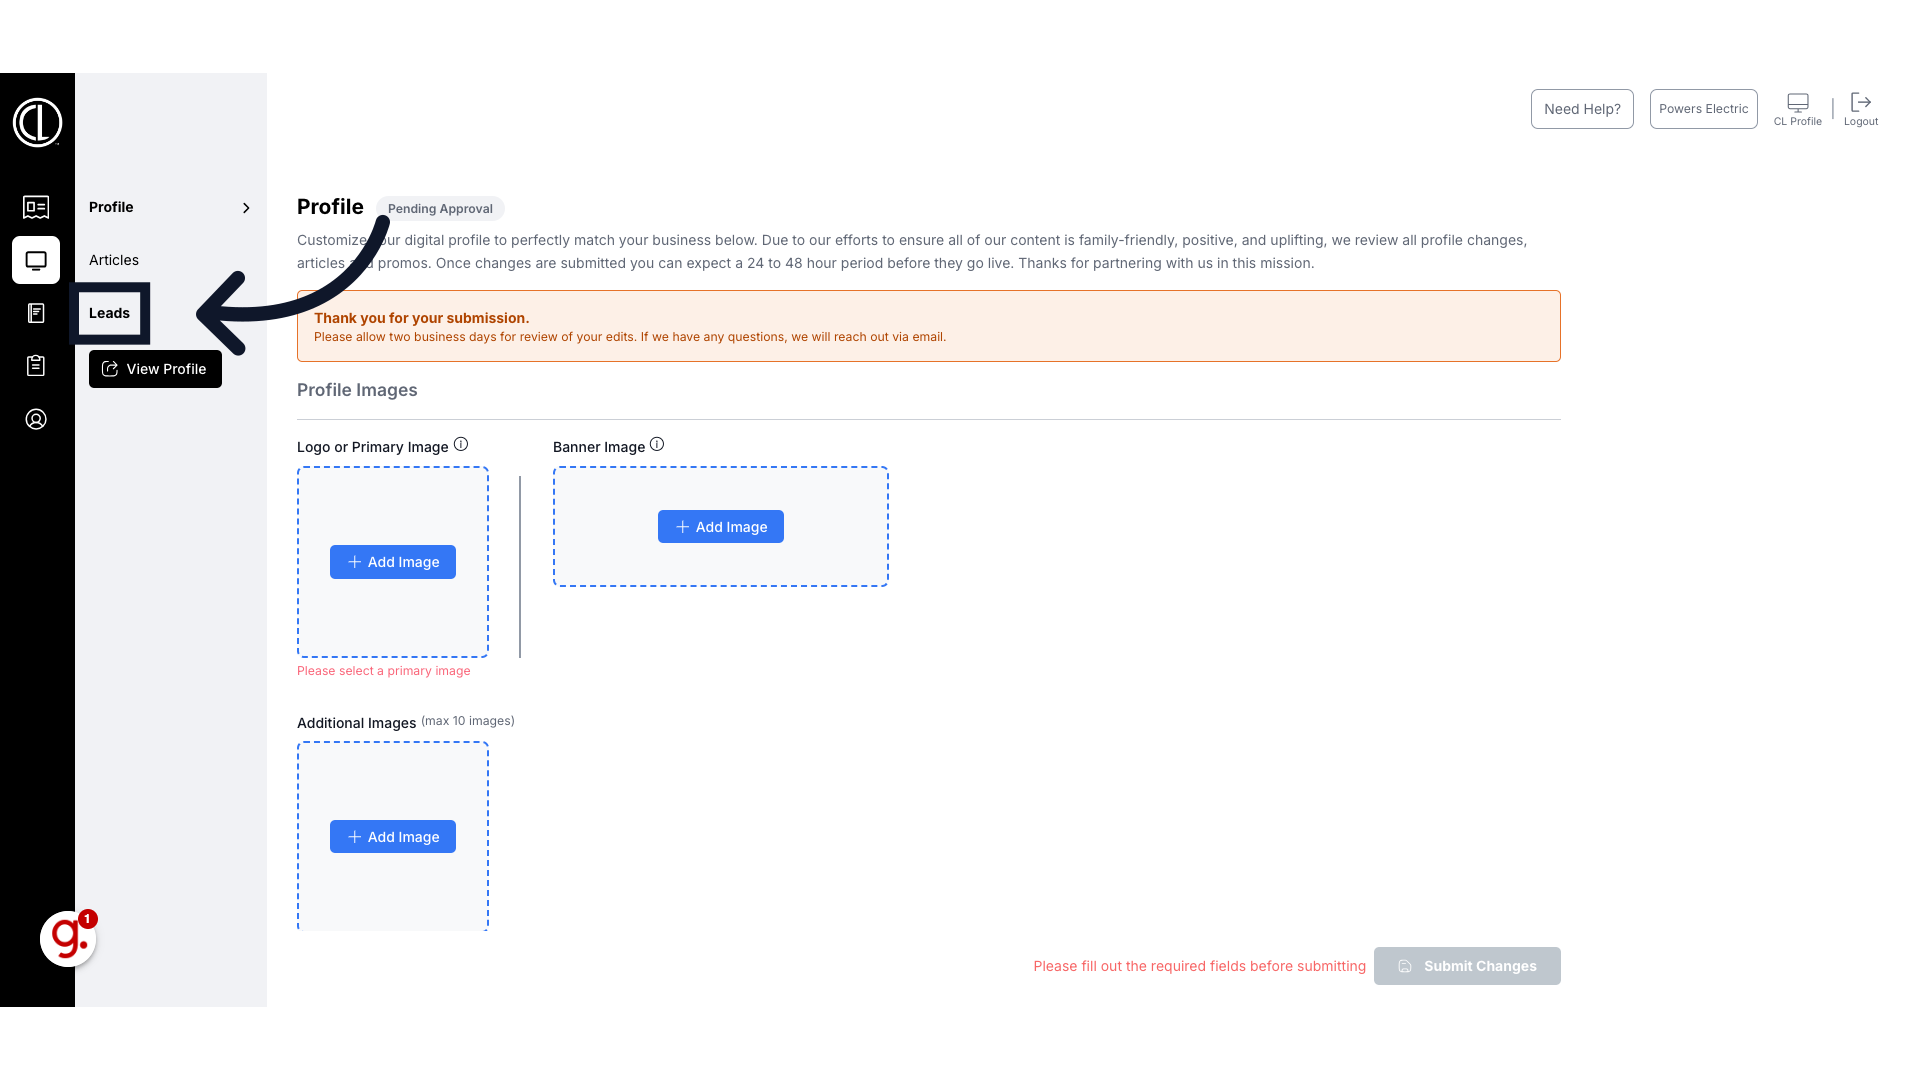
- From the submenu, select “Leads”.
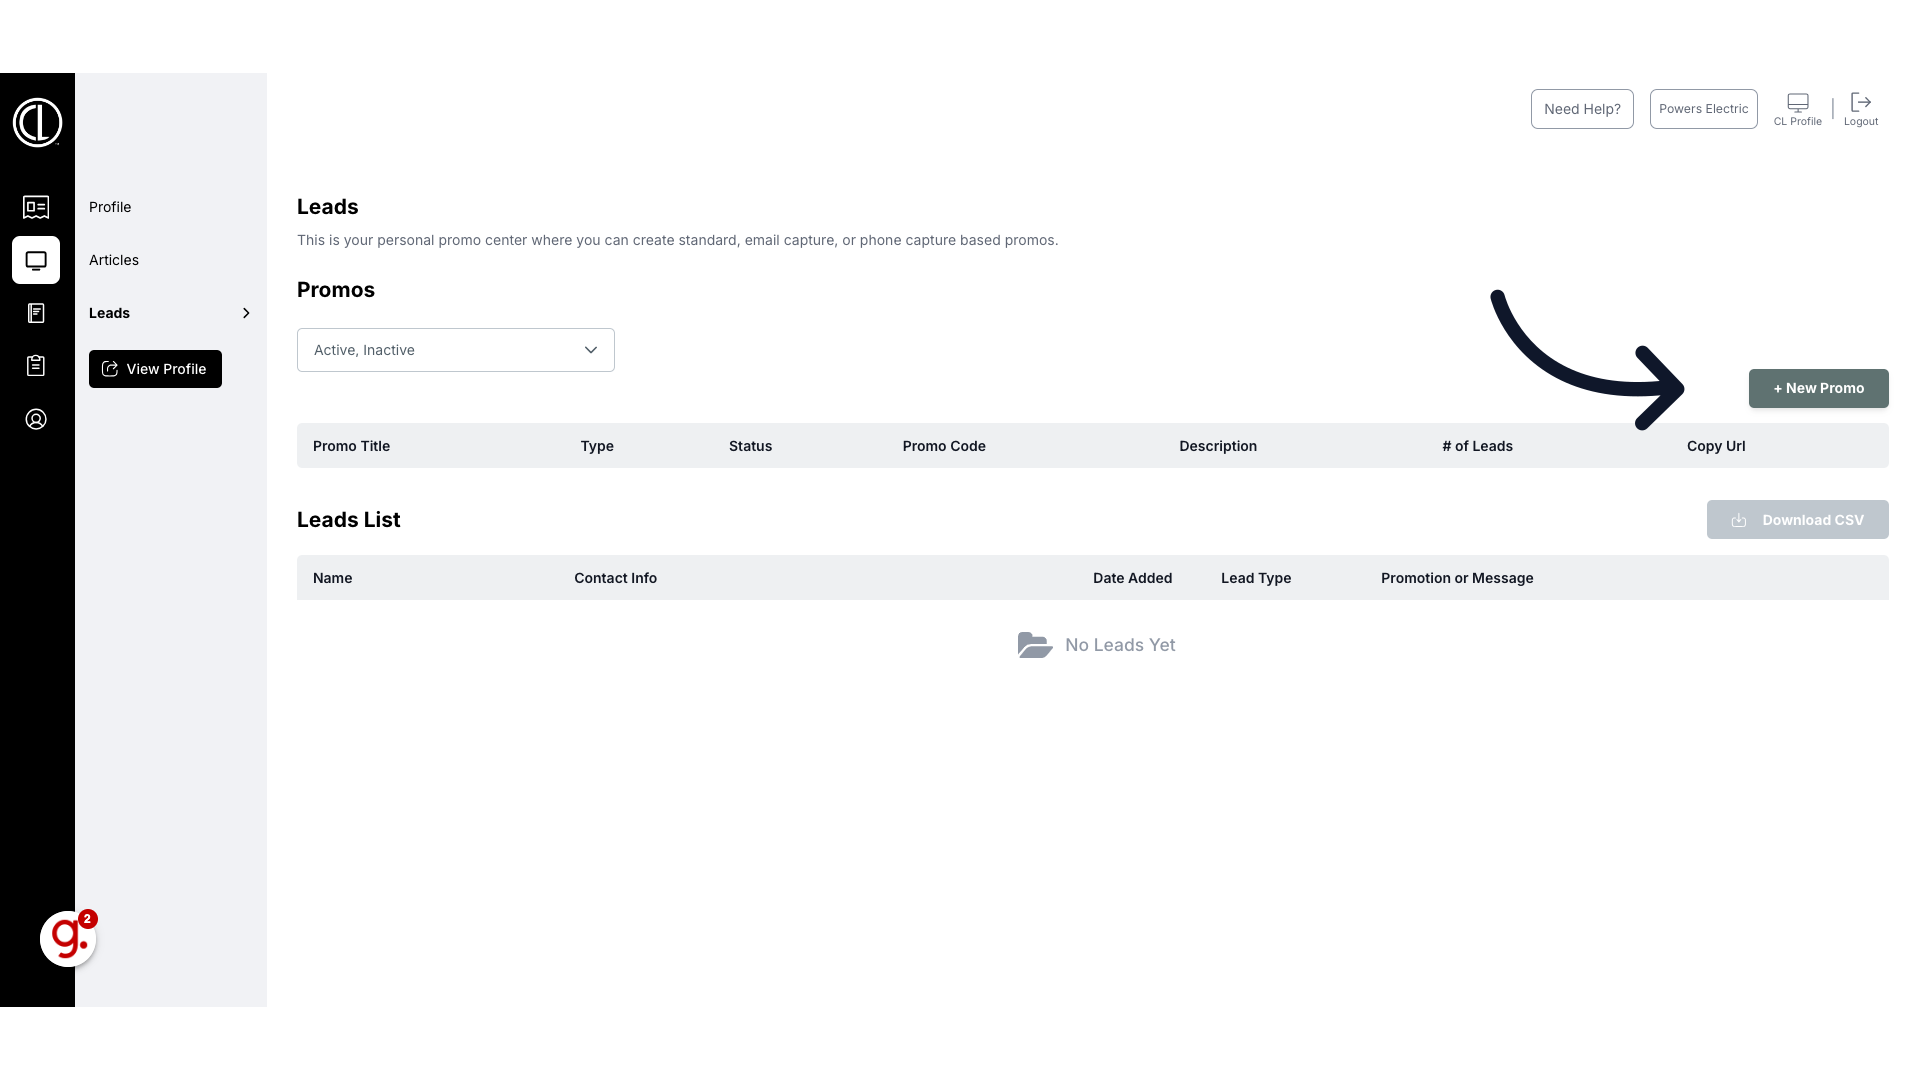
- On the right-hand side, click “New Promo”.
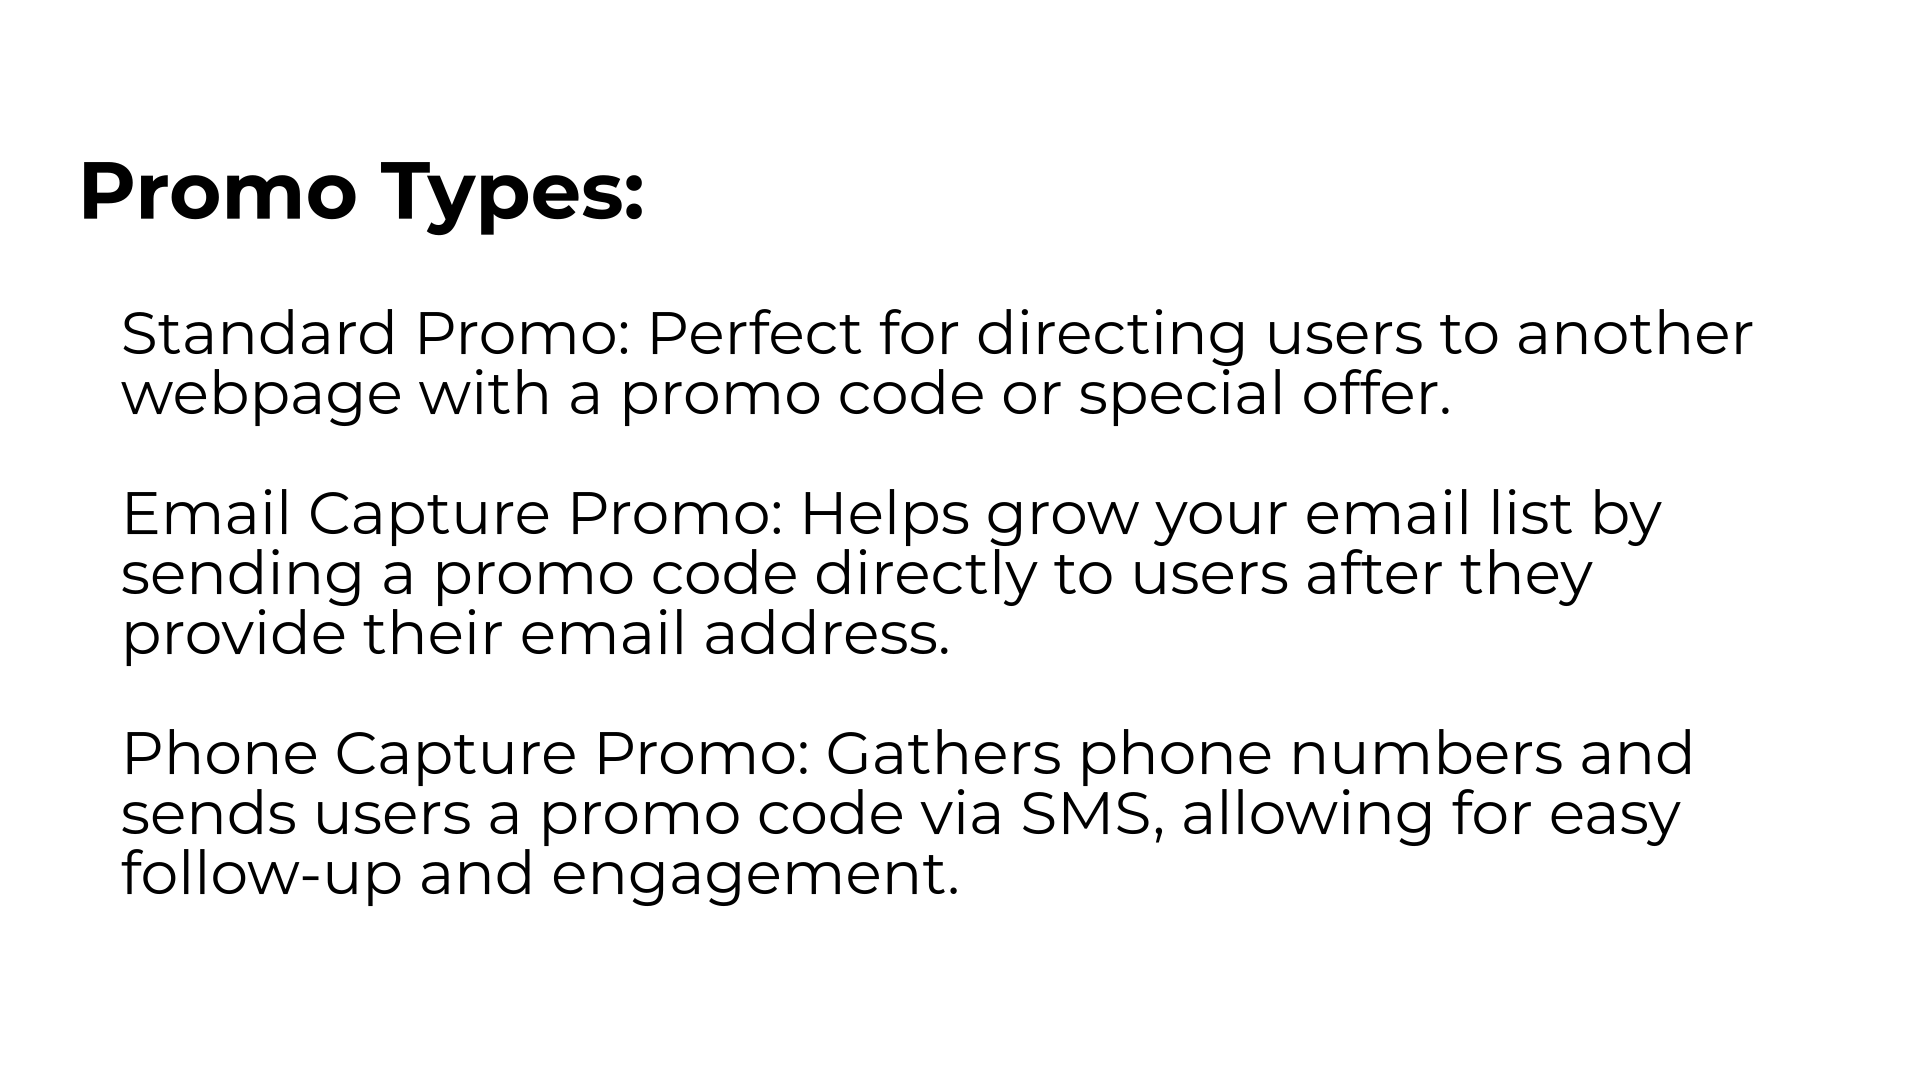
- Select the type of promo you want to create:
- Standard Promo: Perfect for directing users to another webpage with a promo code or special offer.
- Email Capture Promo: Helps grow your email list by sending a promo code directly to users after they provide their email address.
- Phone Capture Promo: Gathers phone numbers and sends users a promo code via SMS, allowing for easy follow-up and engagement.
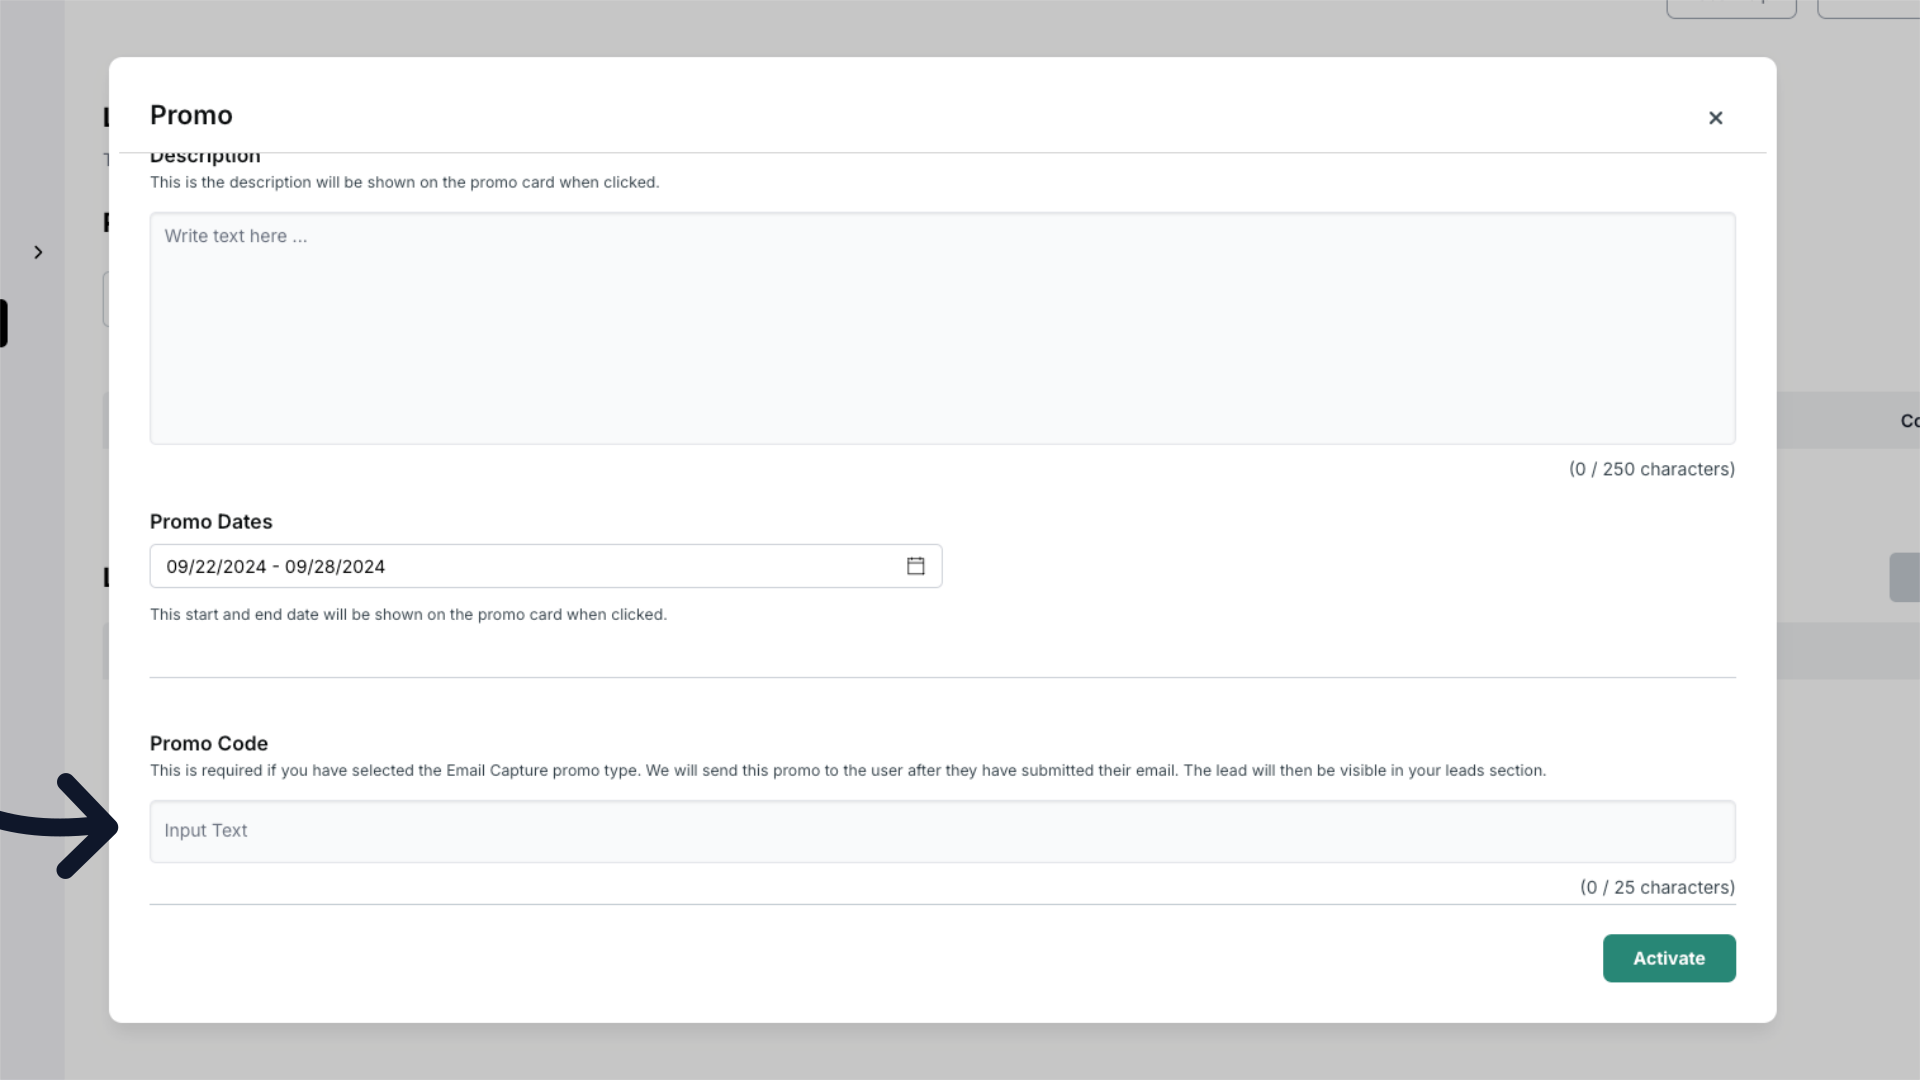
- Fill in the required fields for your promo:
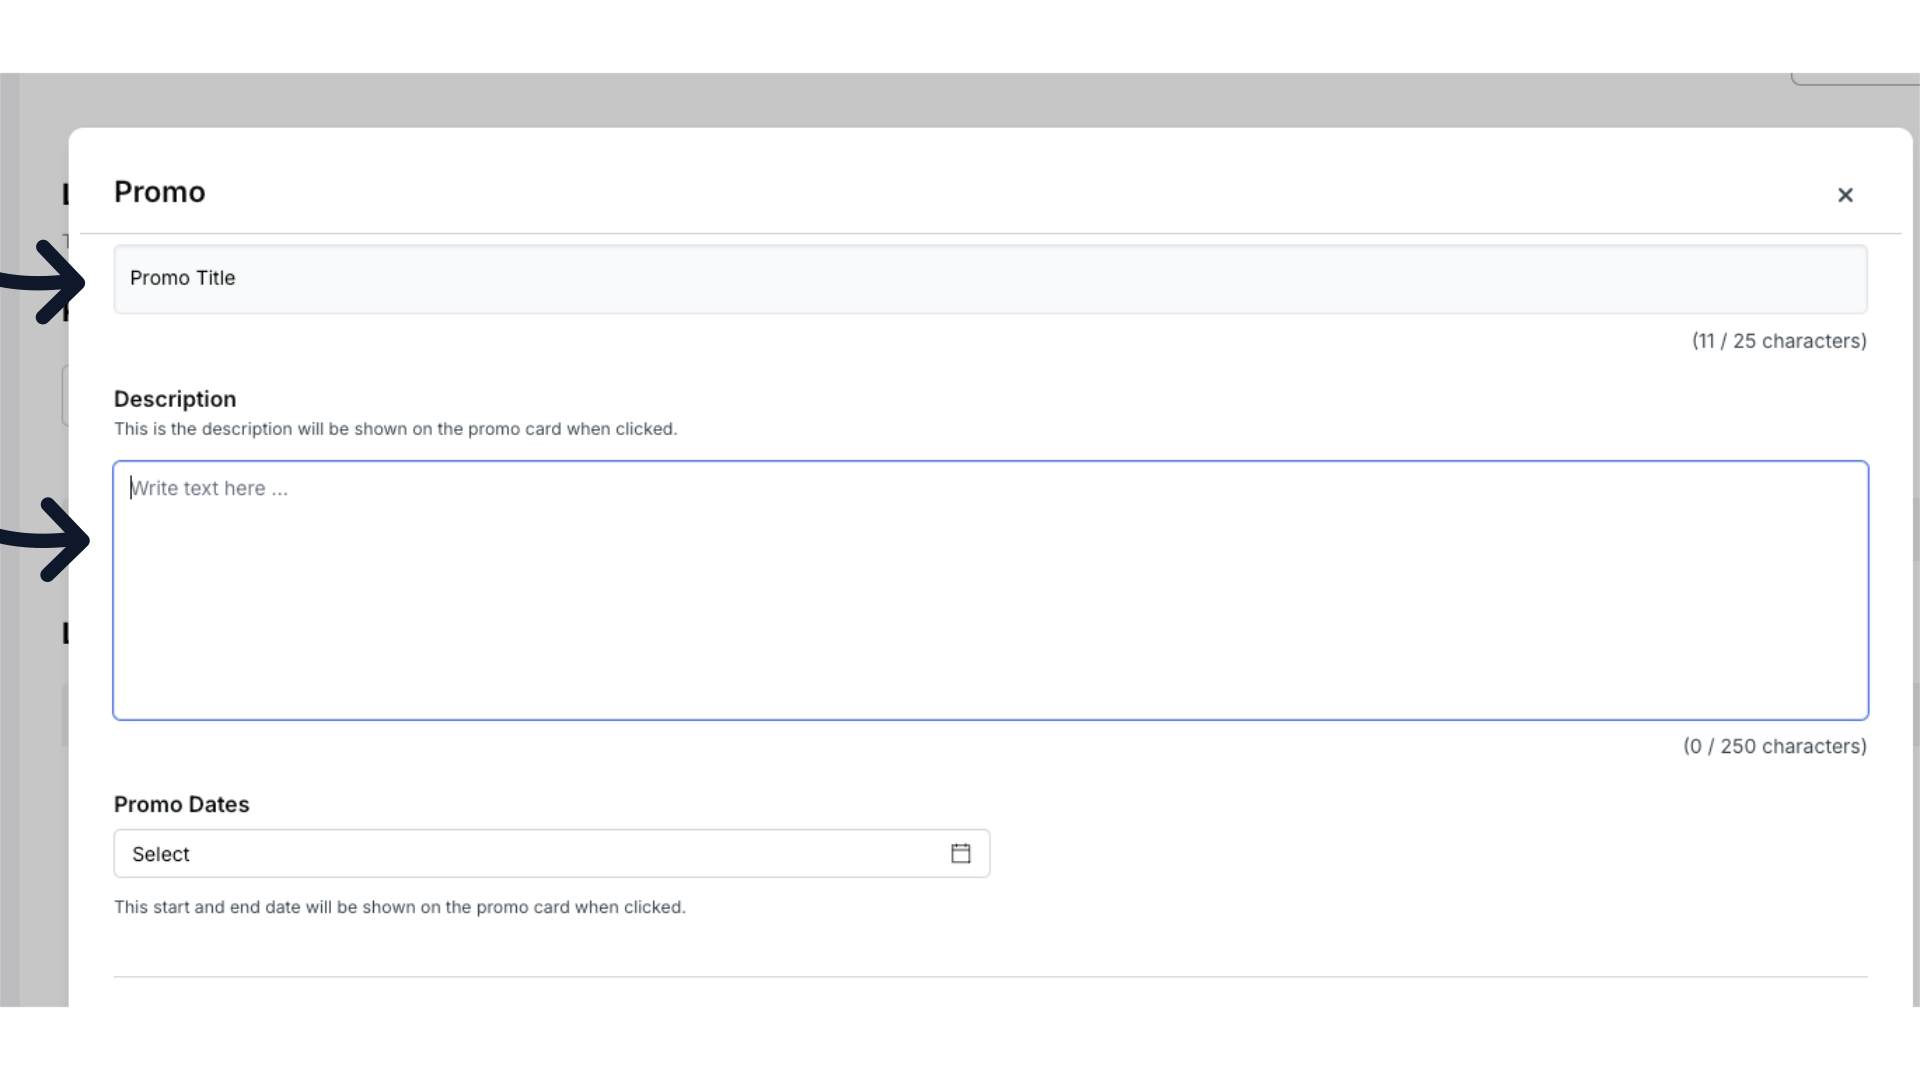
- Title: Enter a short, catchy title (up to 25 characters). This will appear on the promo card.
- Description: Write a brief description (up to 250 characters) explaining your offer. This will also appear on the promo card.
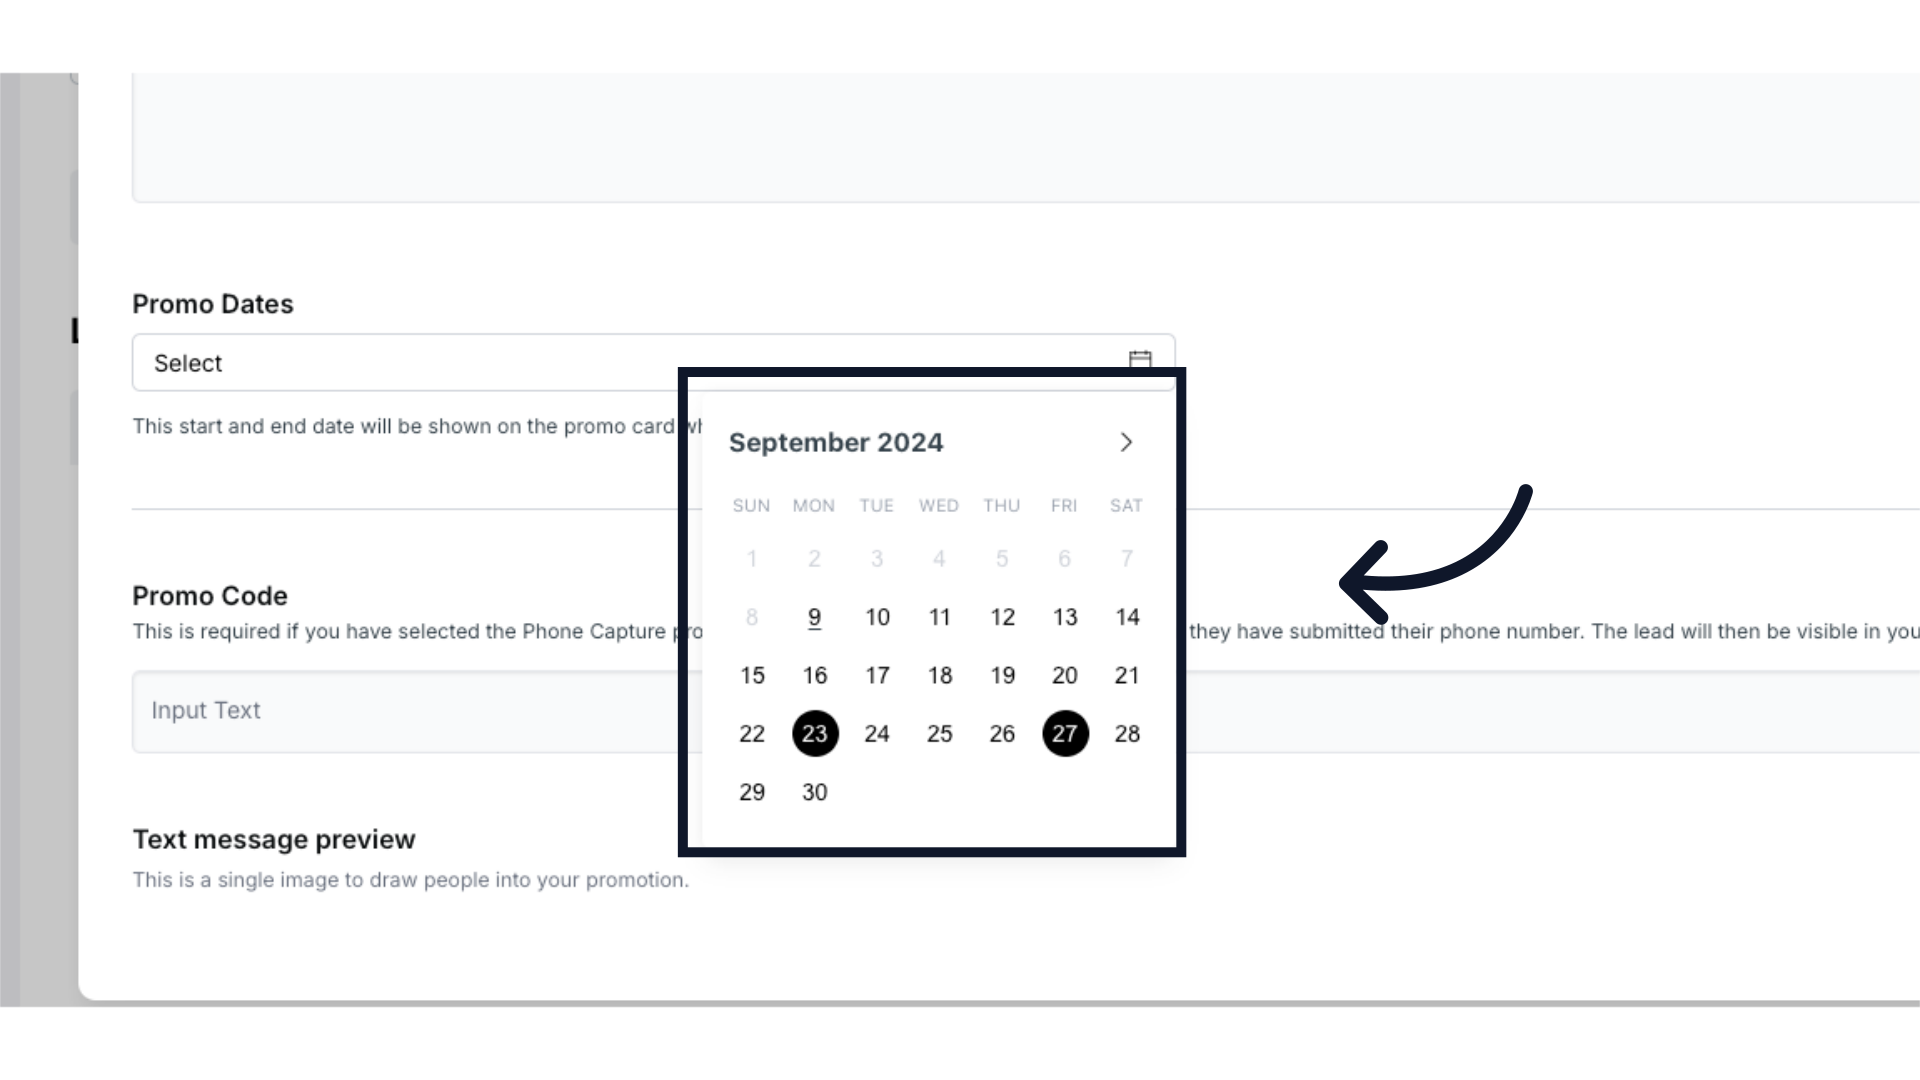
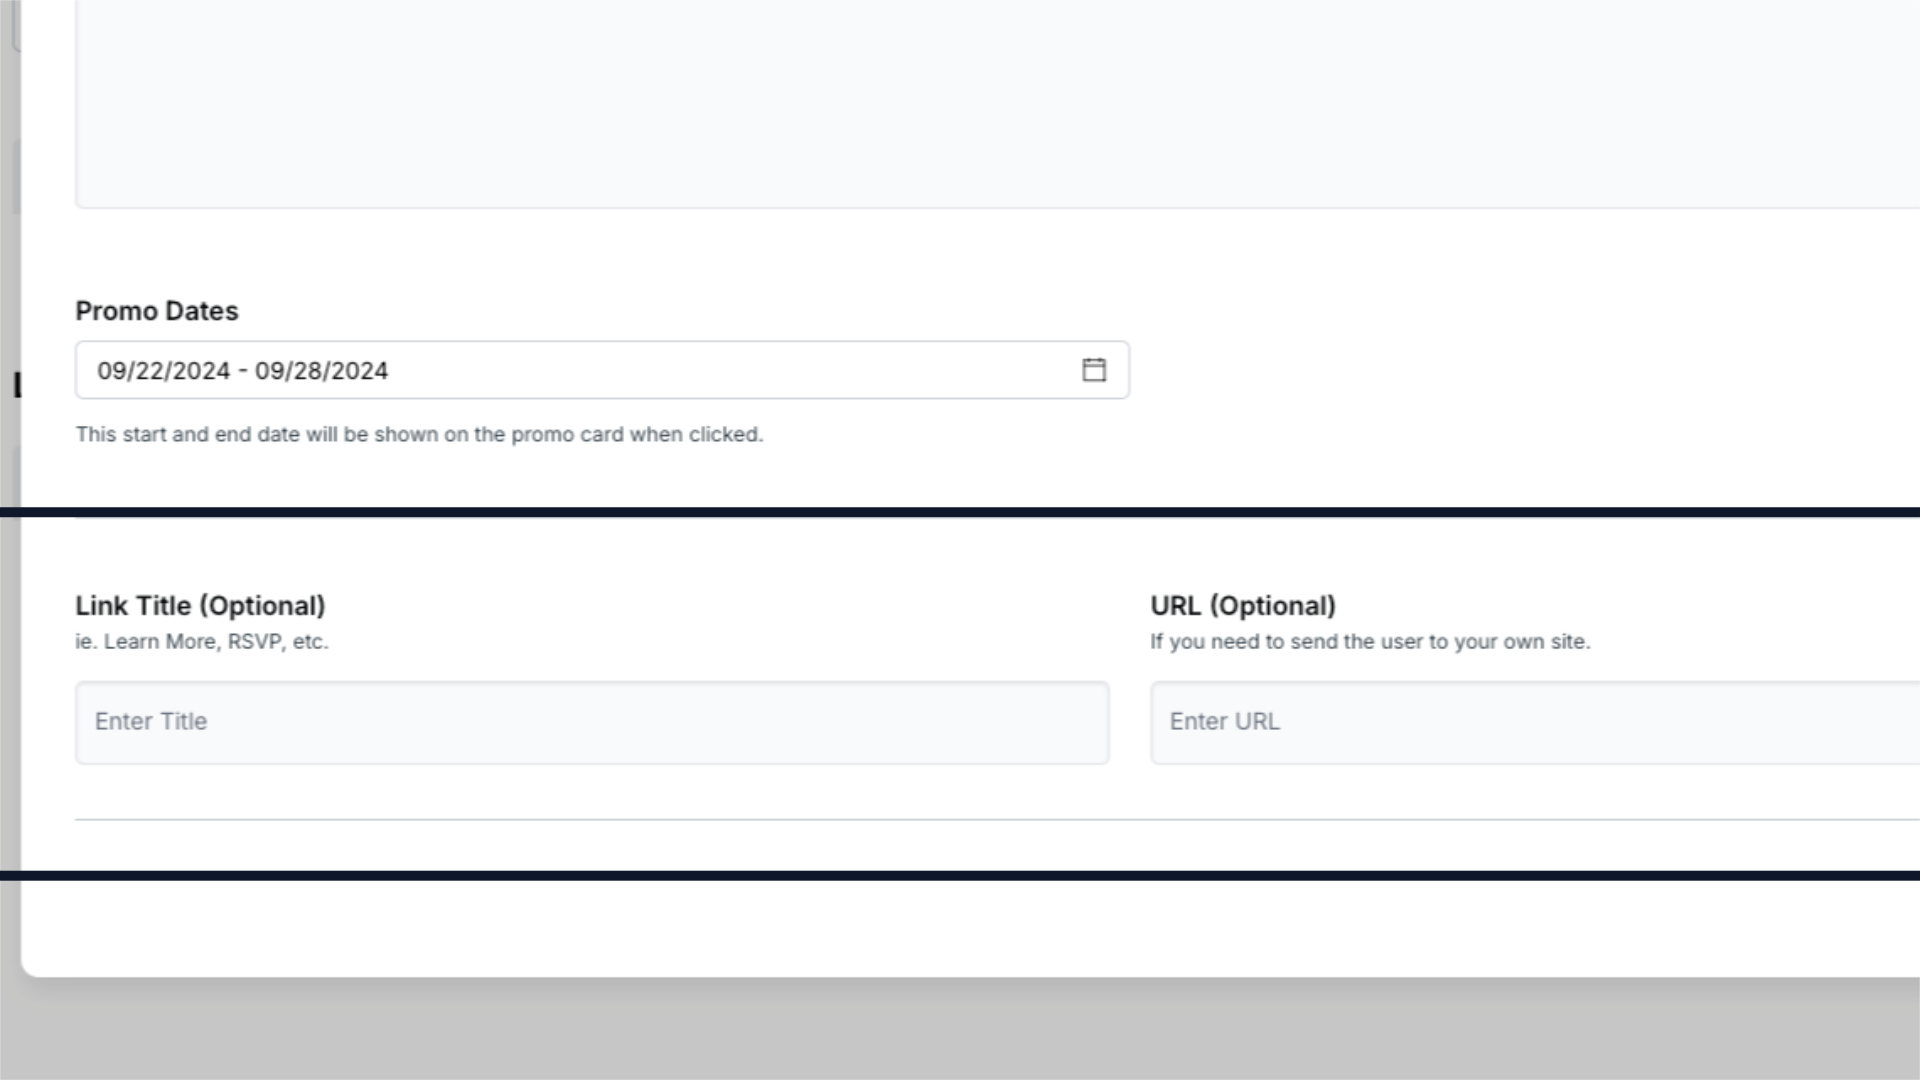
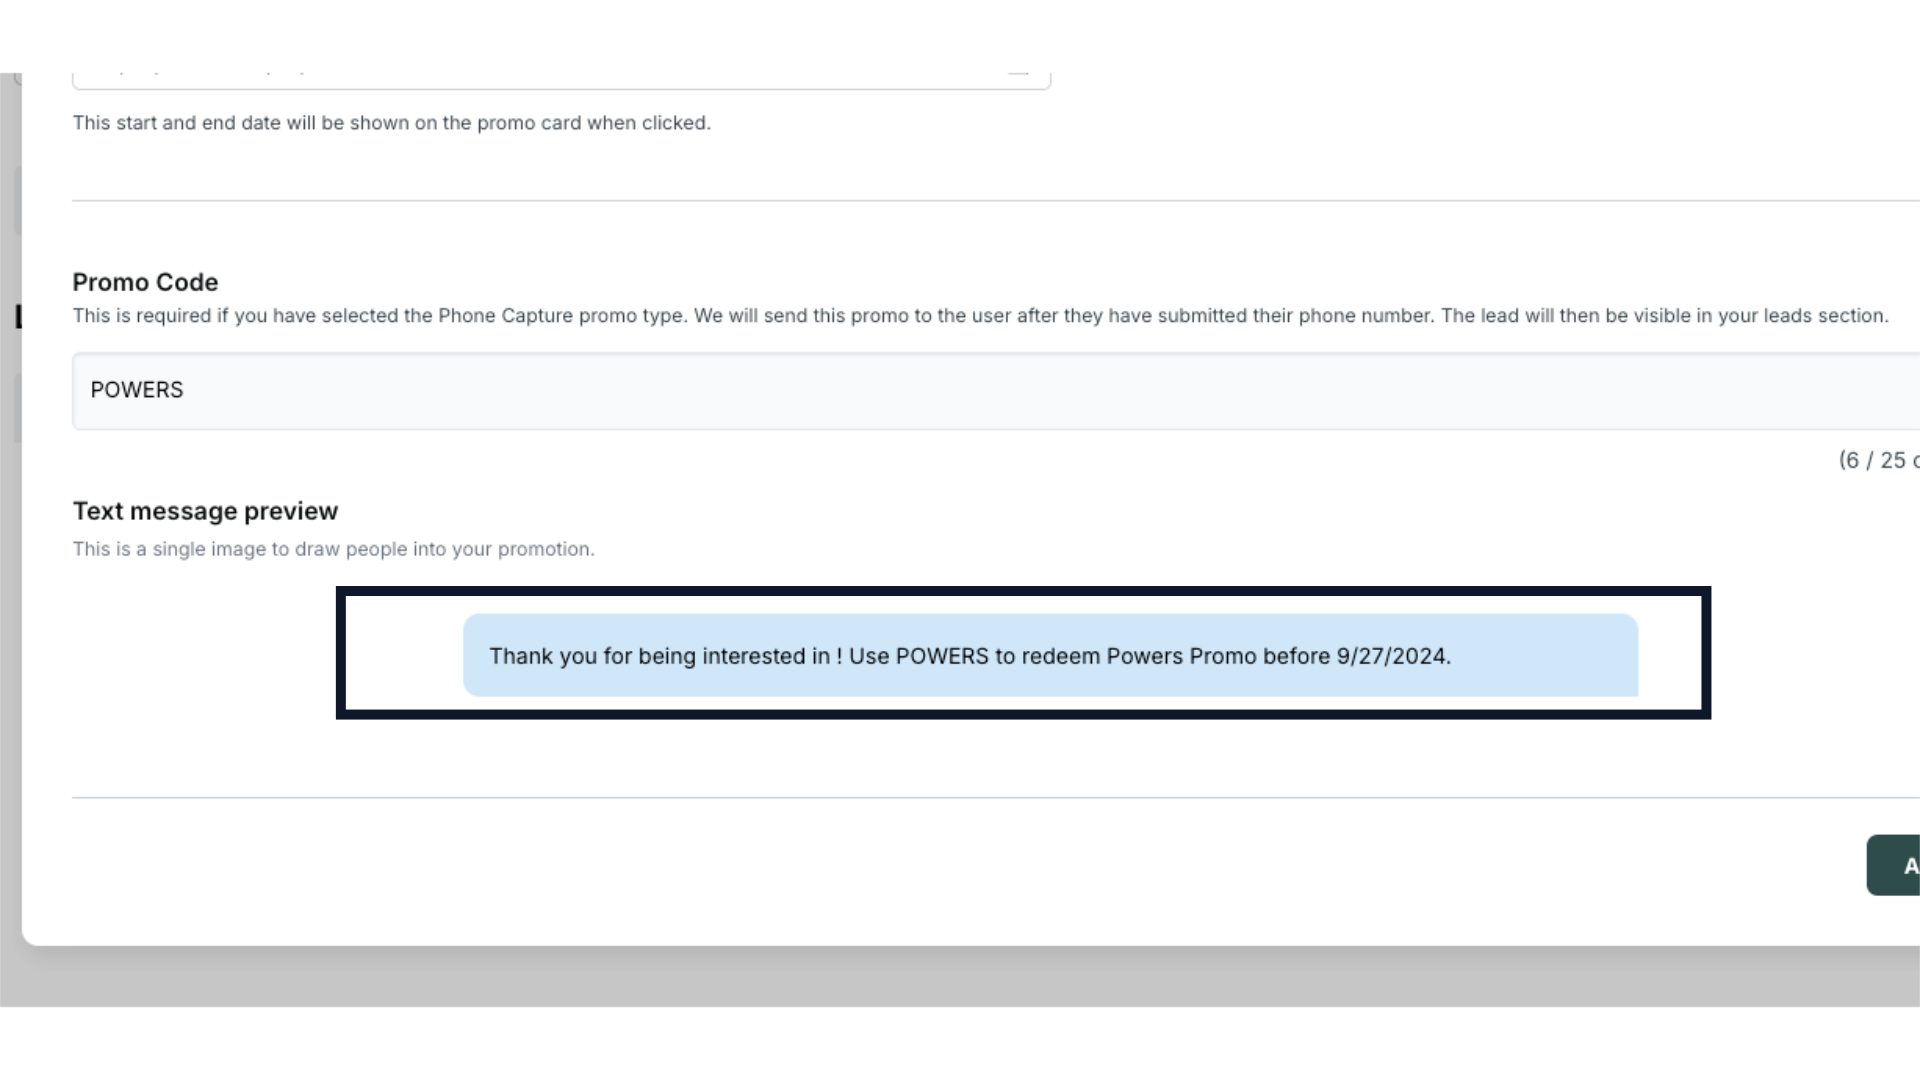
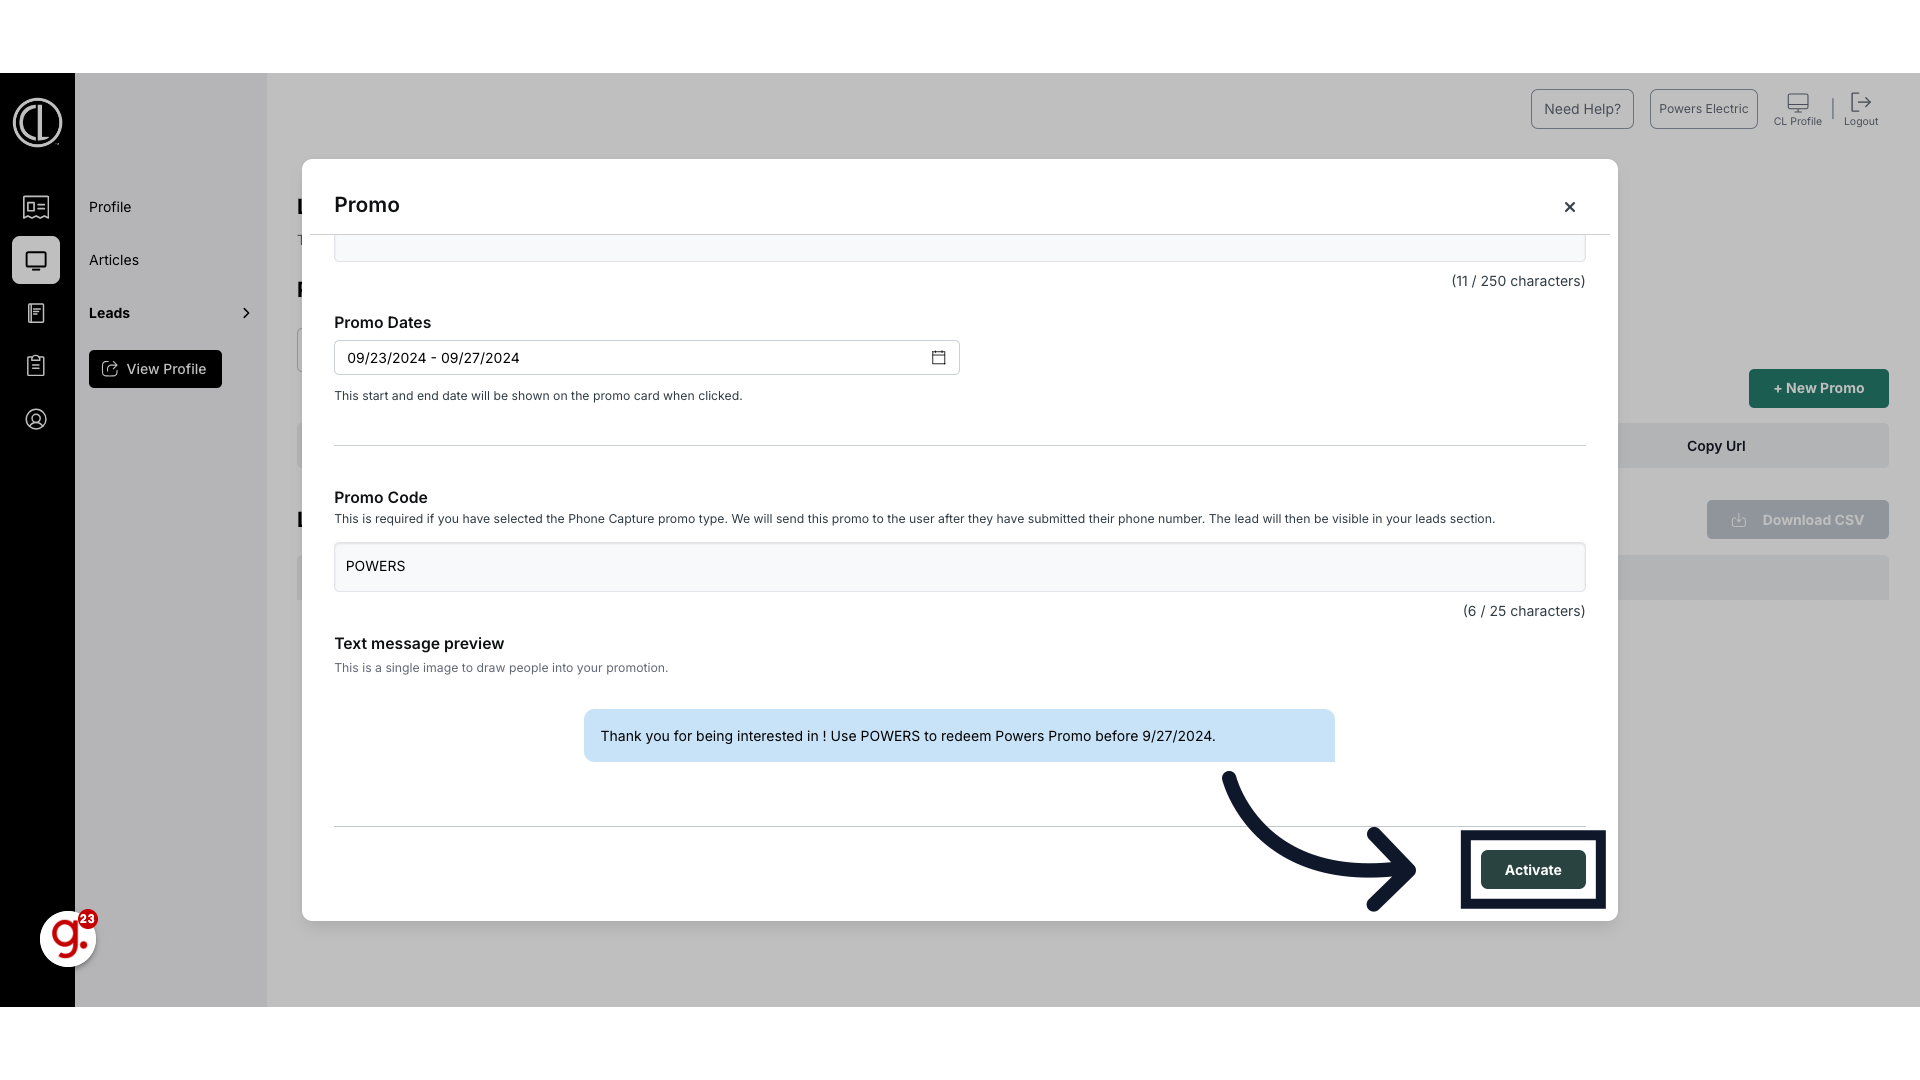
- Promo Dates: Select the start and end dates for your promotion. These dates will be shown on the promo card.
- Link Title (Optional): For Standard Promos, enter a link title like "Learn More" or "RSVP."
- URL (Optional/Standard Promos Only): Add a URL if you want to direct users to a specific webpage.
- Promo Code (Email/Phone Captures Only):
- If you selected Email Capture, enter the promo code that will be sent after users submit their email.
- If you selected Phone Capture, enter the promo code that will be sent via text message after users submit their phone number.
Text Message Preview (Phone Capture only): Write a message for users, such as: "Thank you for your interest! Use [PROMO CODE] to redeem [PROMO TITLE]."
- Once all fields are complete, click “Activate” to save and activate your promo.
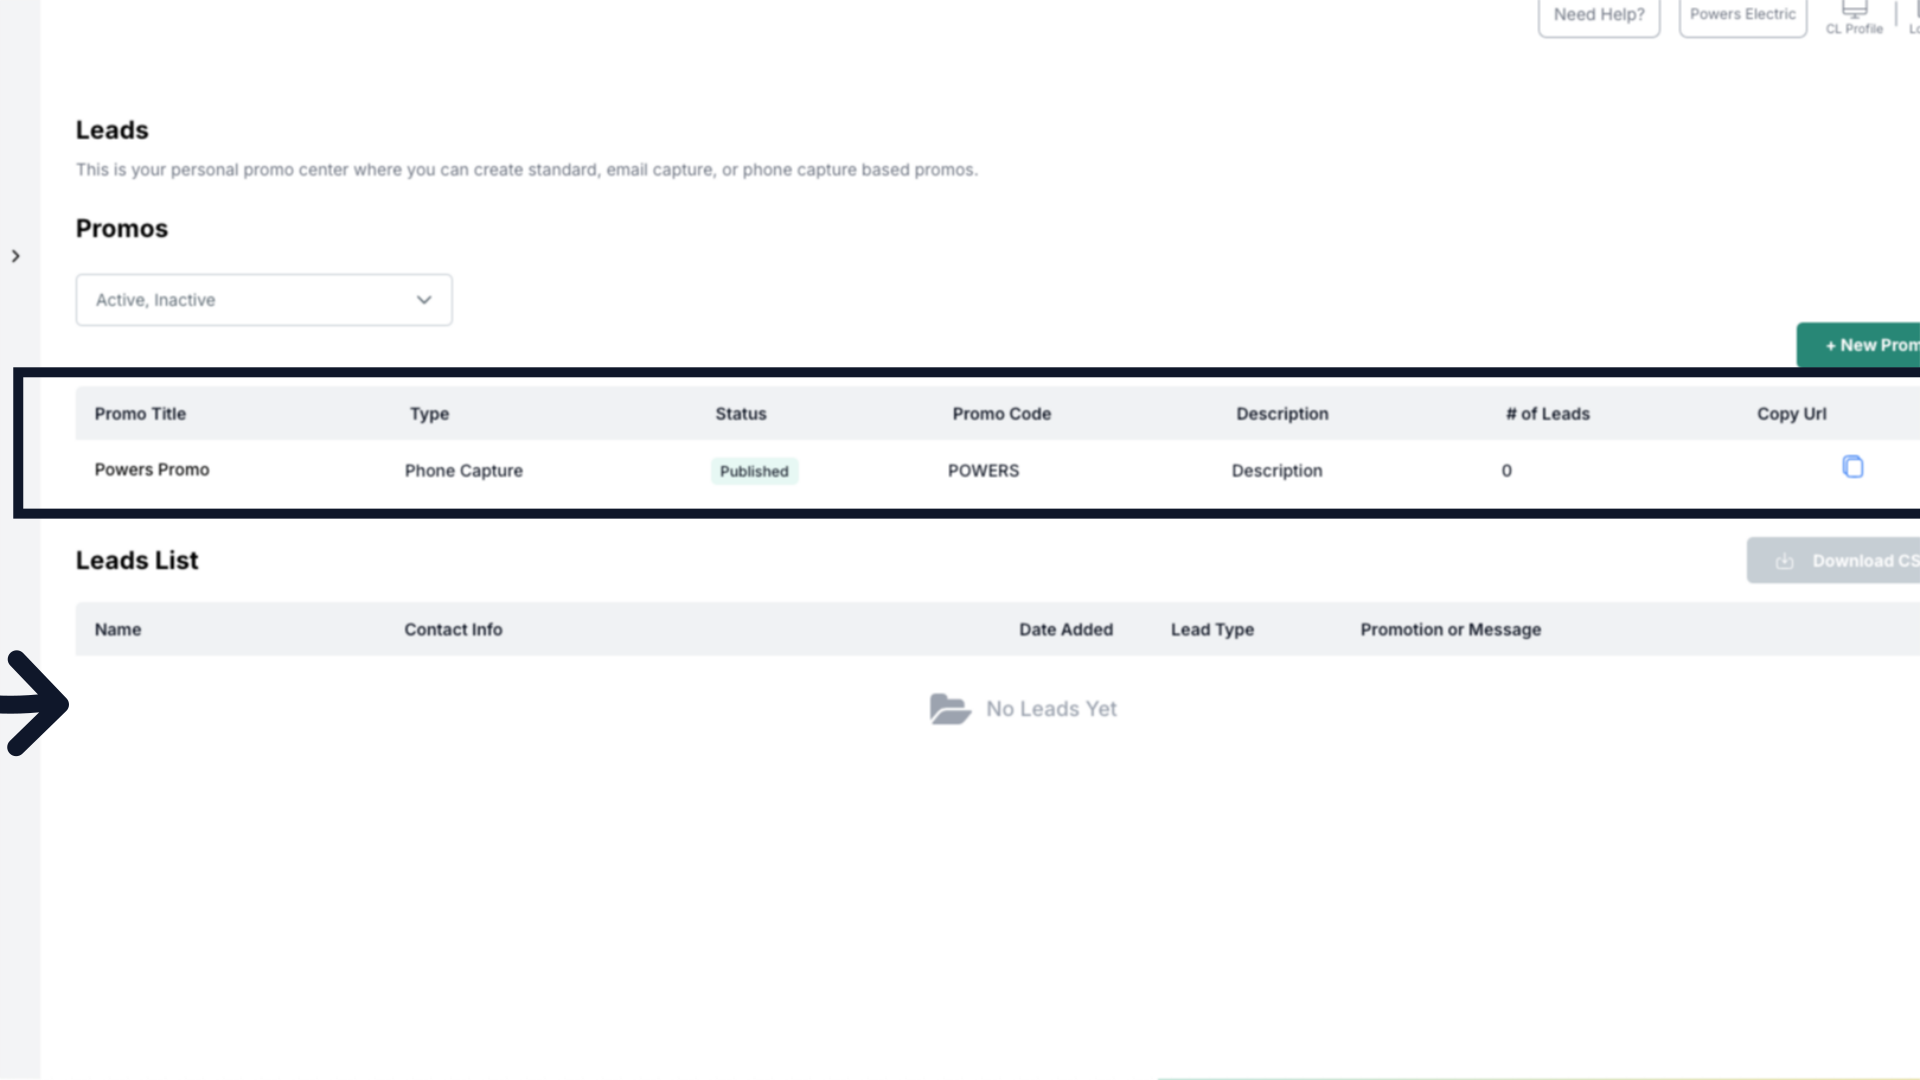
- On the main Leads page, you can view your;
- Active or inactive promos where you can track leads, download them via CSV, and access your promo URL.
- Leads List for Email Capture and Phone Capture promos, leads will automatically be added.
Creating a Digital Promo in the Customer Portal
This guide will walk you through how to create a promo in the Customer Portal.
Go to citylifestylehq.com
1. Benefits to Running Promos
Premium Digital Services offer Promos that are an effective tool to engage audiences, capture valuable leads, and drive traffic to your website or special landing pages. By selecting the right promo type, you can enhance your marketing efforts to meet specific business goals, such as increasing leads or driving sales.

2. Click "Digital"
In the Customer Portal, click the "Digital" tab on the left hand side
3. Click "Leads"
Access the Leads section.
4. Click "+ New Promo"
On the right hand side click "New Promo"
5. Select Promo Type
In the Promo box, select the type of promo you would like to run.
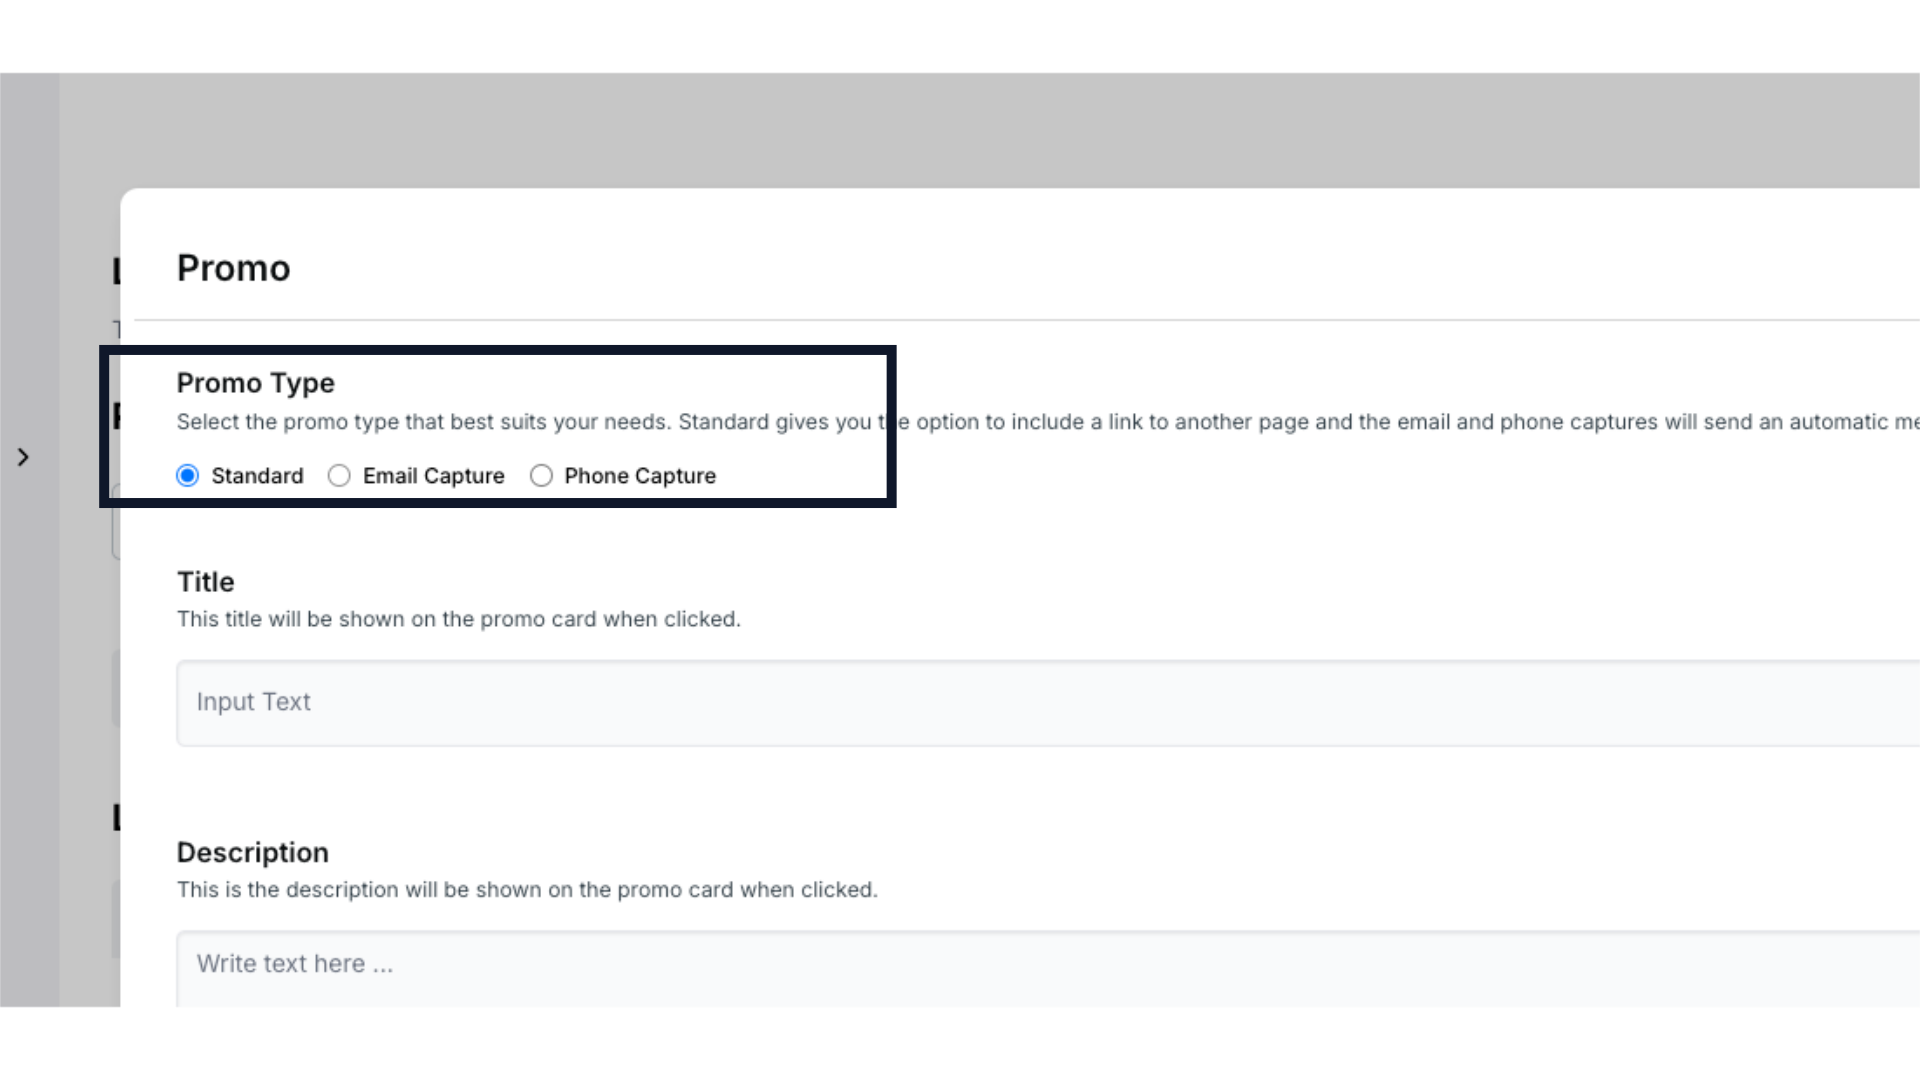
6. Promo Types & Benefits
There are three different types of promos. The Standard Promo simply directs users to another webpage to use the code. An Email Capture Promo helps grow your email list by asking for an email address in order to receive the code. Lastly the Phone Capture Promo gathers phone numbers as it sends the code via text. This allows for easy follow-up and engagement.
7. Enter Promo Title and Description
Once you've selected the type of promo you would like to run, enter a short, catchy title that will appear on the promo card. Next write a brief description explaining your offer. This will also appear on the promo card.
8. Select Promo Dates
Next select the start and end dates for your promotion. These dates will be shown on the promo card.
9. Optional Link Title and URL
For the Standard Promo, it will allow you the option to add a link title like "Learn More" or "RSVP" as well as if you want to add a URL to direct users to a specific webpage.
10. Enter Promo Code
If you selected an Email Capture Promo, simply enter the promo code that will be sent after the user submits their email address.
11. Preview Phone Capture
If you selected a Phone Capture Promo you can preview the text message the recipient will receive once you enter the code.
12. Click "Activate"
Once you have entered all of the information for your promo click activate to finalize the promotion.
13. Track Promos and Leads on the Leads Page
On the main Leads page, you can view your active or inactive promos, track leads, download them via CSV, and access your promo URL. For Email Capture and Phone Capture promos, leads will automatically be added to the Leads List.
This guide covered the process of creating a promo in Citylifestylehq's Customer Portal.