Creating a New Contact in an Account
Creating a new contact with the correct and updated information ensures that the right individuals receive the appropriate communication and access. The contact type determines what information they will receive and their level of access to the Customer Portal. Keeping contact information up to date helps us maintain clear communication, avoid delays, and ensure that the correct people are managing their responsibilities. This also helps us provide better service and strengthens our relationship with the client.
- In ARC, navigate to the Accounts page on the left-hand side of the screen.
- Click on the “Accounts” Tab found towards the top of the page.
- Search for the account name in the search field.
- Other fields are not required but can be used to help filter your search.
- Select your account from the list by clicking on the account name.
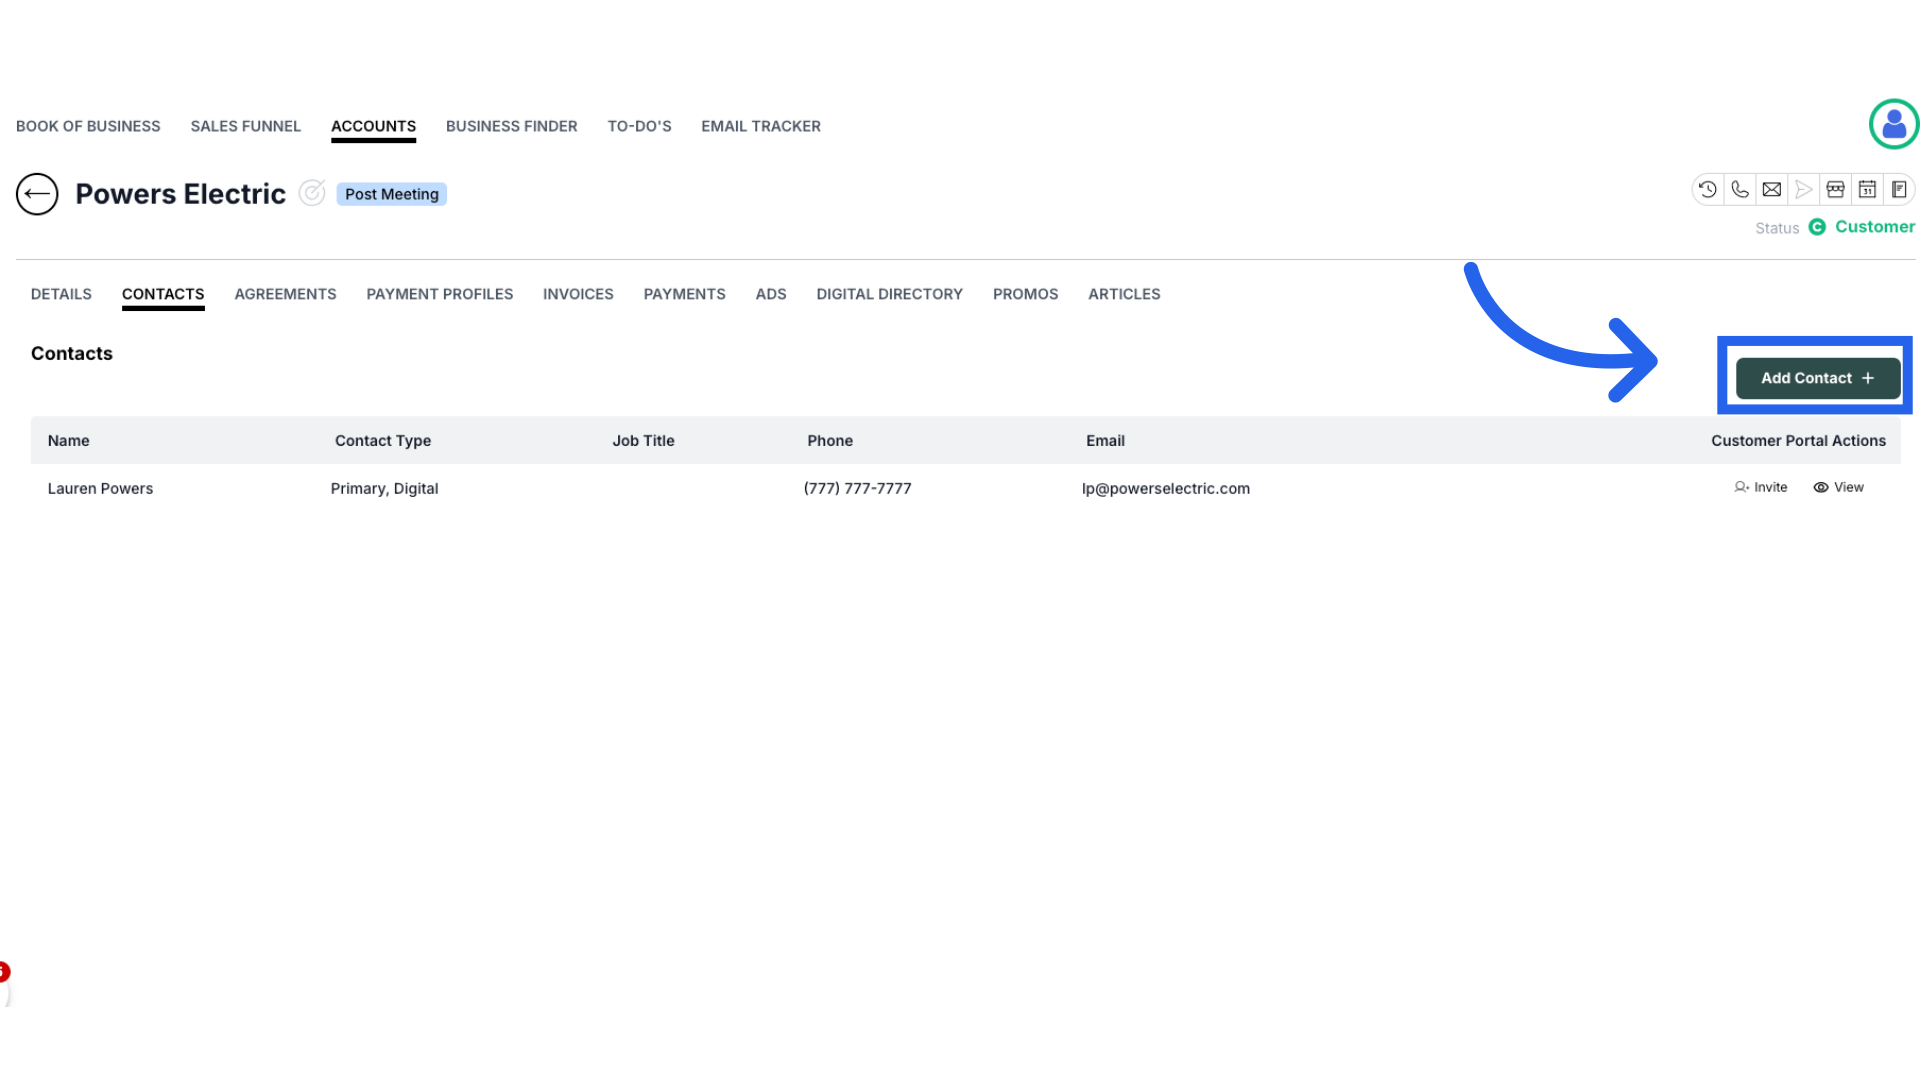
- Select the Contacts tab located toward the top of the page.
- Click on the green “Add Contact +” button on the far right side of the page.
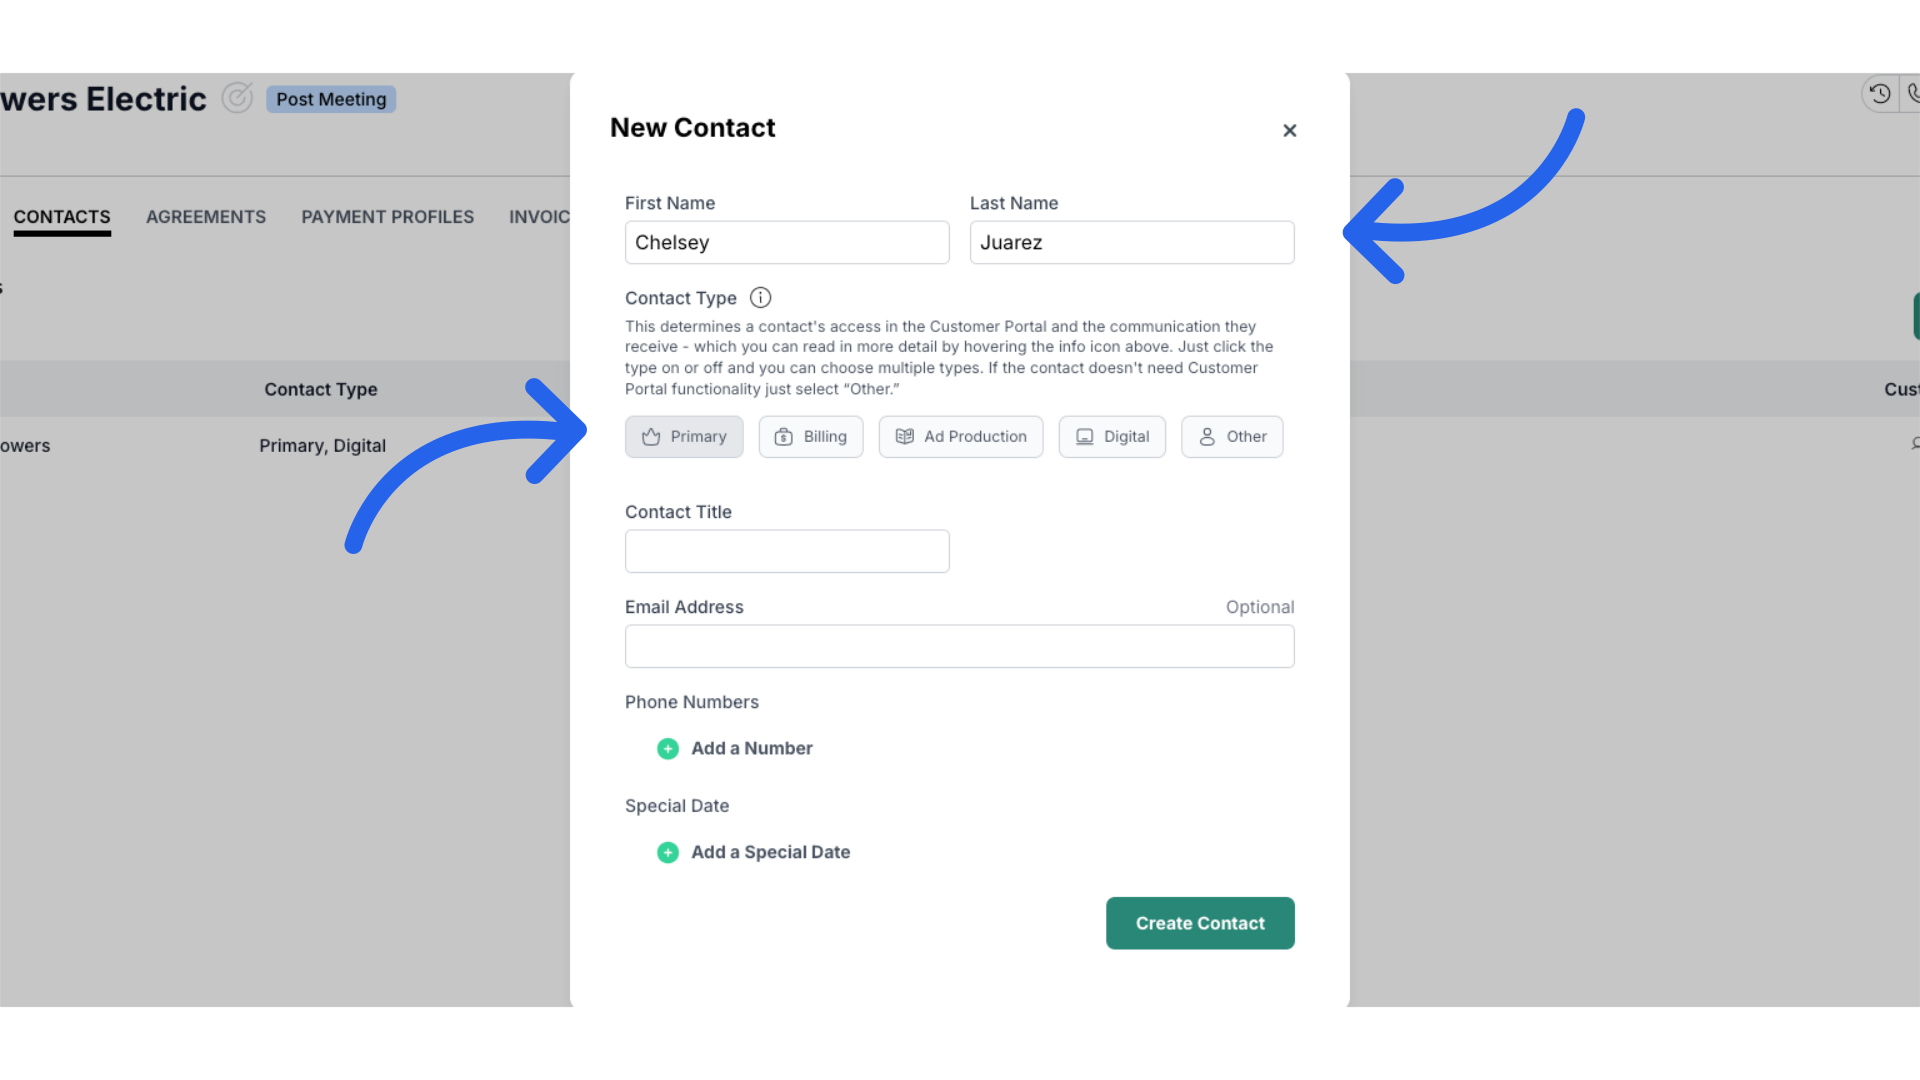
- In the new window, enter the contact's first and last name.
- Under “Contact Type,” select all that apply.
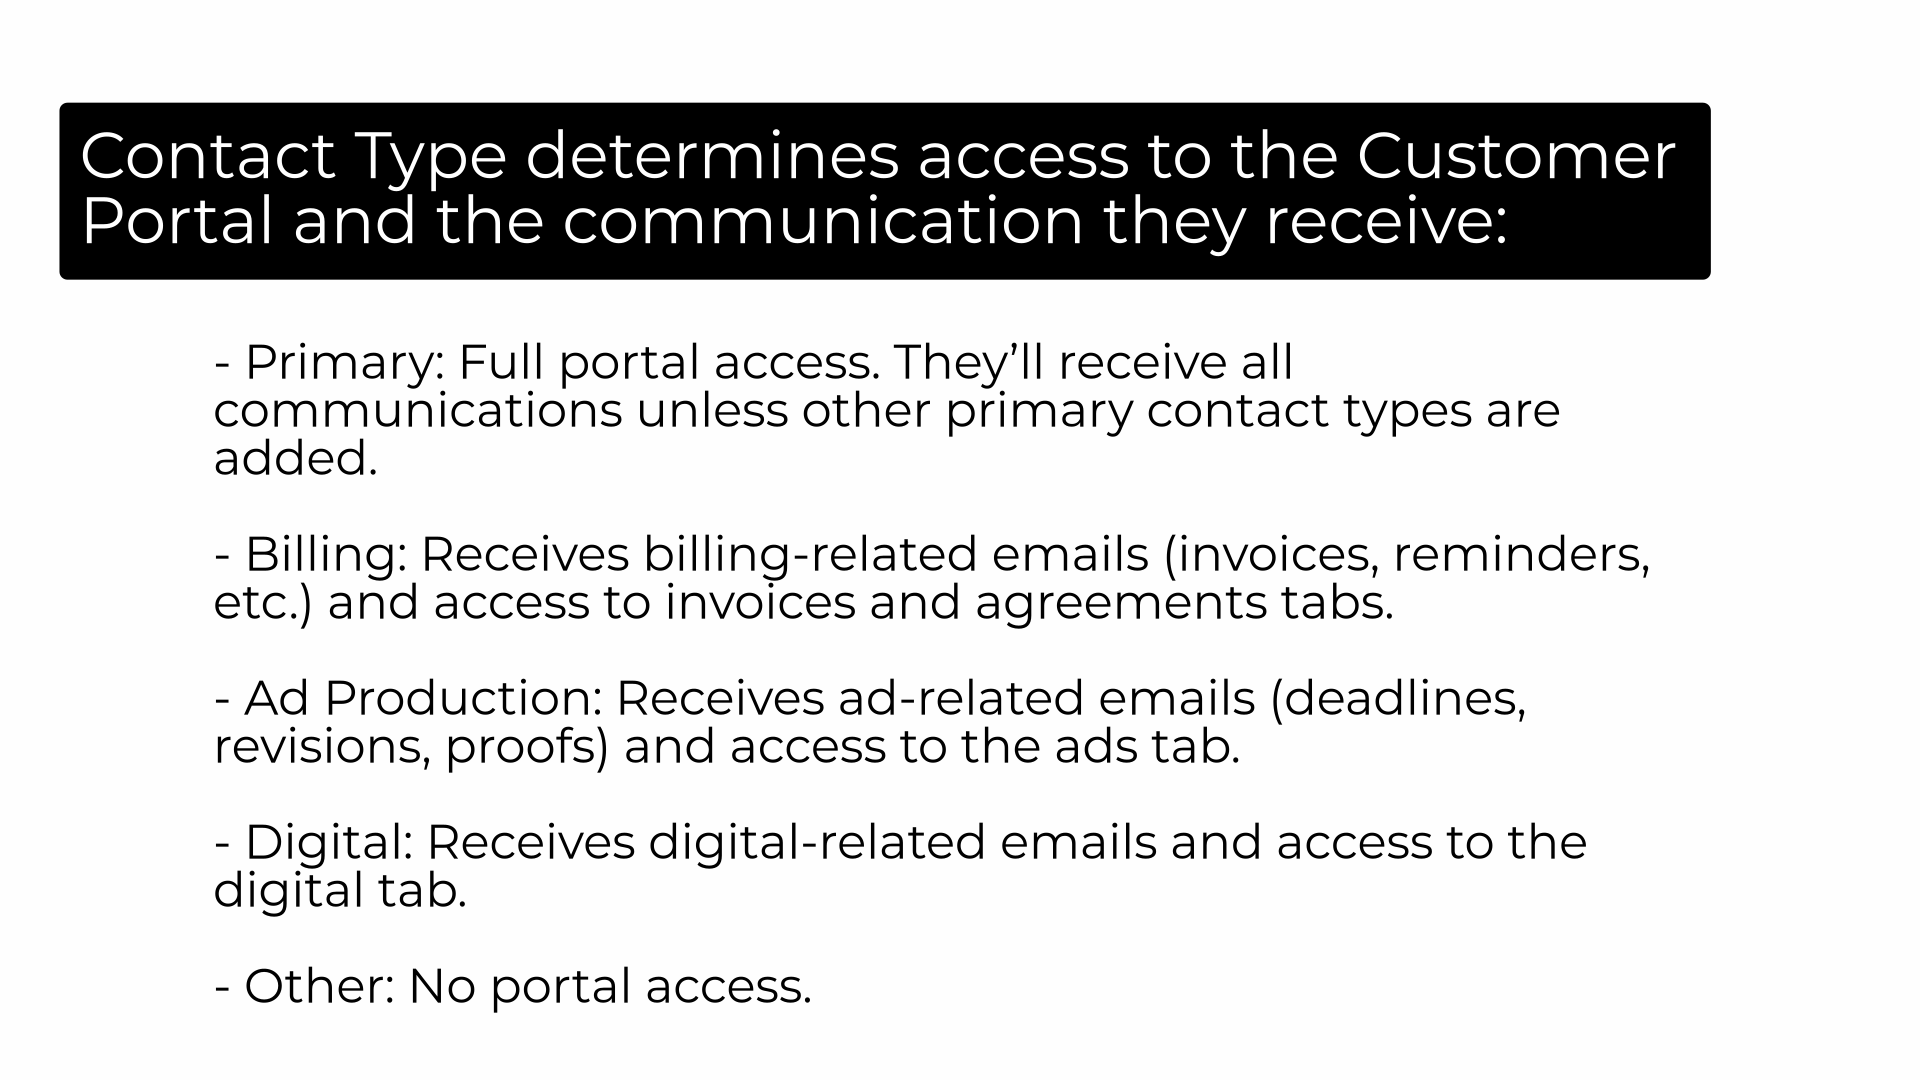
- Selecting the specific contact type will determine a contact’s access in the Customer Portal and the communication they will receive.
- Primary: Has access to all tab types in the portal.
- There can be only ONE primary contact per account
- If no other contacts are listed, they will receive all types of communications.
- If other contact types are listed, this will override the primary account from getting those types of communications. If you want them to still receive other communications, select all contact types that apply in addition to the primary contact type.
- Billing: Receives all billing communications such as invoices, payment reminders, and account statements and has access to the invoice and agreements tabs in the customer portal.
- Ad Production: Receives ad deadline reminders, revision requests, notifications when proofs are available, and all other ad submission communications and has access to the ads tab in the customer portal.
- Digital: Receives any digital communications and digital tab in the customer portal.
- Other: These contacts will not have portal access.
- Primary: Has access to all tab types in the portal.
- Selecting the specific contact type will determine a contact’s access in the Customer Portal and the communication they will receive.
- Under “Contact Title,” add the title of the contact's position.
- Under “Email Address,” enter the contact's verified email address. You will have to add a separate contact entry to list alternative email addresses.
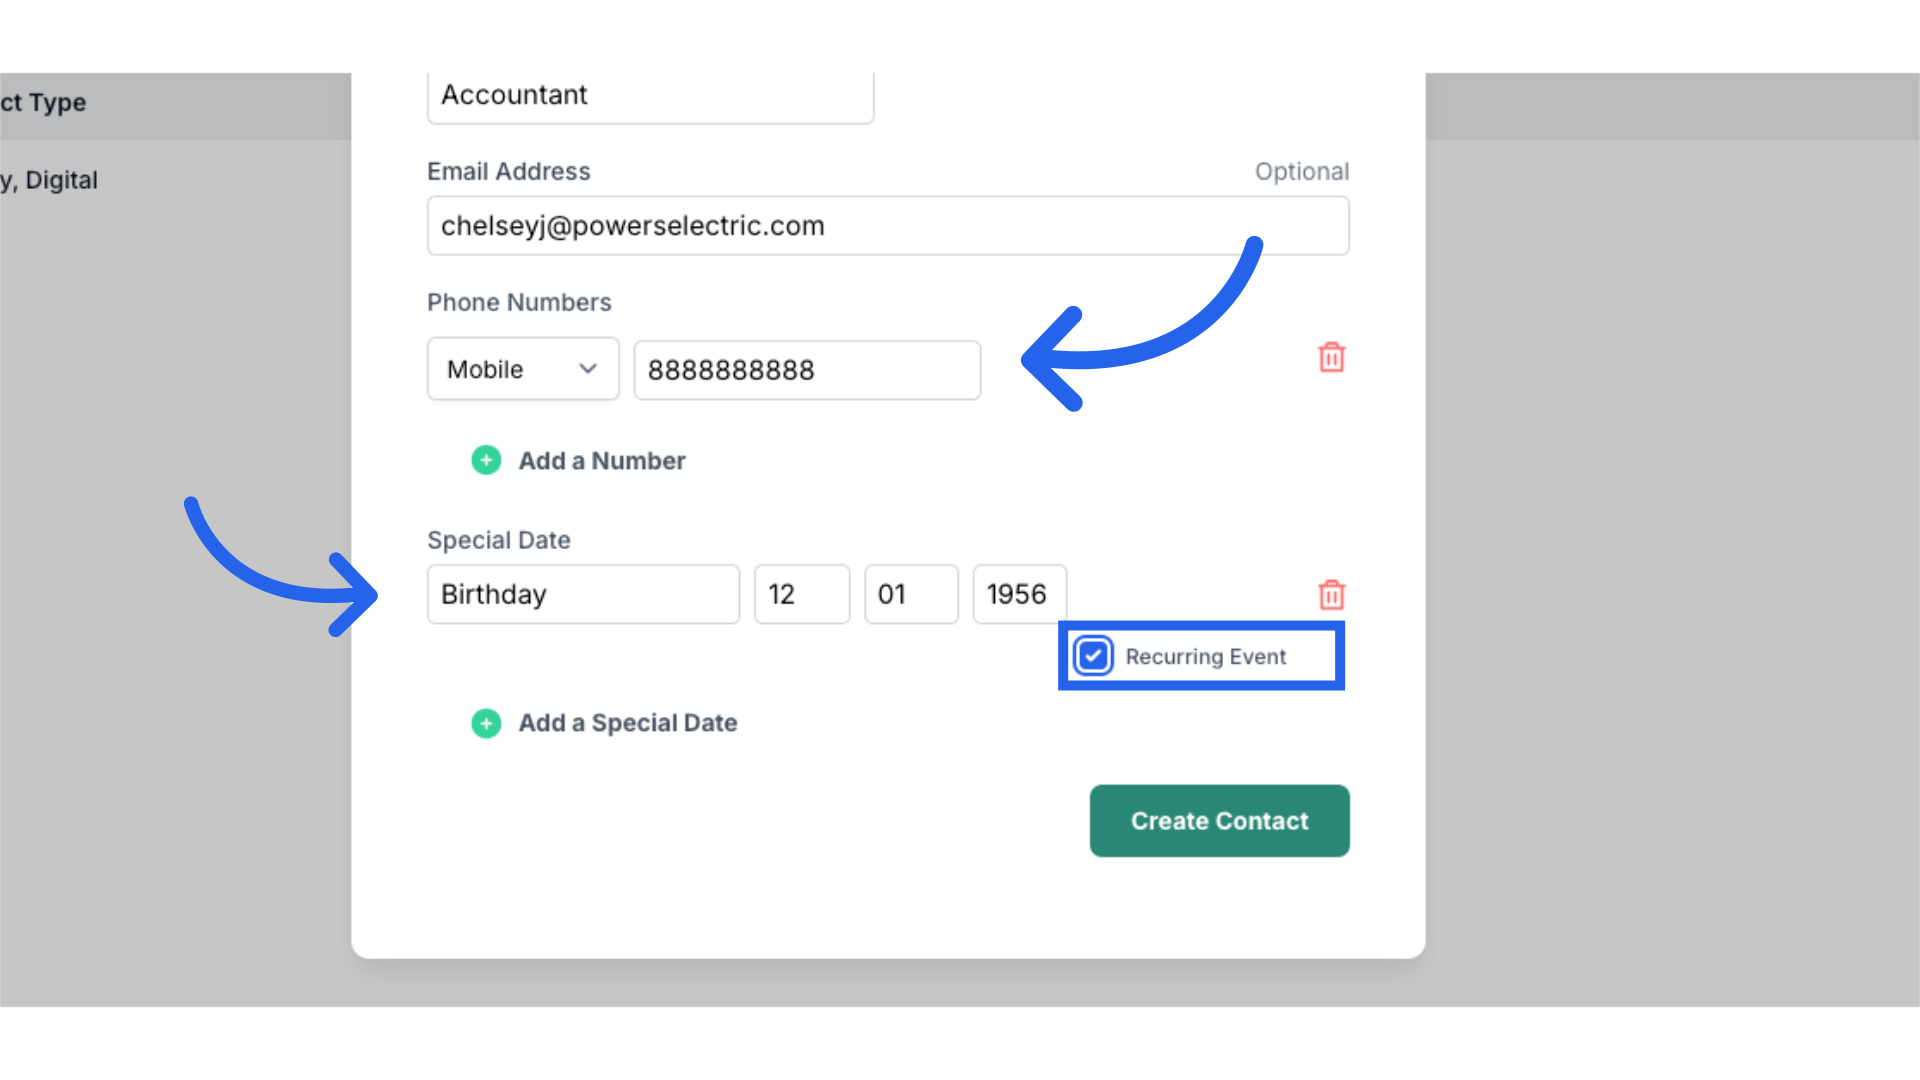
- Click “Add a Number,” select the phone number type, and enter the number.
- To add a special date, you can enter a special date label and enter the specific date. Indicate if the date is to be a recurring event.
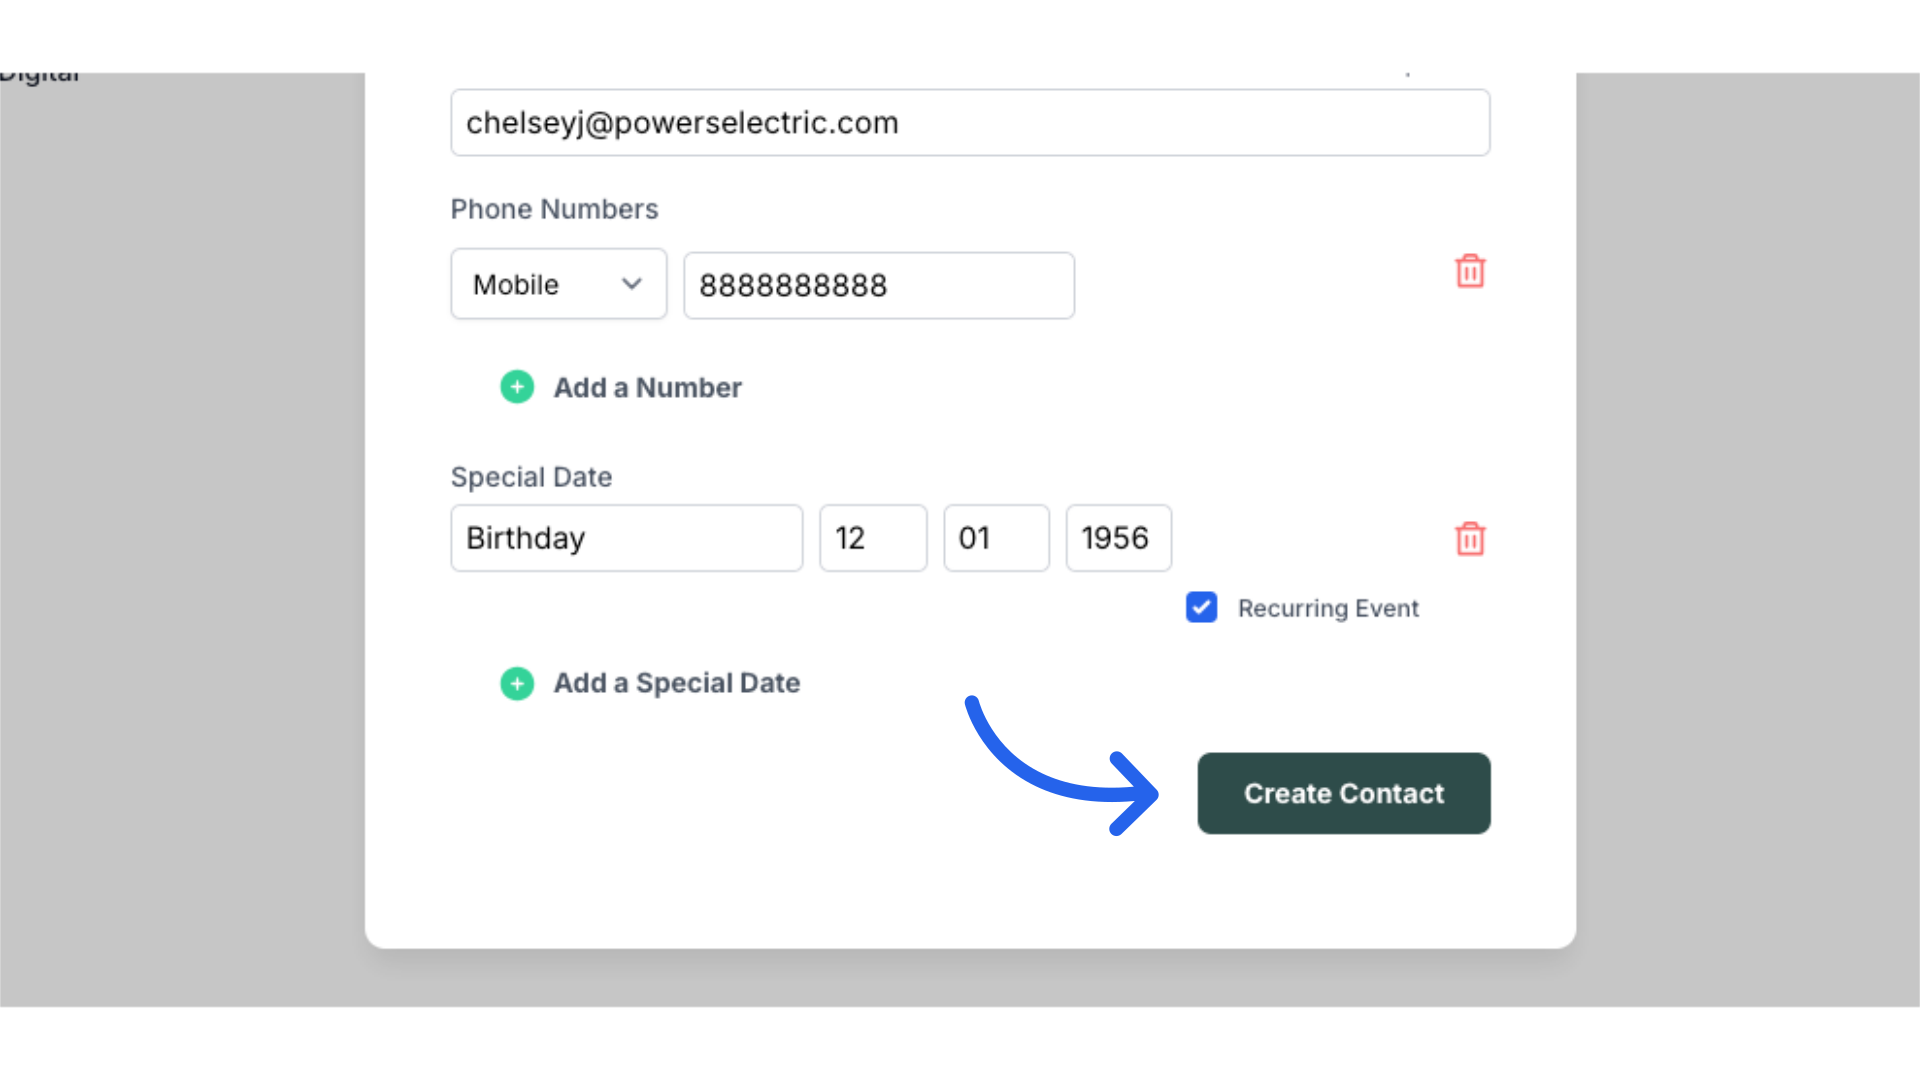
- Click on the green “Create Contact” button to save.
How to Create a New Contact in an Account
This guide will show you how to add a new contact to a clients account in ARC.
Go to citylifestylehq.com
1. Why is contact information important?
Keeping contact's information updated ensures the right people receive the right communication and access. The contact type controls what info they get and their Customer Portal access. Staying current helps avoid delays, ensures responsibilities are managed, and strengthens client relationships.
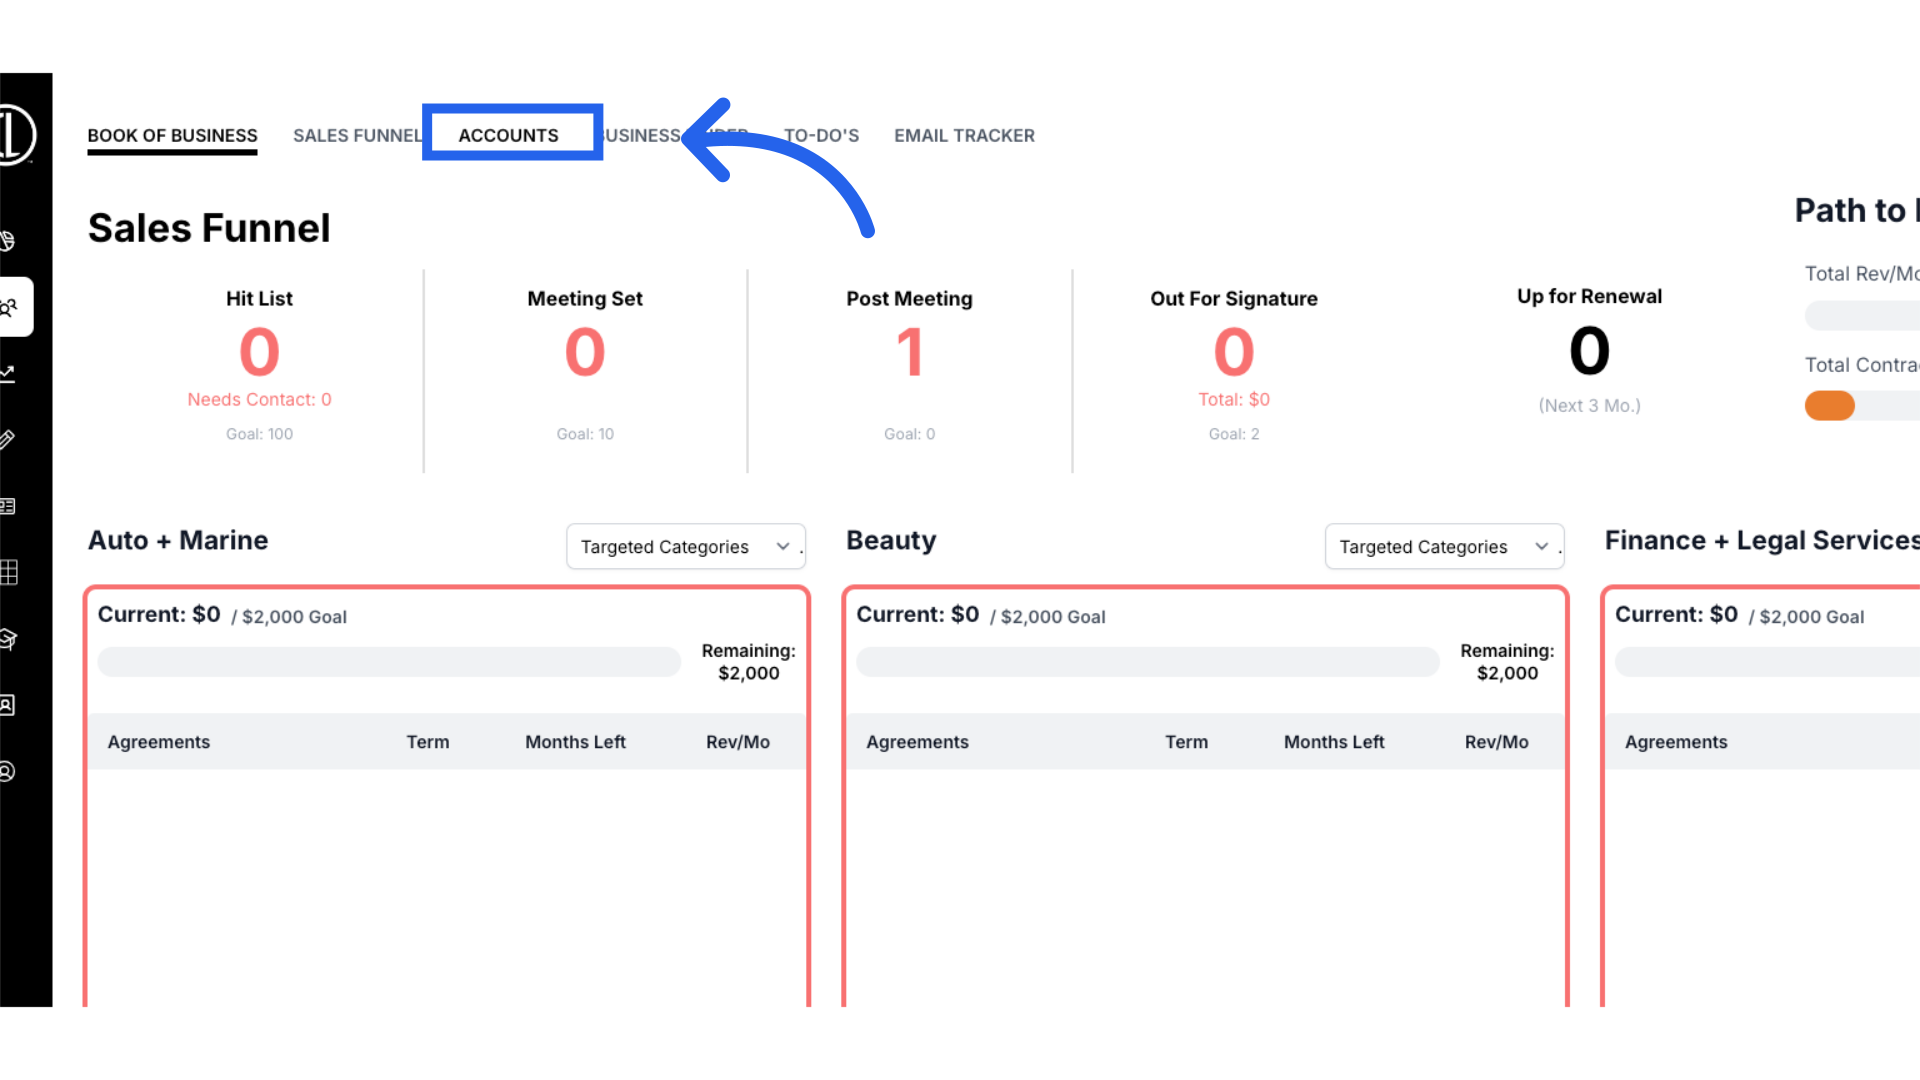
2. Click "Accounts"
In the ARC dashboard, navigate to the Accounts tab on the left side of the screen

3. Click "Accounts"
Navigate to the "Accounts" section.
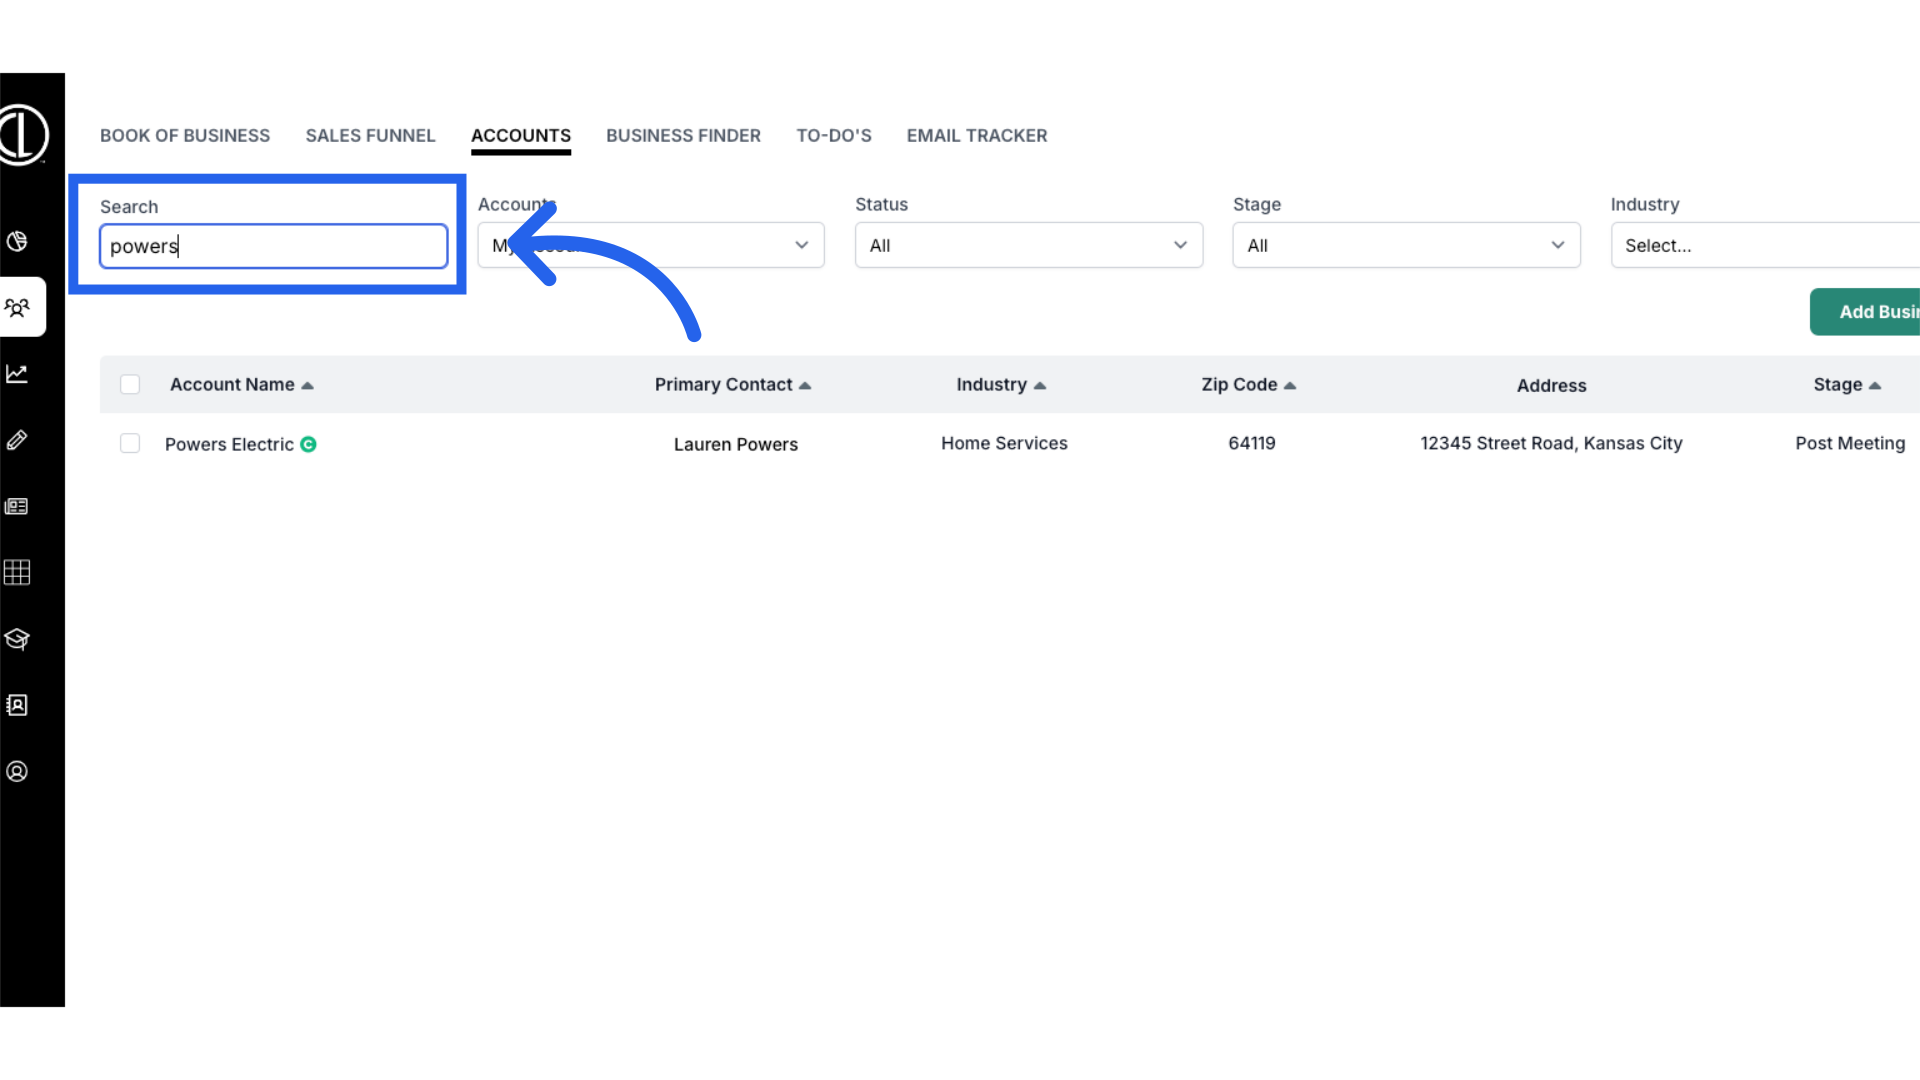
4. Search for account
Search for the account name in the search field. The other fields are not required but can be used to help filter your search.
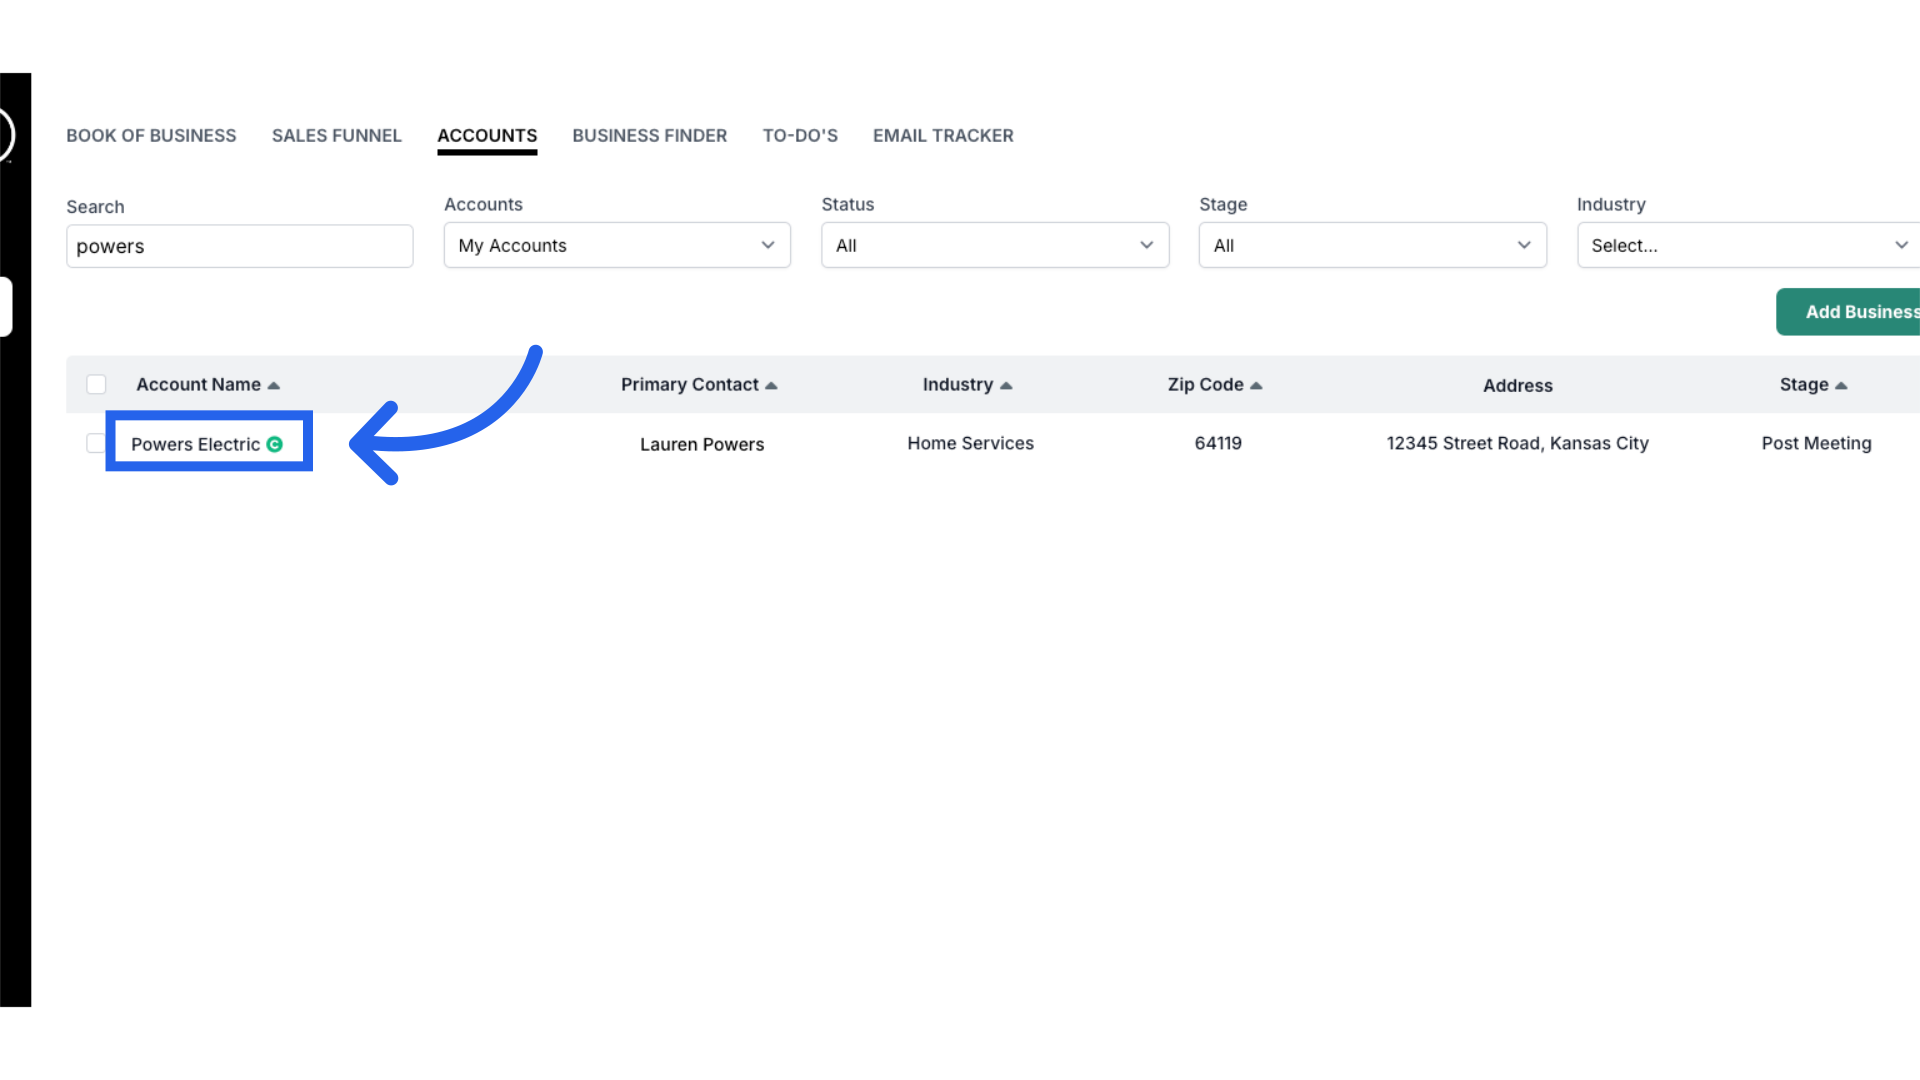
5. Click on account
Select the account by clicking on the name from the list.
6. Click "Contacts"
Access the "Contacts" section.

7. Click "Add Contact"
Click the green "Add Contact" button on the right side of the page.
8. Enter name and select "Contact Type"
Enter the contact's first and last name and under "Contact Type" select all that apply.
9. Contact Types
The Contact Type determines access to the Customer Portal and the communication they receive. A primary contact has full portal access and will receive all communications unless other primary contacts are added. Billing contacts receive emails such as invoices, reminders and have access to the invoices and agreements tabs. Ad Production contacts receive emails such as ad deadlines, revisions, proofs and have access to the ads tab. Digital contacts receive digital related emails and have access to the digital tab. The other contact type gives no portal access.
10. Enter contacts title and email address
Next enter the contacts title and email address if needed.
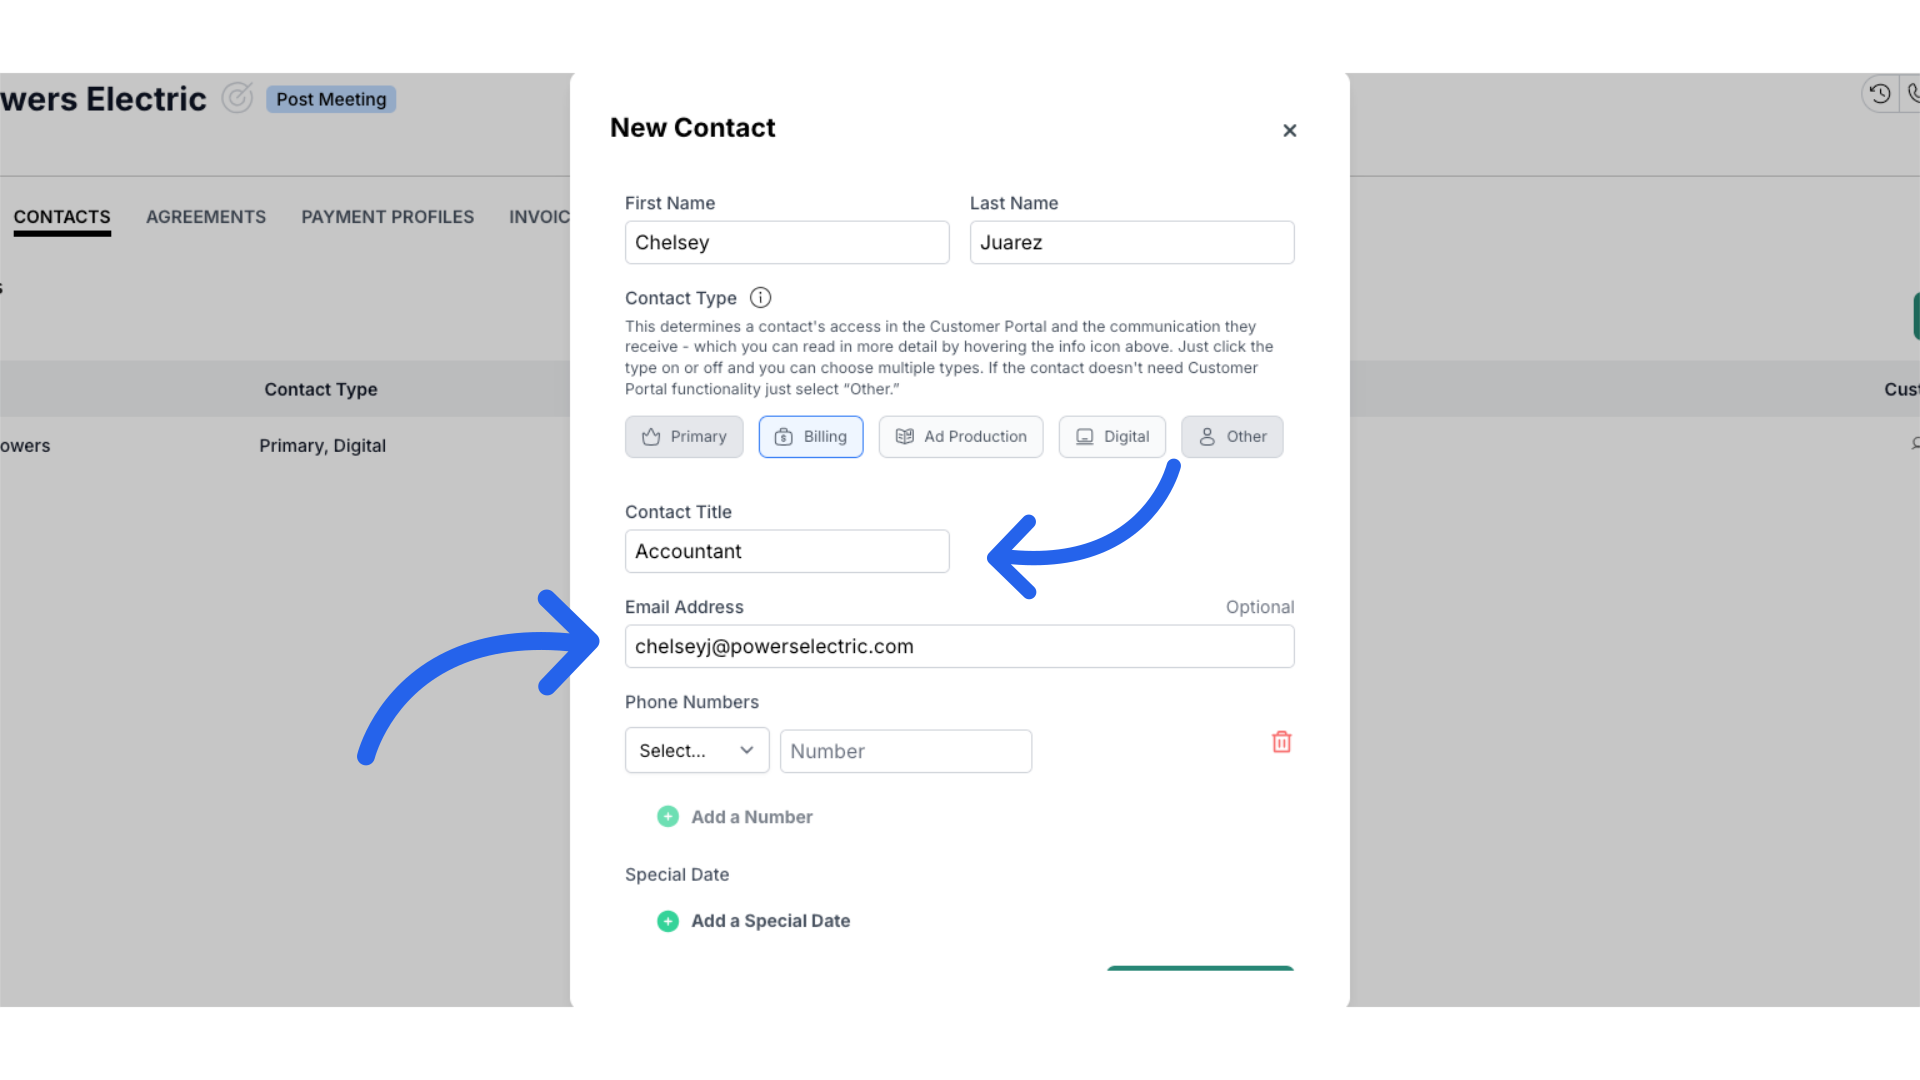
11. Enter contacts phone number and any special dates to remember
Next fill in the contacts phone number. You can also add in a special date such as their birthday or the day they signed their contract. Then note if this is a recurring event.
12. Click "Create Contact"
Finalize and create the new contact.
This guide explained how to add an additional contact to a clients account in ARC.