How to Navigate the Billing Tab in an Account
In ARC, a client’s account has a billing tab where you can view all invoice and payment details in one place. Here you will be able to determine if a client has made their payment or if there is an open balance on their account.
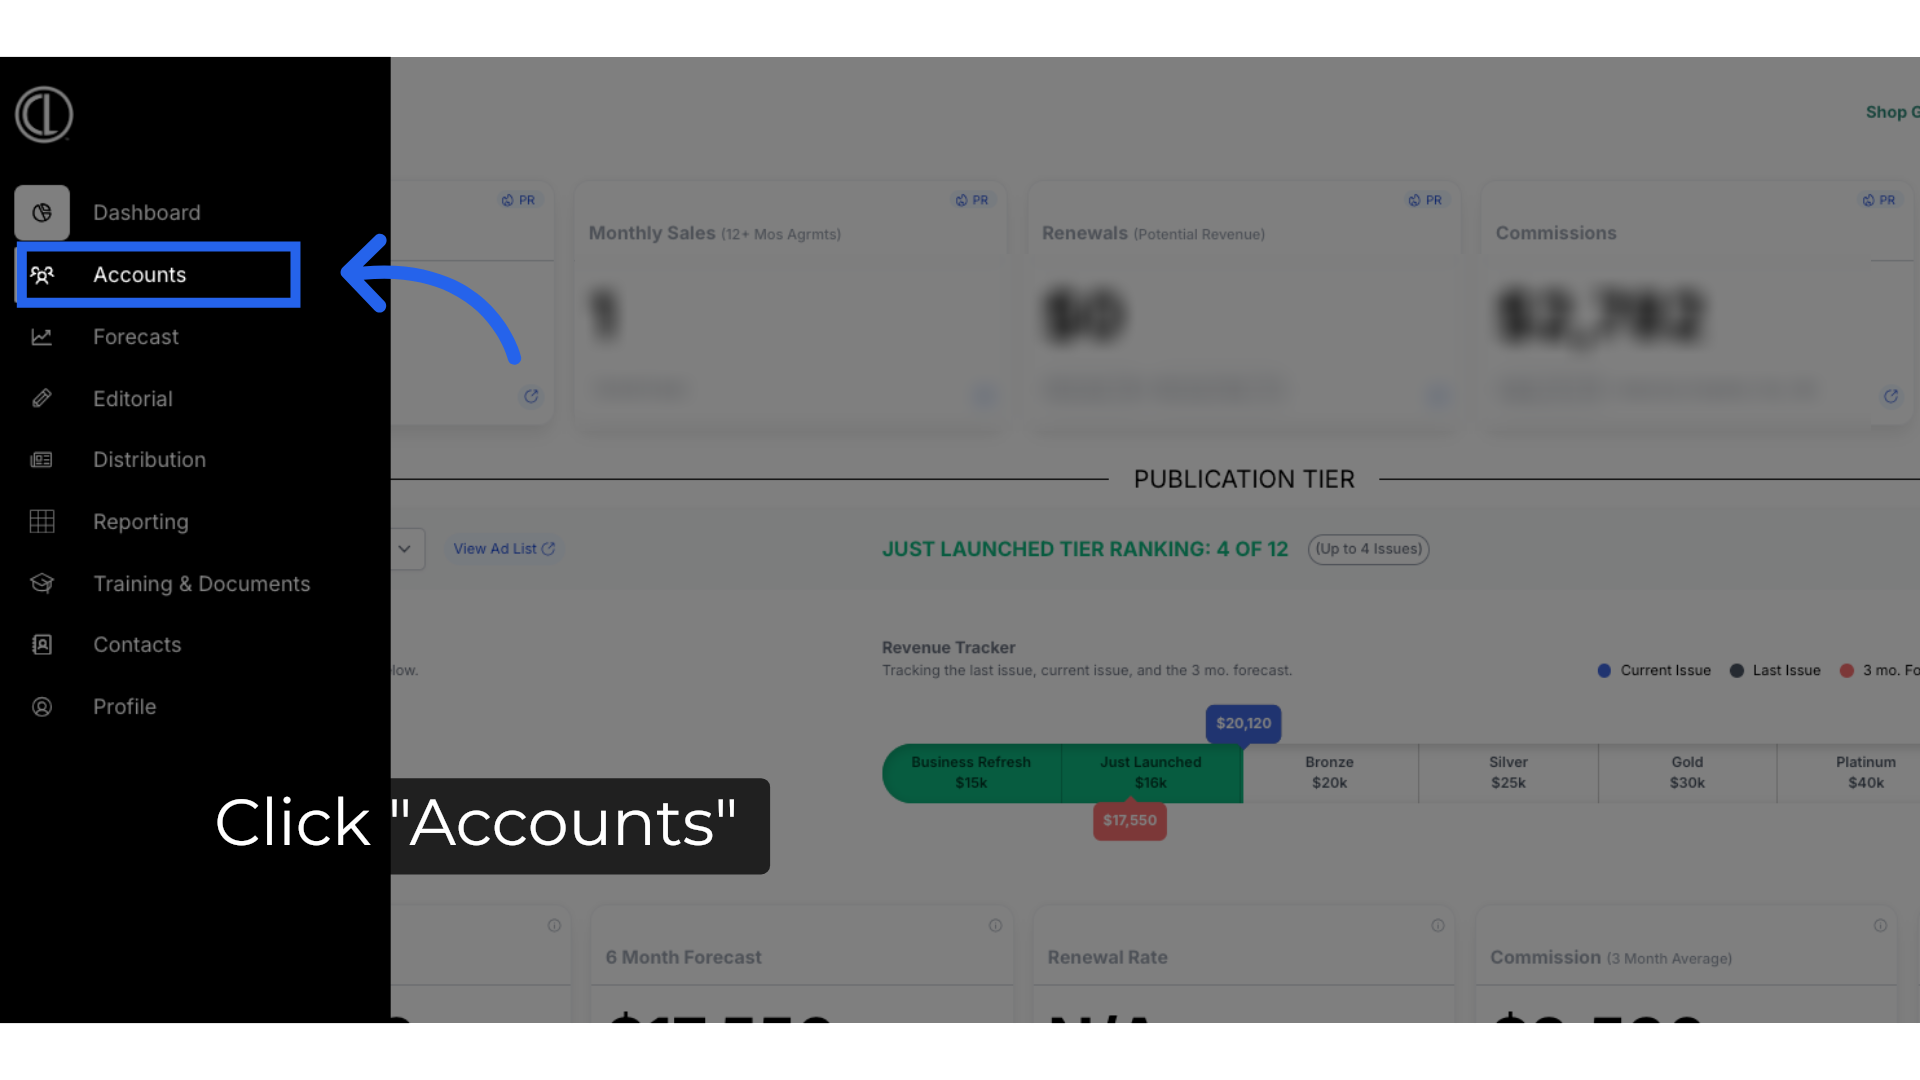
- In ARC, navigate to the Accounts page on the left-hand side of the screen.
- Click on the “Accounts” Tab found towards the top of the page.
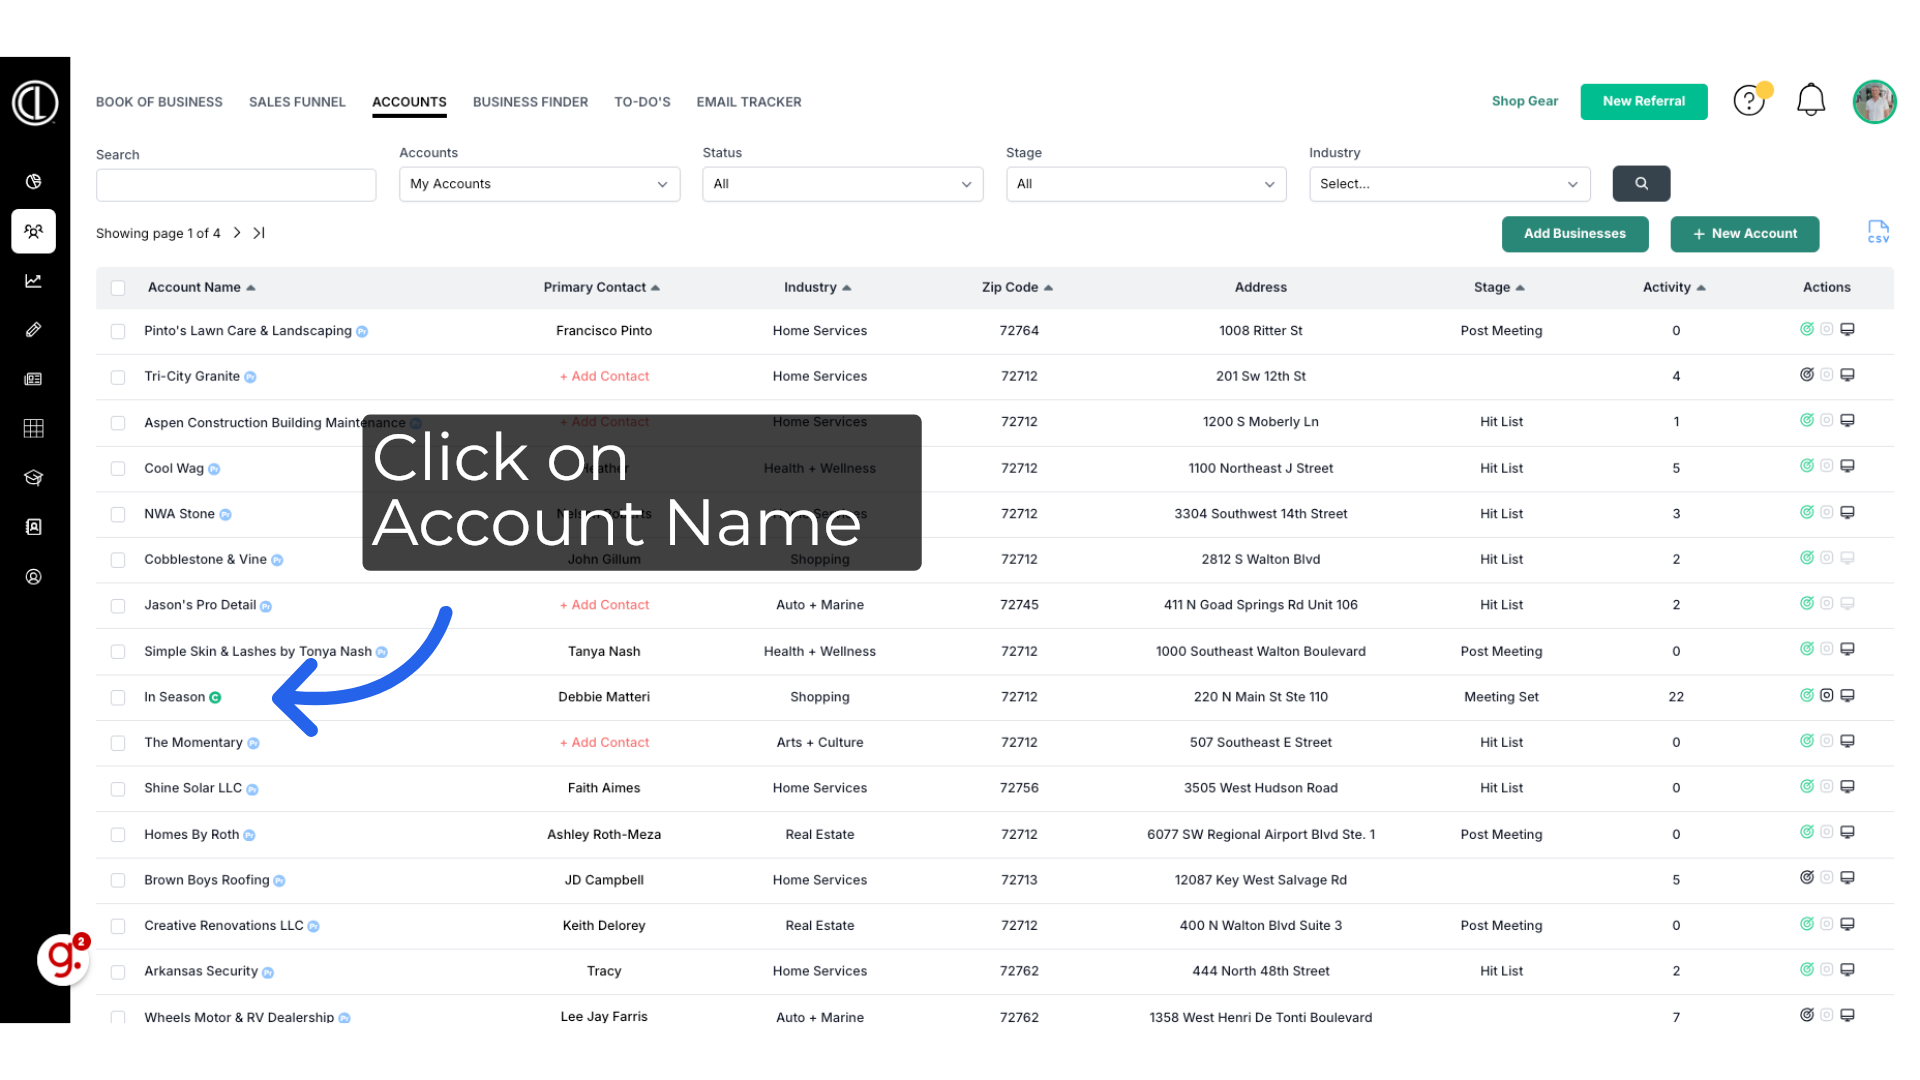
- Search for the account name in the search field.
- Other fields are not required but can be used to help filter your search.
- Select your account from the list by clicking on the account name.
- Select the Billing tab located under the Account name.
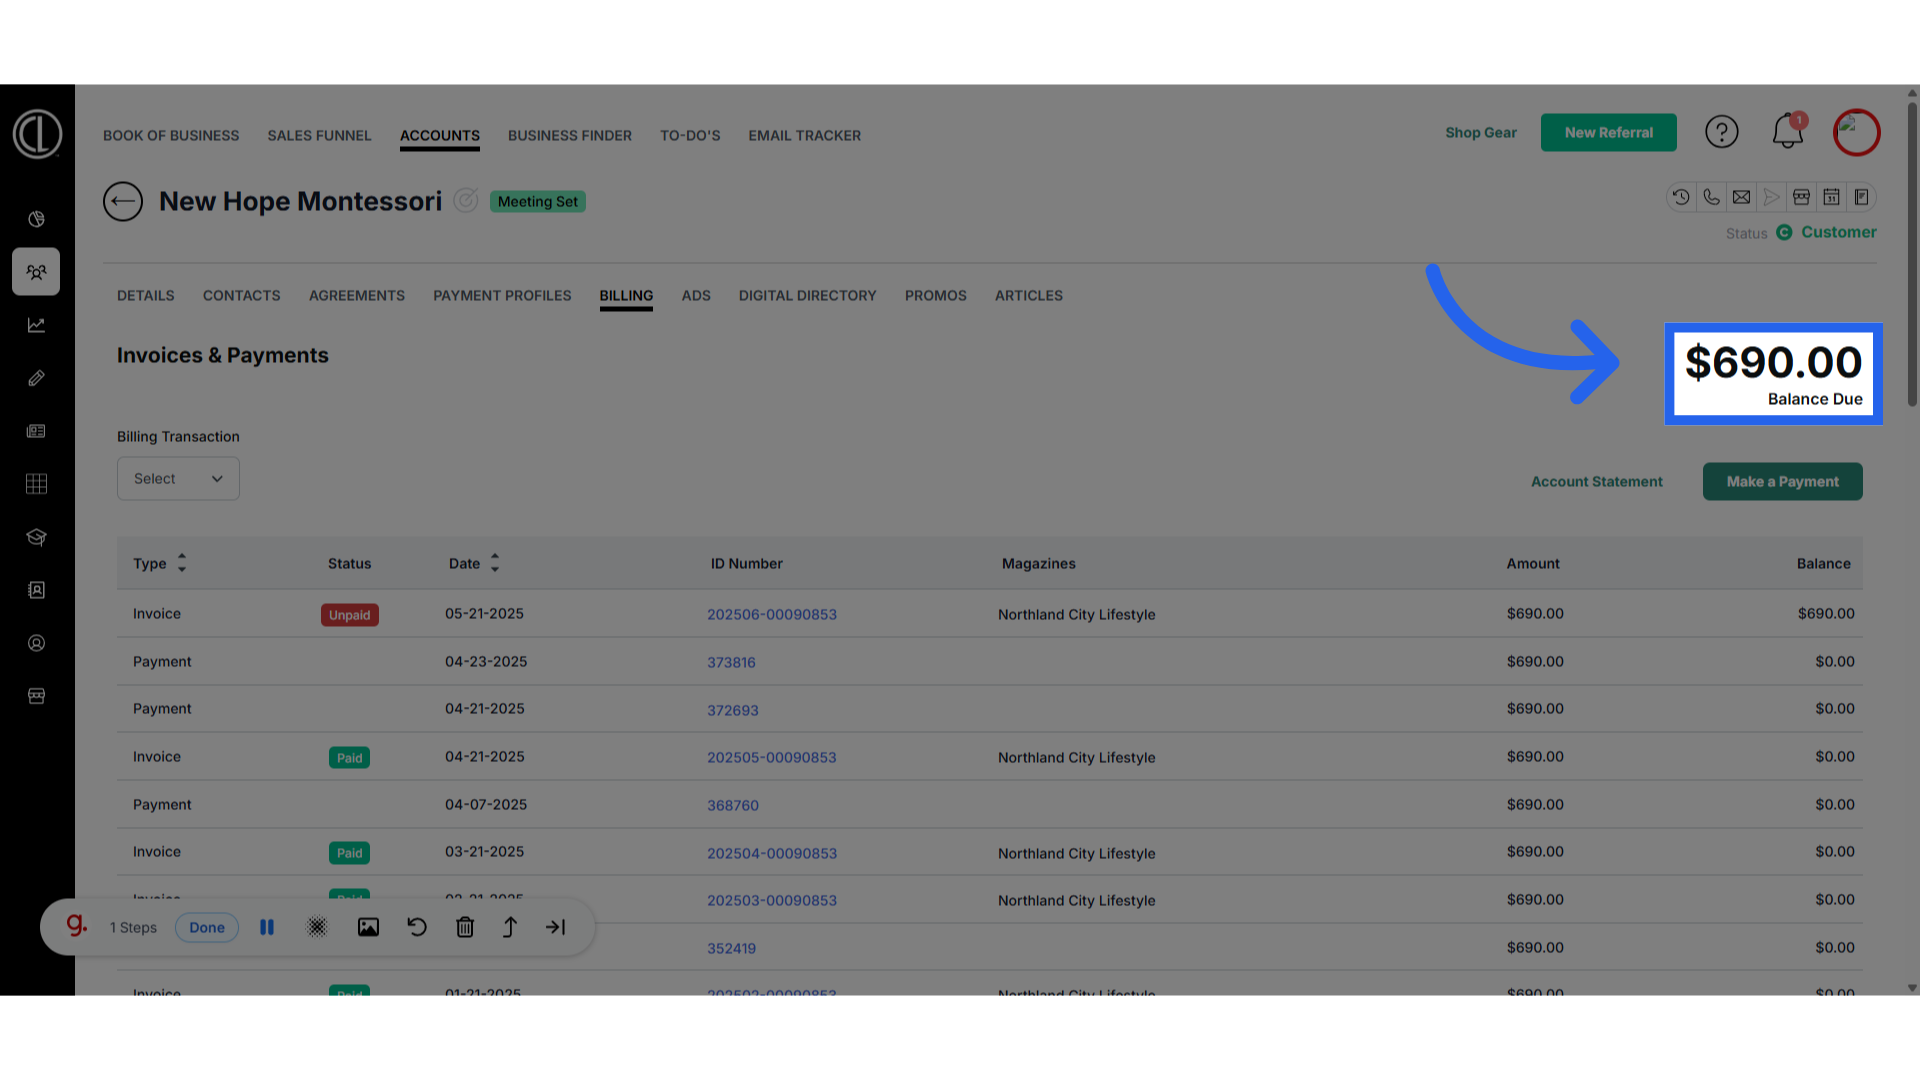
- If there is an open balance on the account, the amount will appear on the top right of the screen.
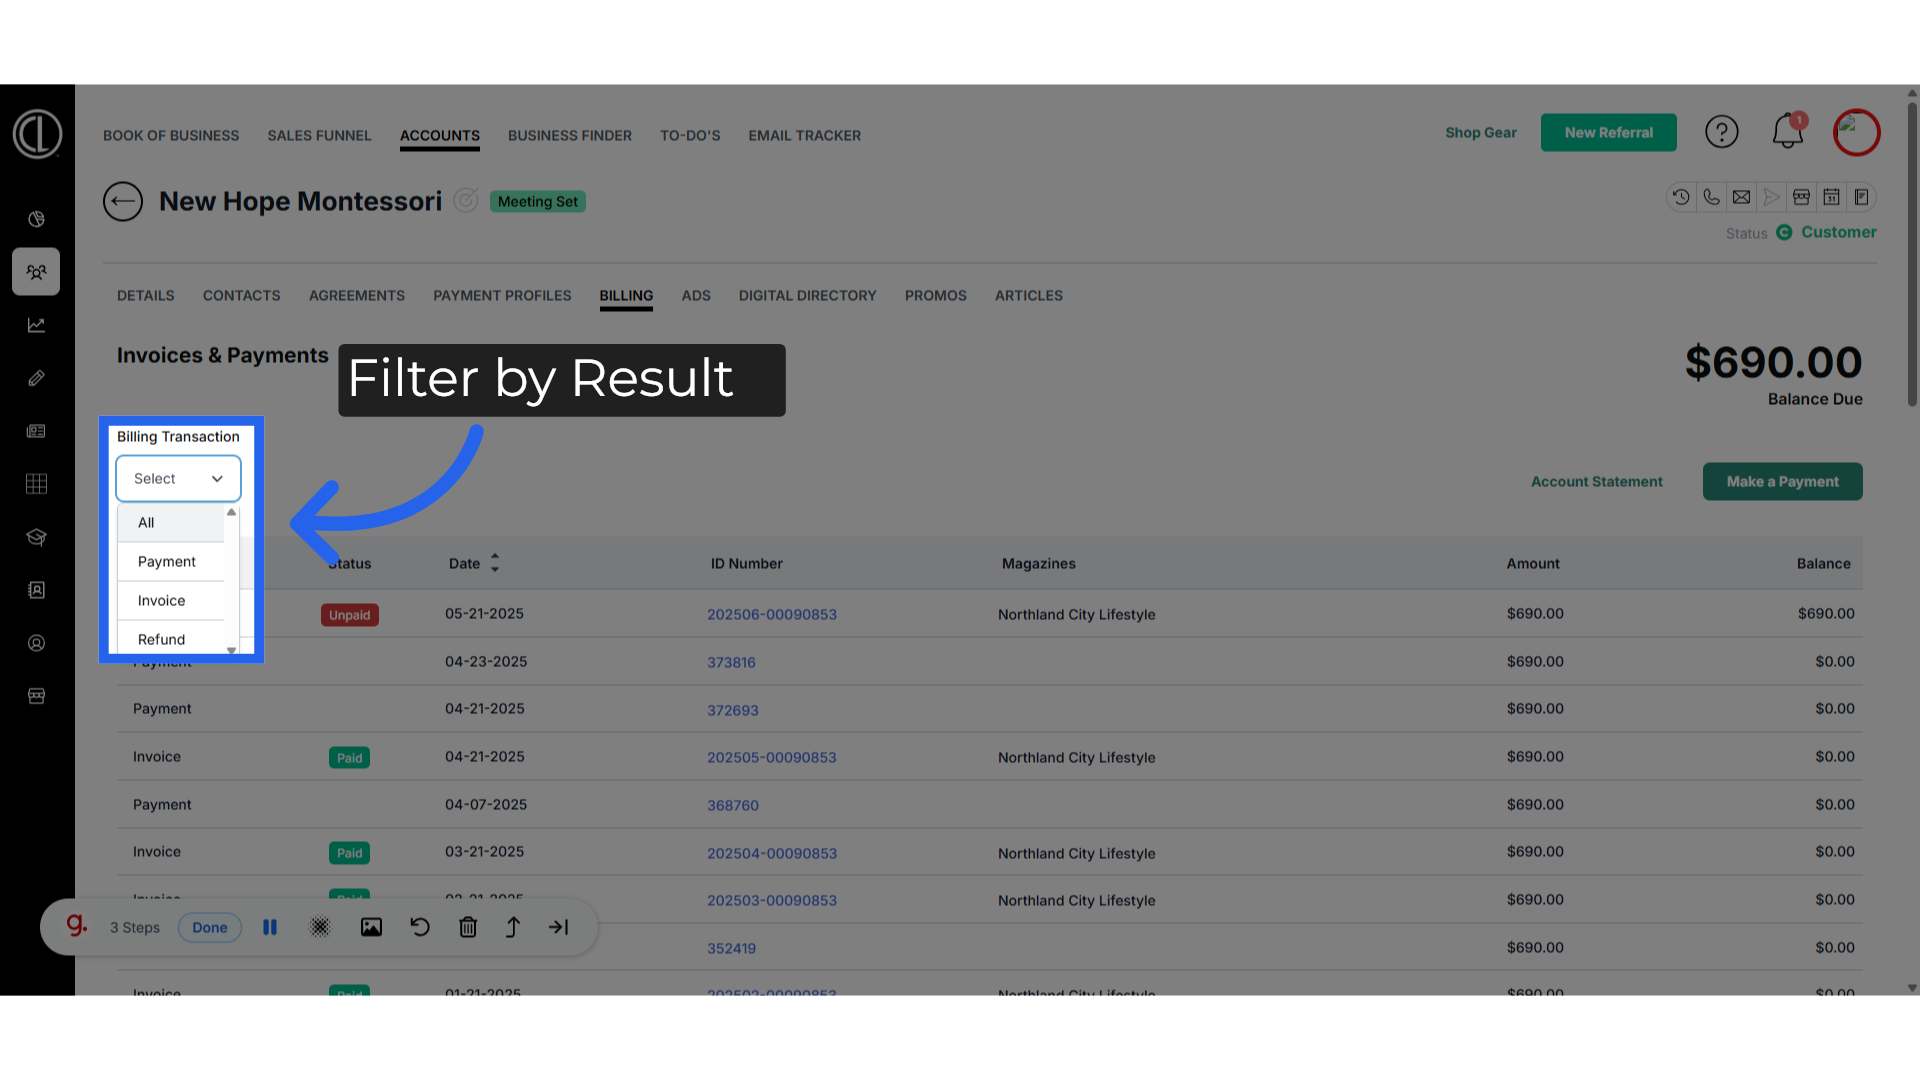
- You can filter your table results by payments, invoices, or refunds when clicking the billing transaction drop-down.
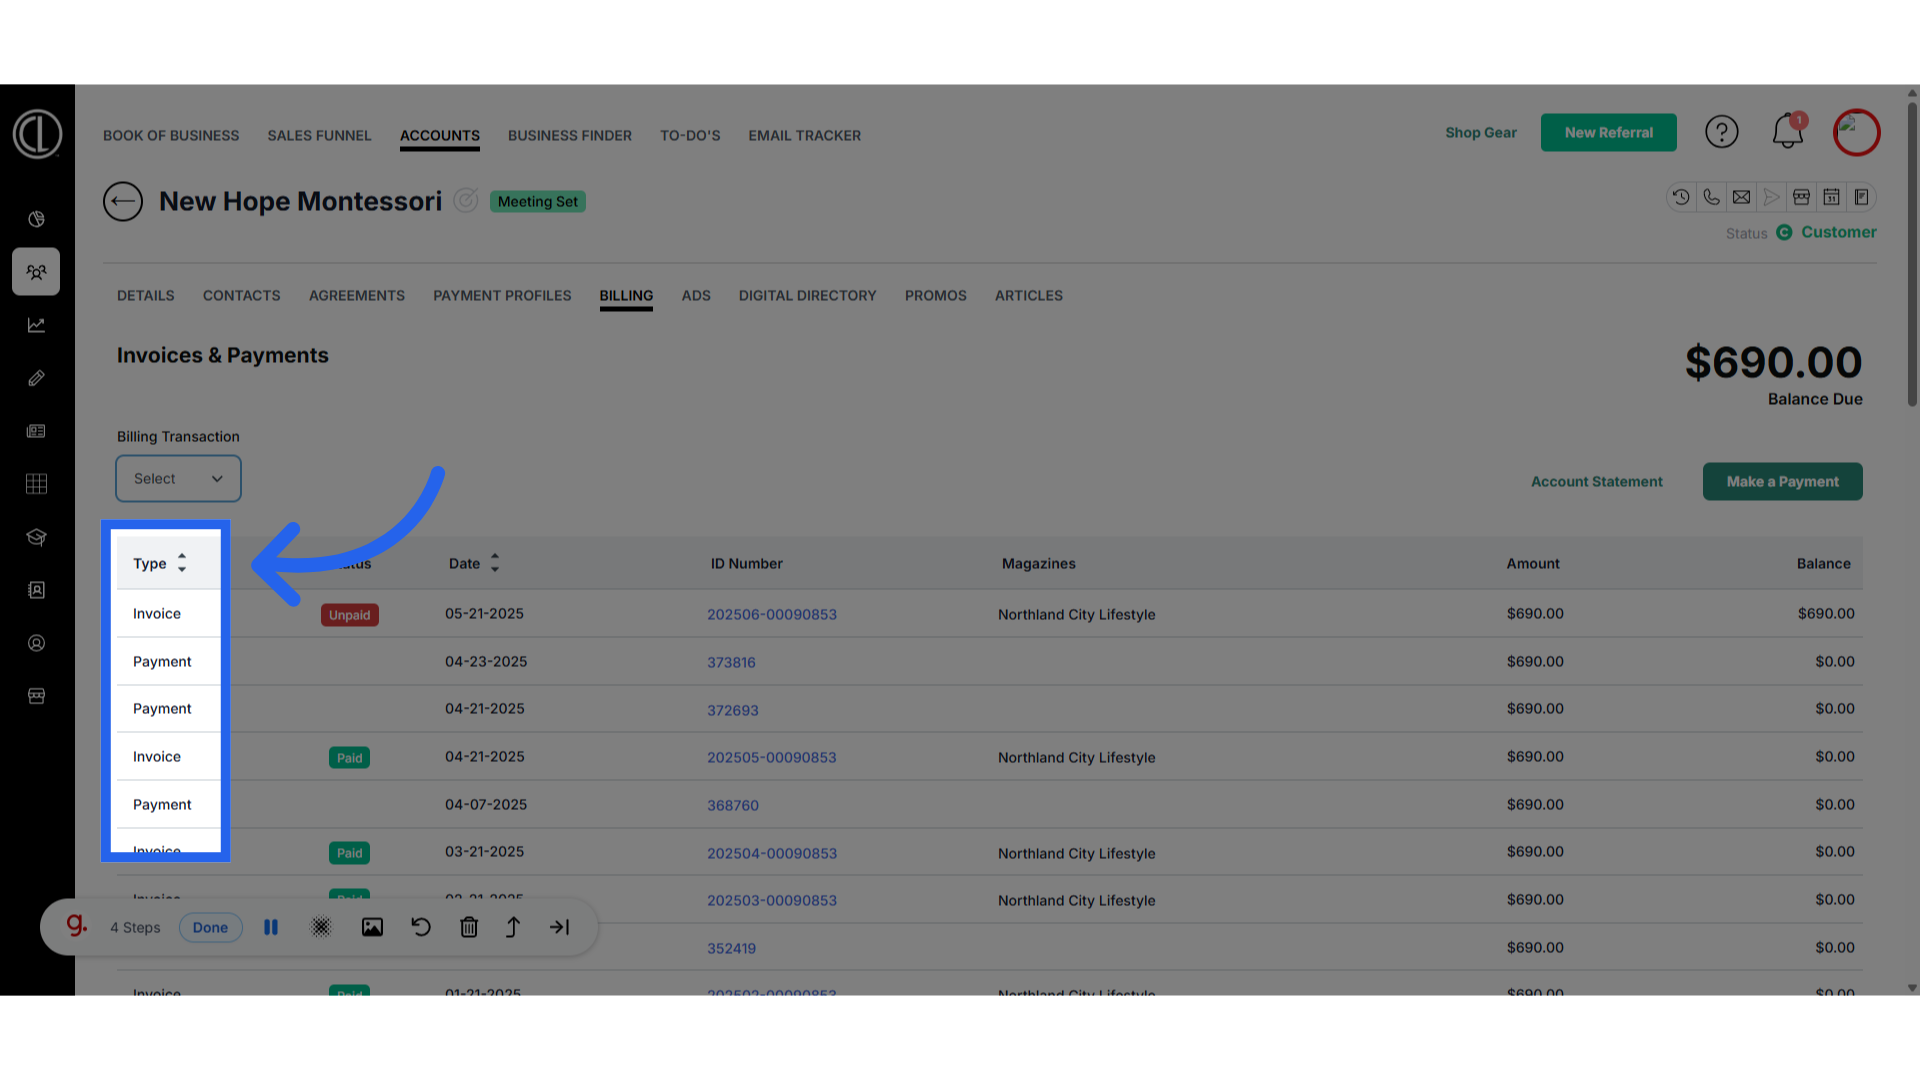
- The first column of the table will show your transaction type. By clicking the arrows next to it, you can sort the order by type.
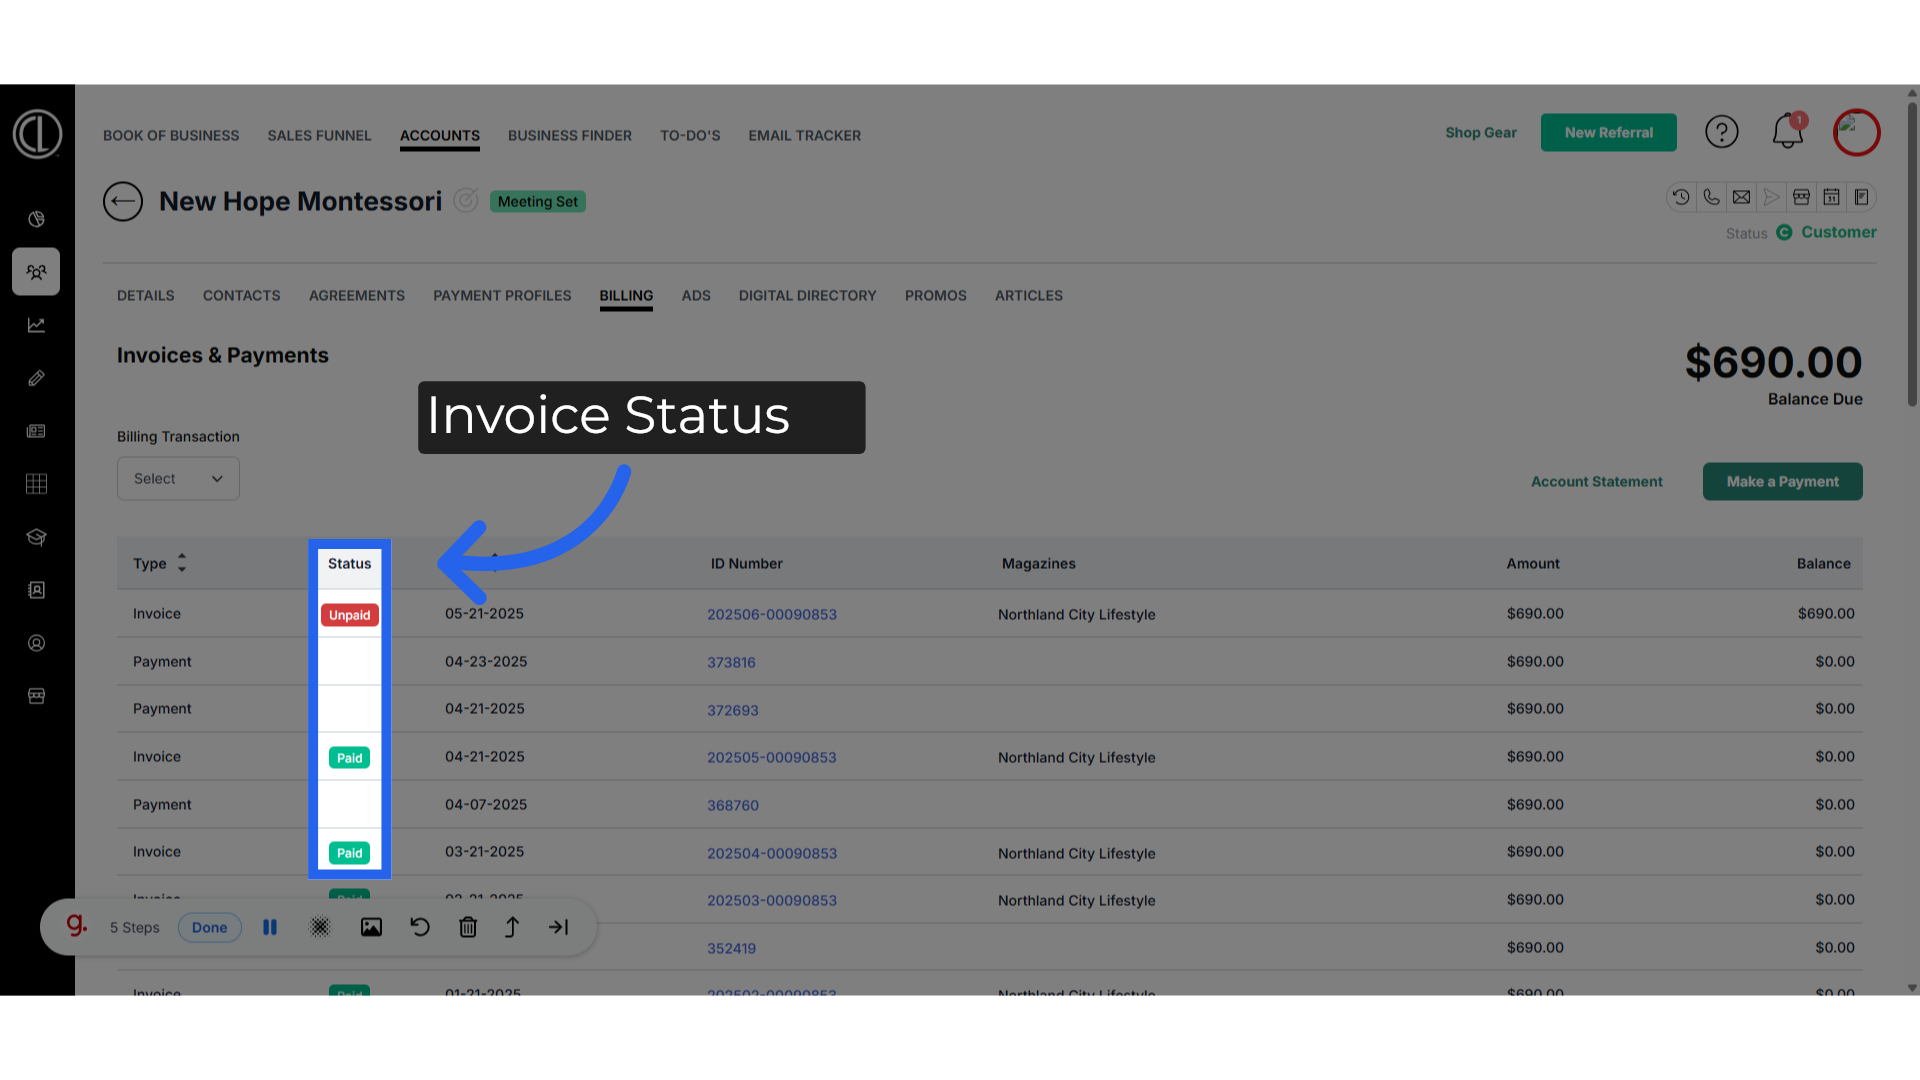
- The status column will show you the current status of an invoice. Paid or unpaid
- The date column will reflect the date the transaction was processed or invoiced. You can use the arrows to filter the table by date
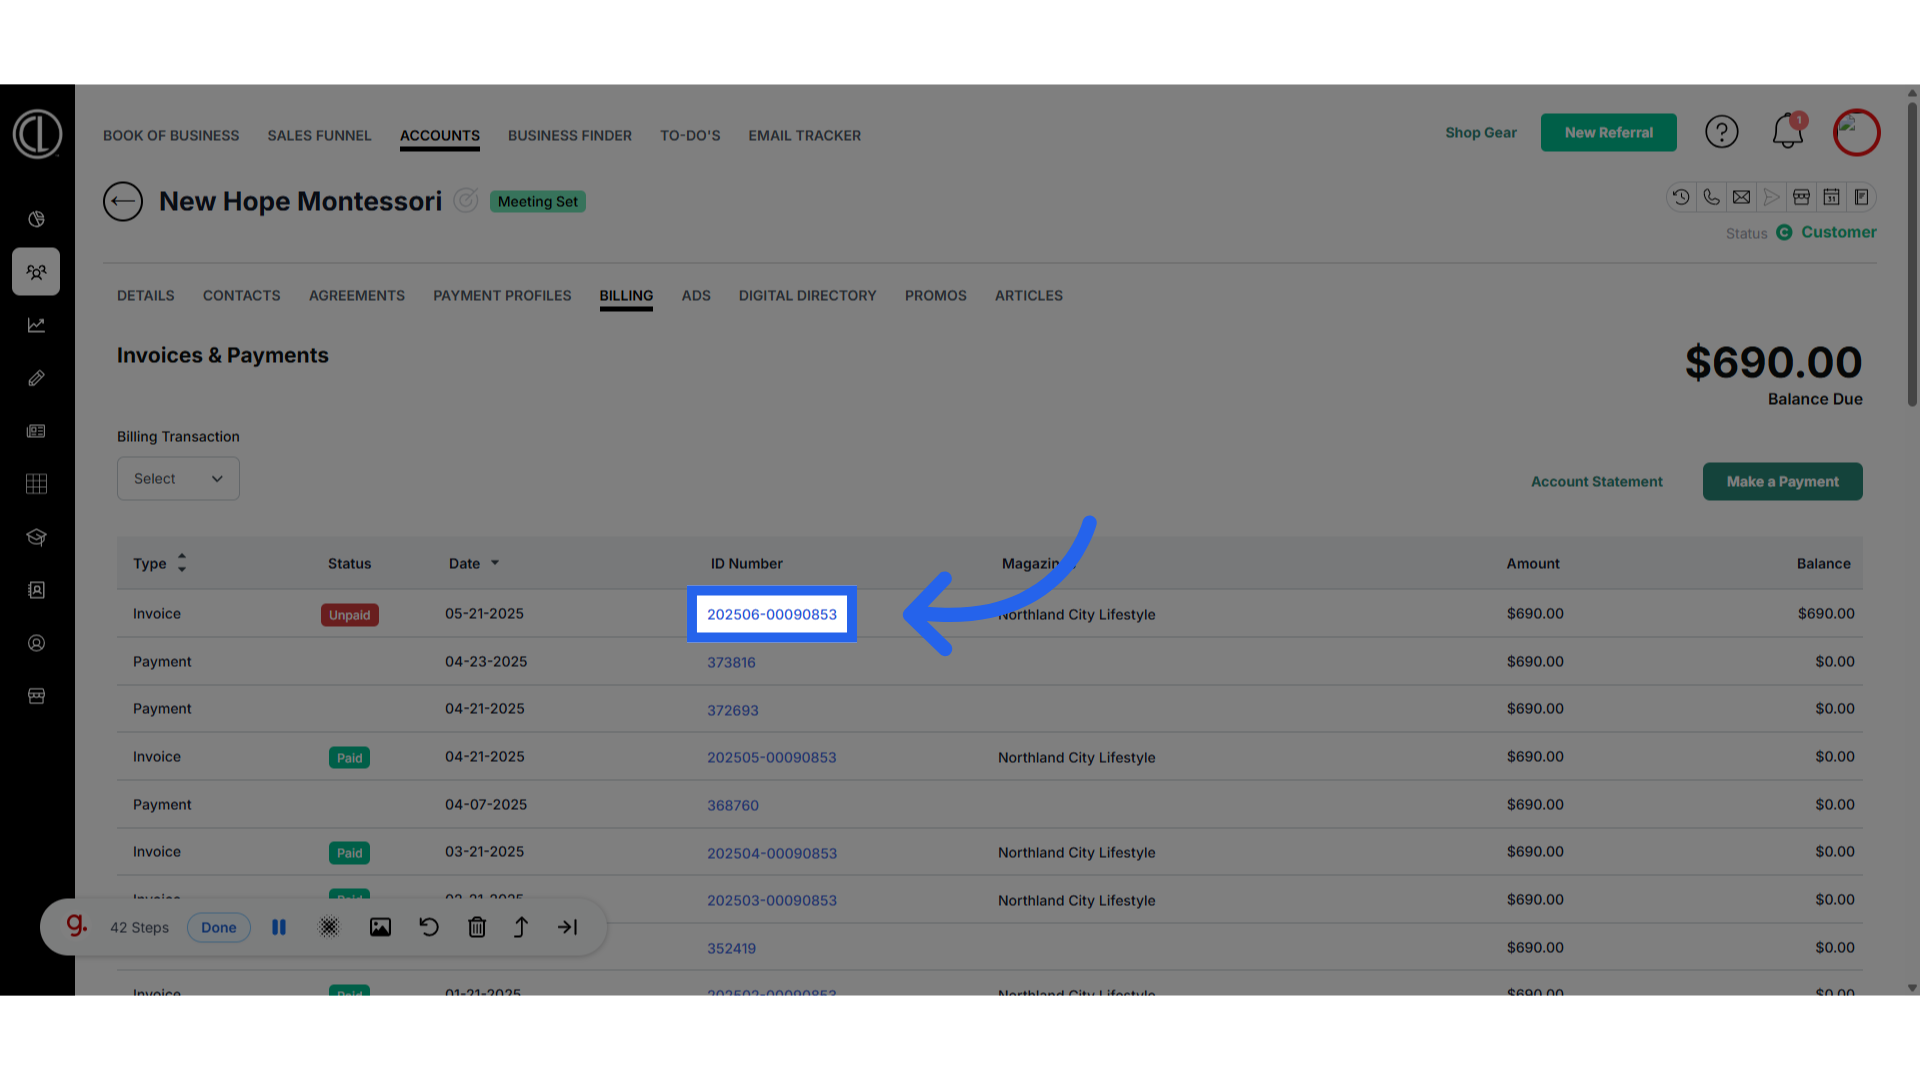
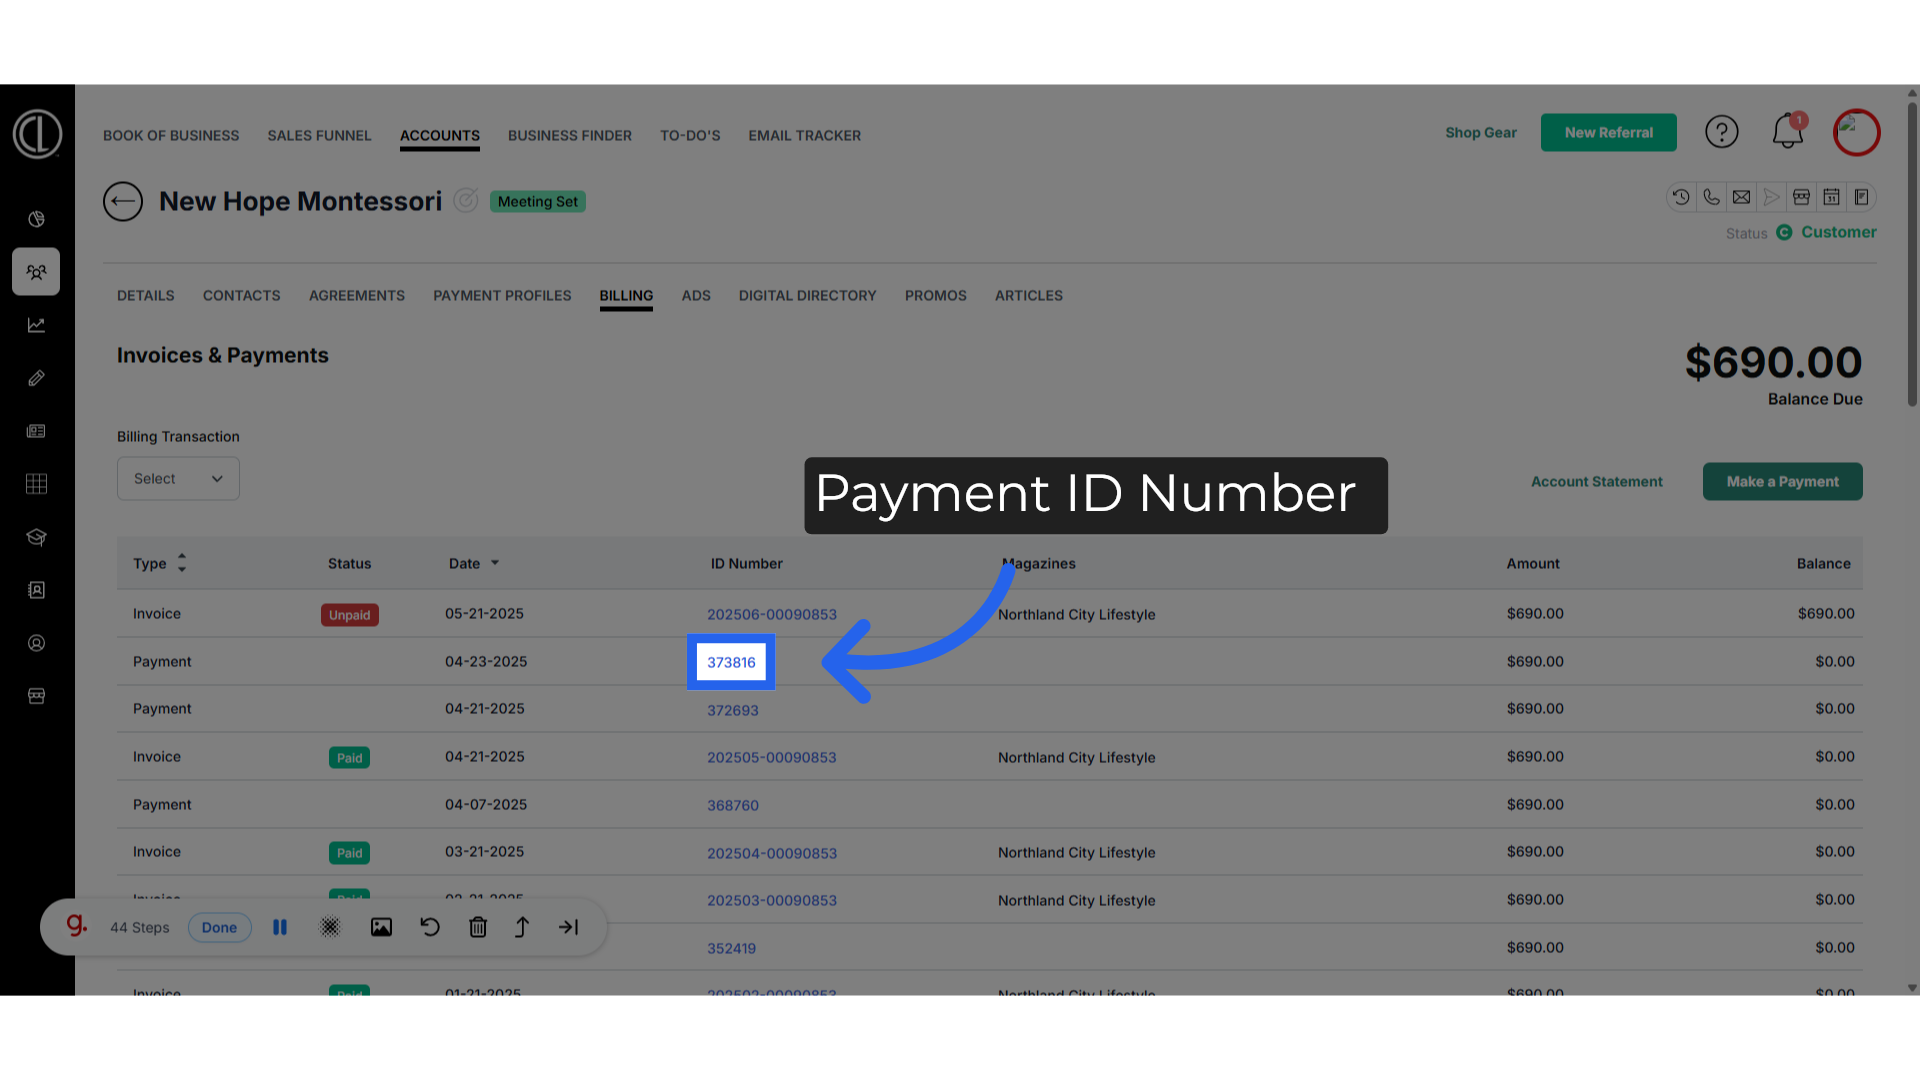
- The ID number is the payment, refund reference, or invoice number associated with the transaction. Invoice numbers are a combination of the year and month the invoice is associated with and the agreement number, preceded by zeros to make it 8 digits long.
- The publication name listed under the Magazines column is the publication to which the transaction applied.
- The amount column shows how much the invoice or payment is for.
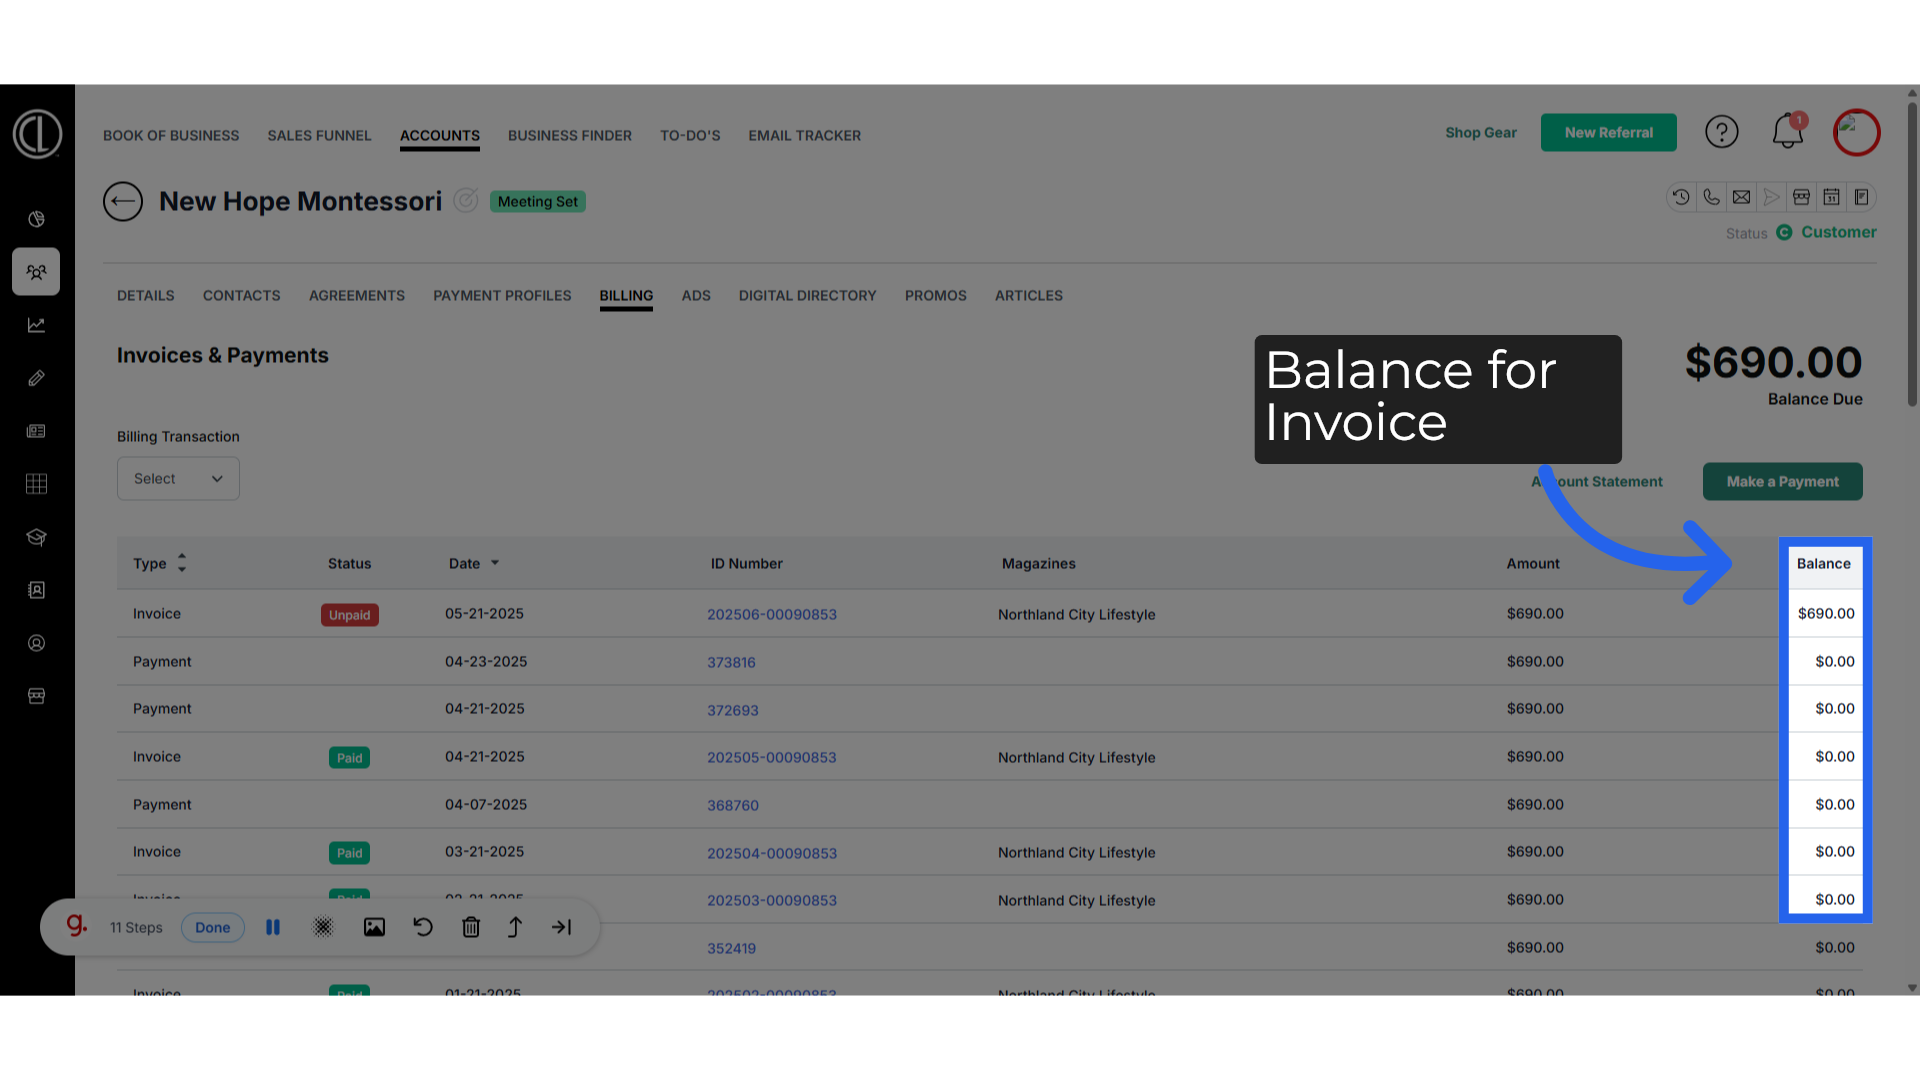
- The balance column will reflect the amount currently not paid on an invoice
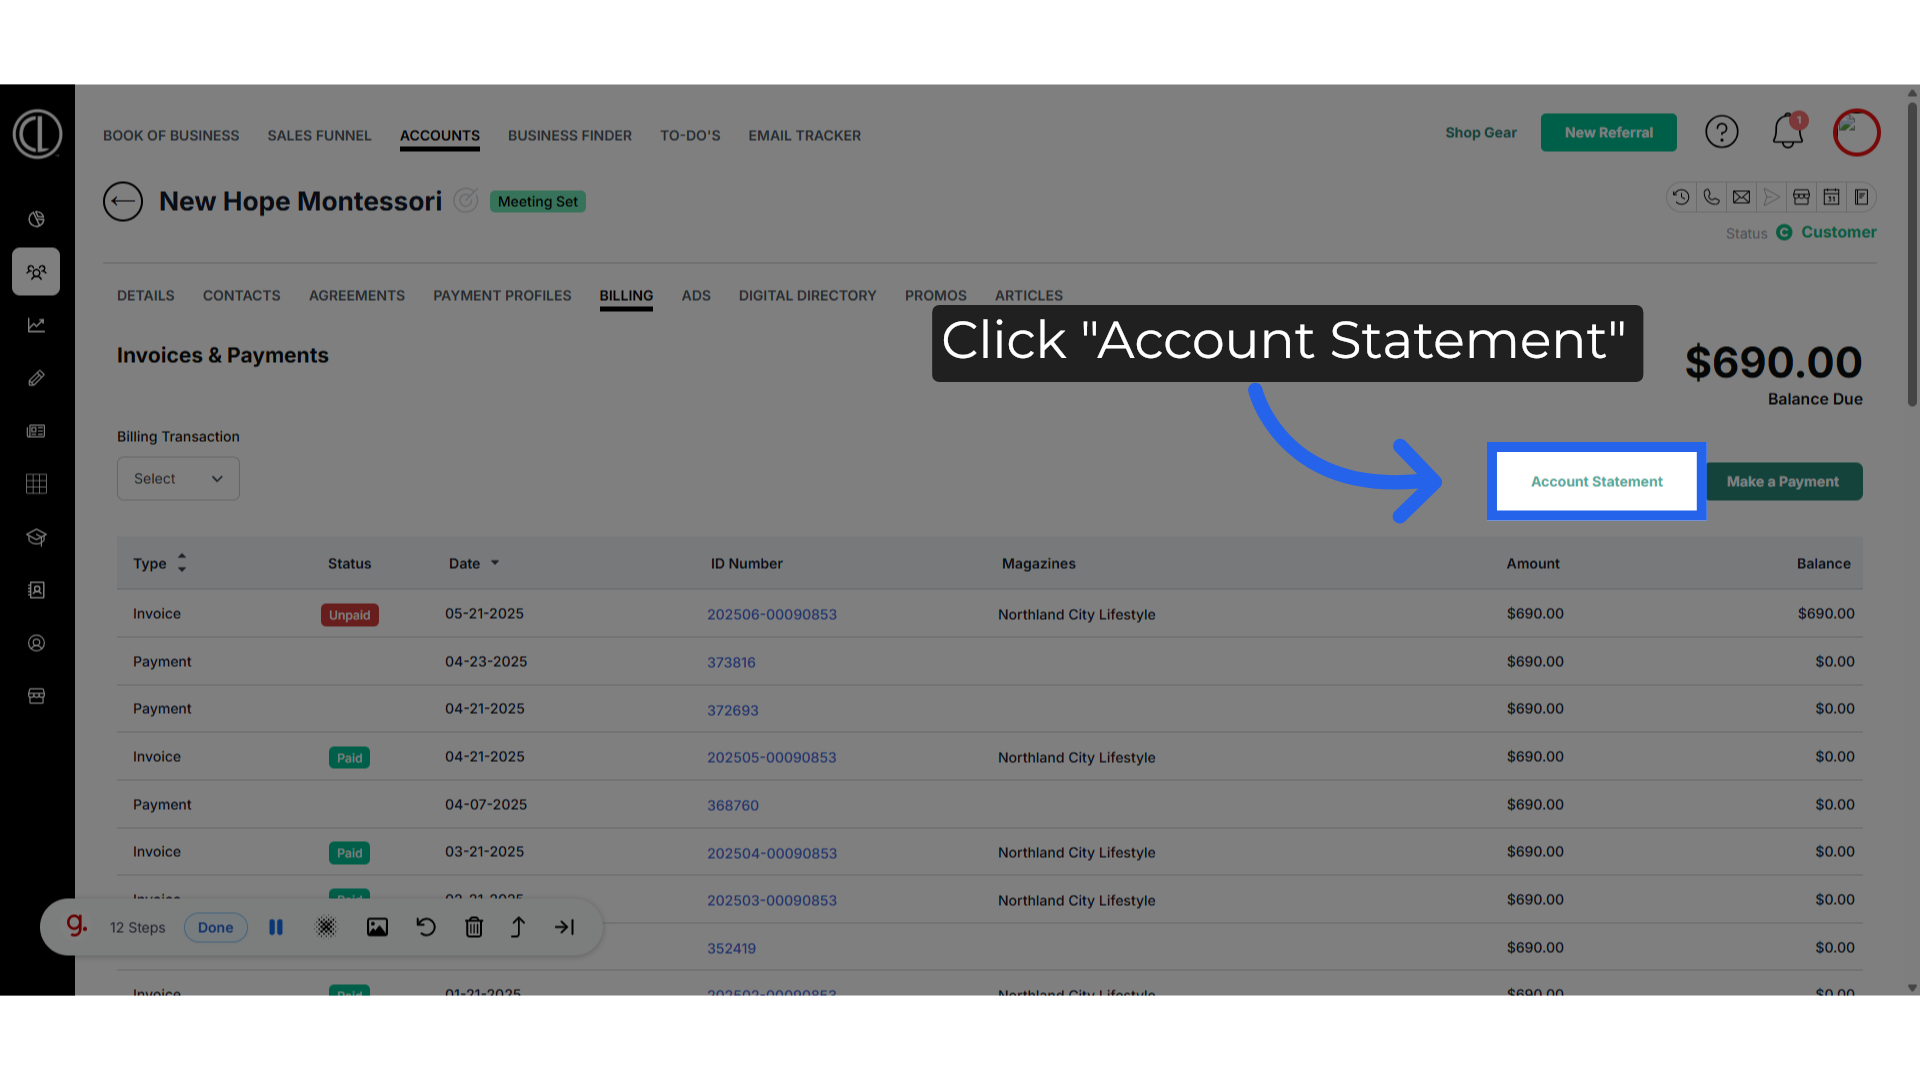
- Click “Account Statement” to generate a PDF with a complete summary of invoices, payments, and account details you can share with the client.
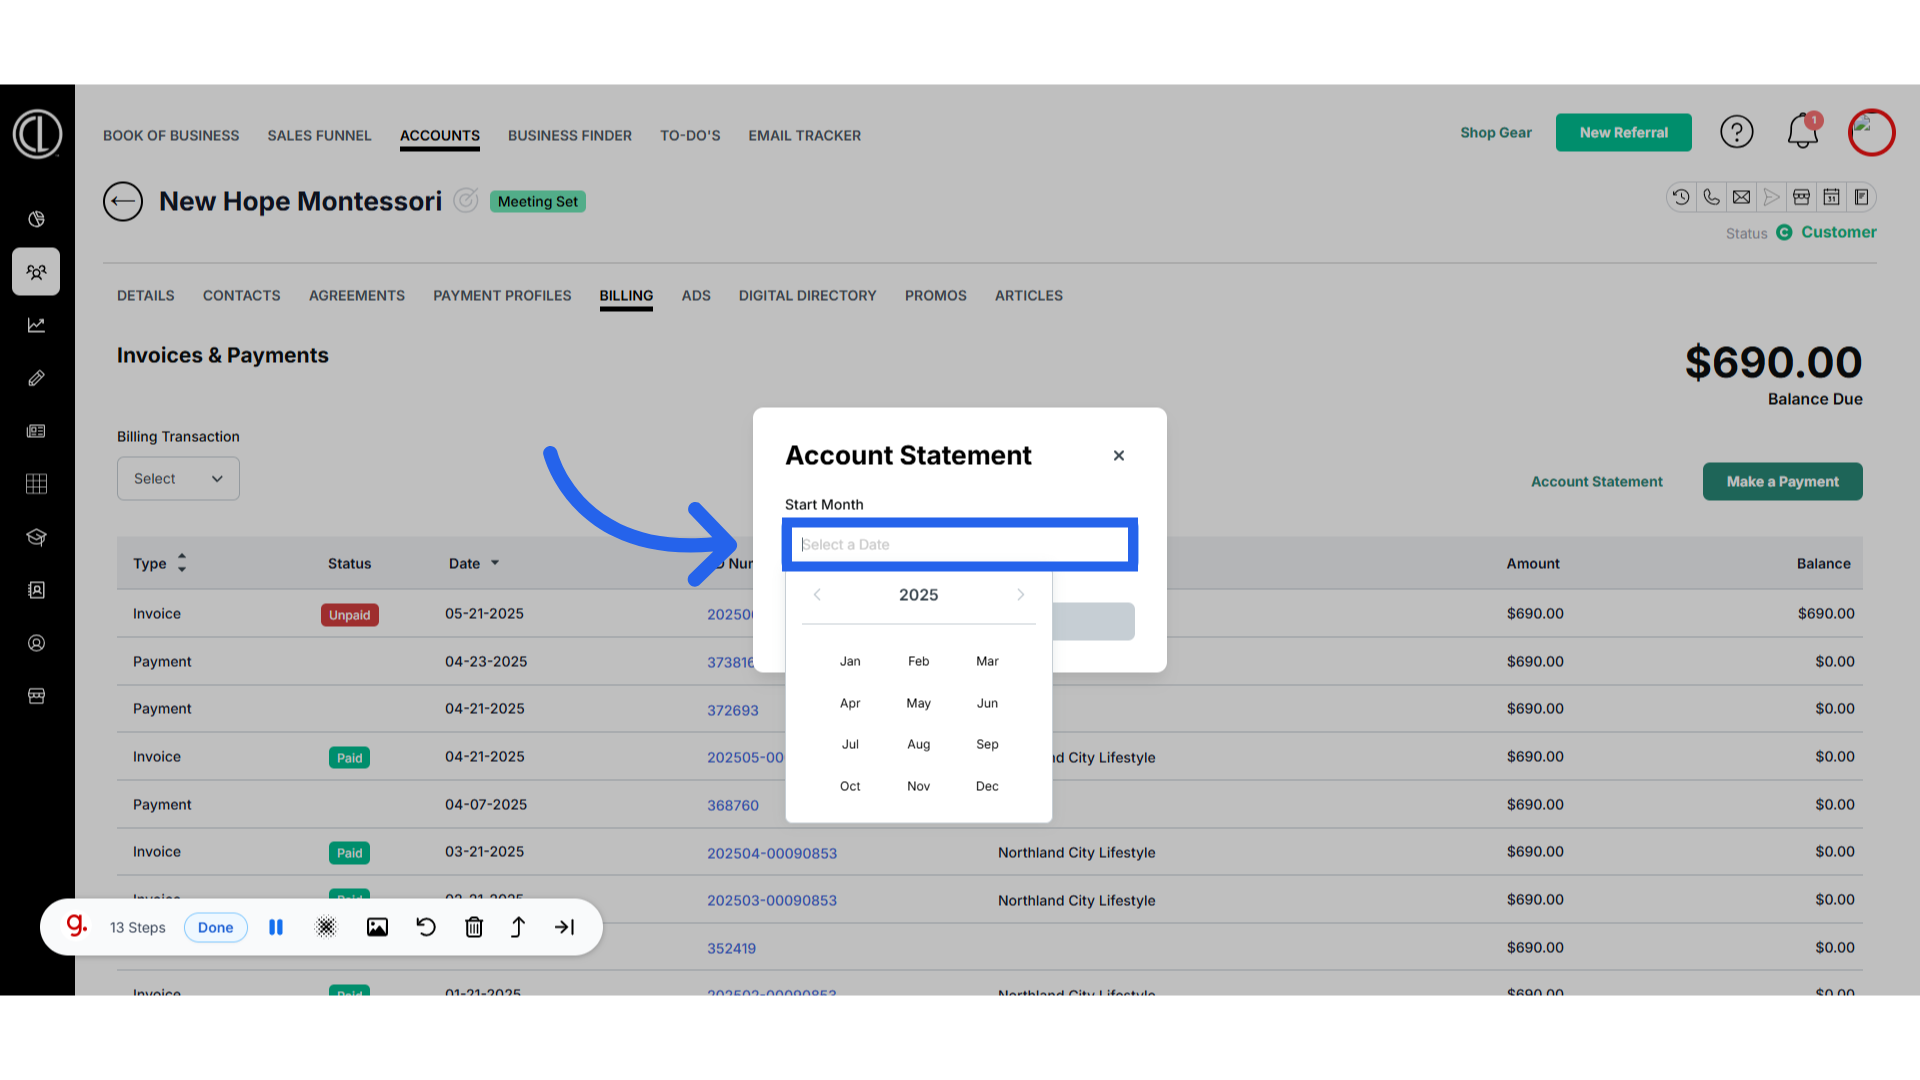
- Choose a specific date range you want the account statement to pull details for.
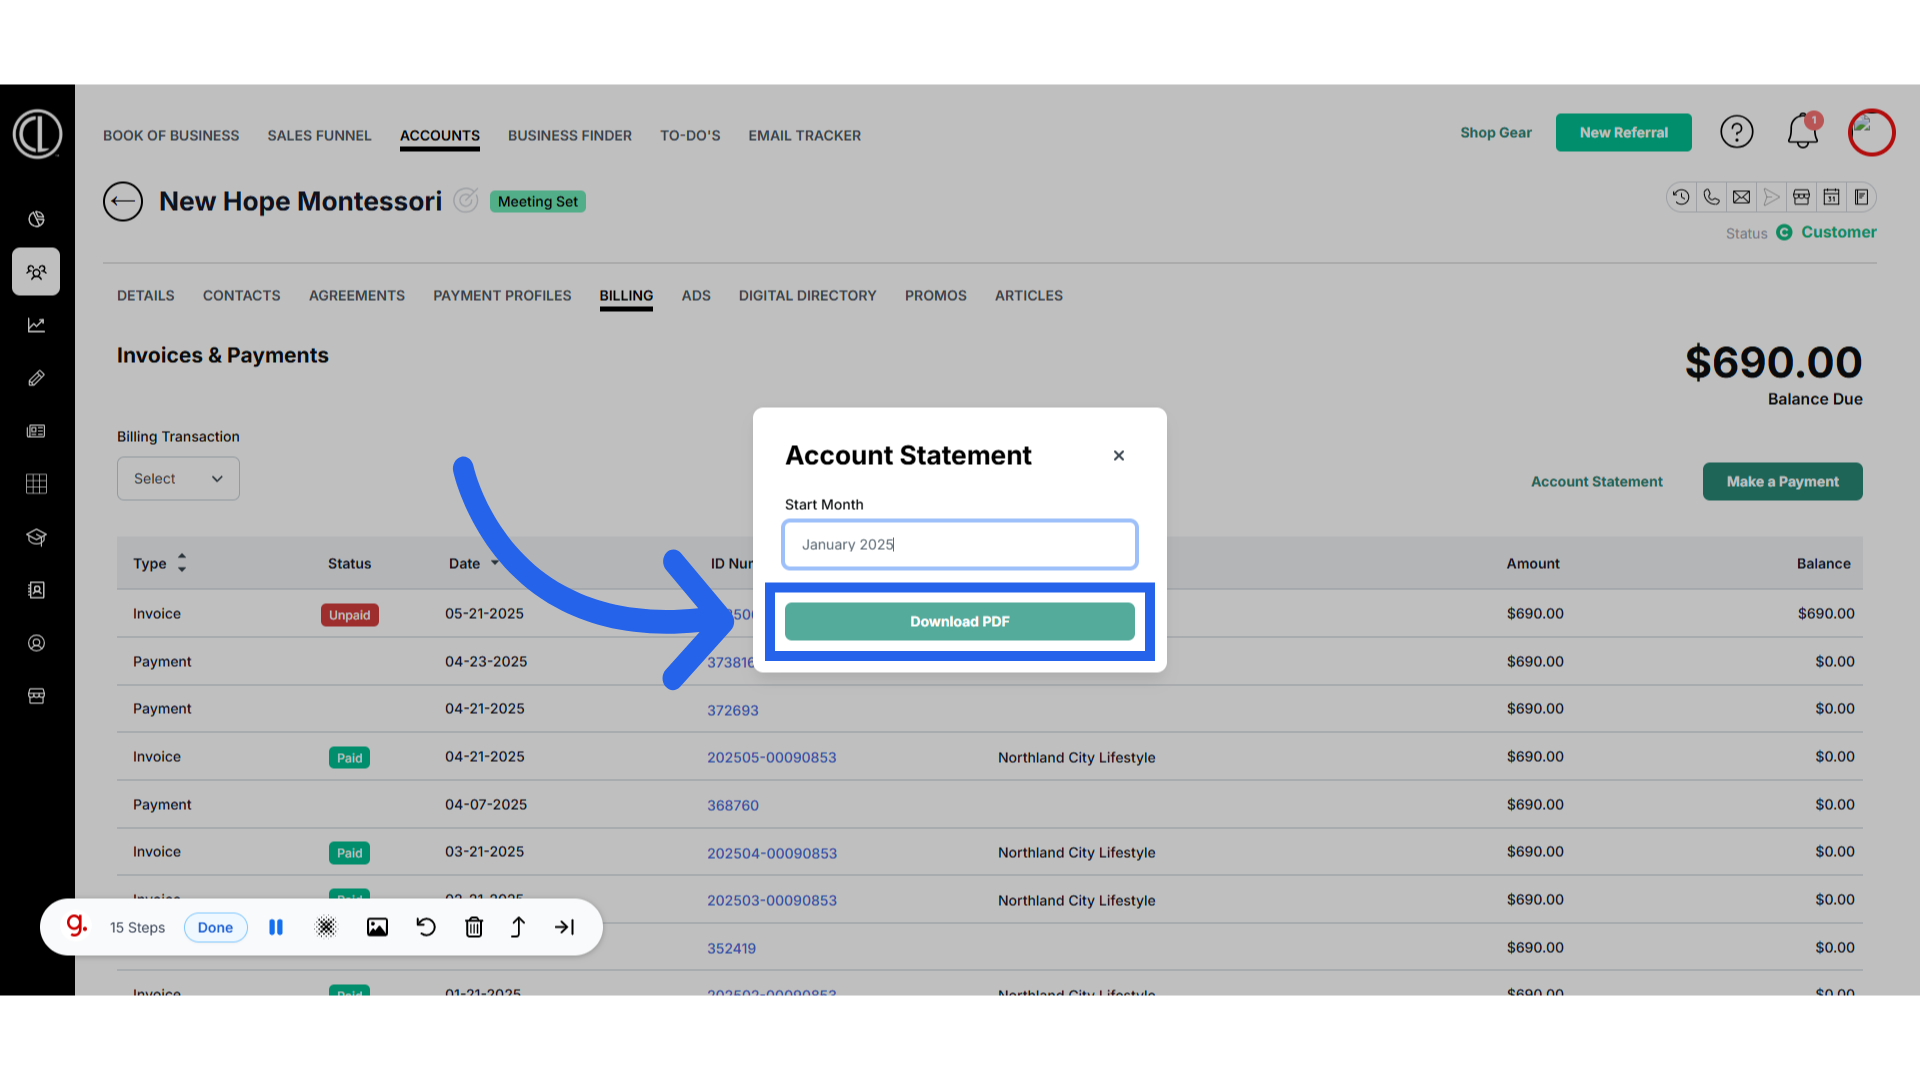
- Click "Download PDF."
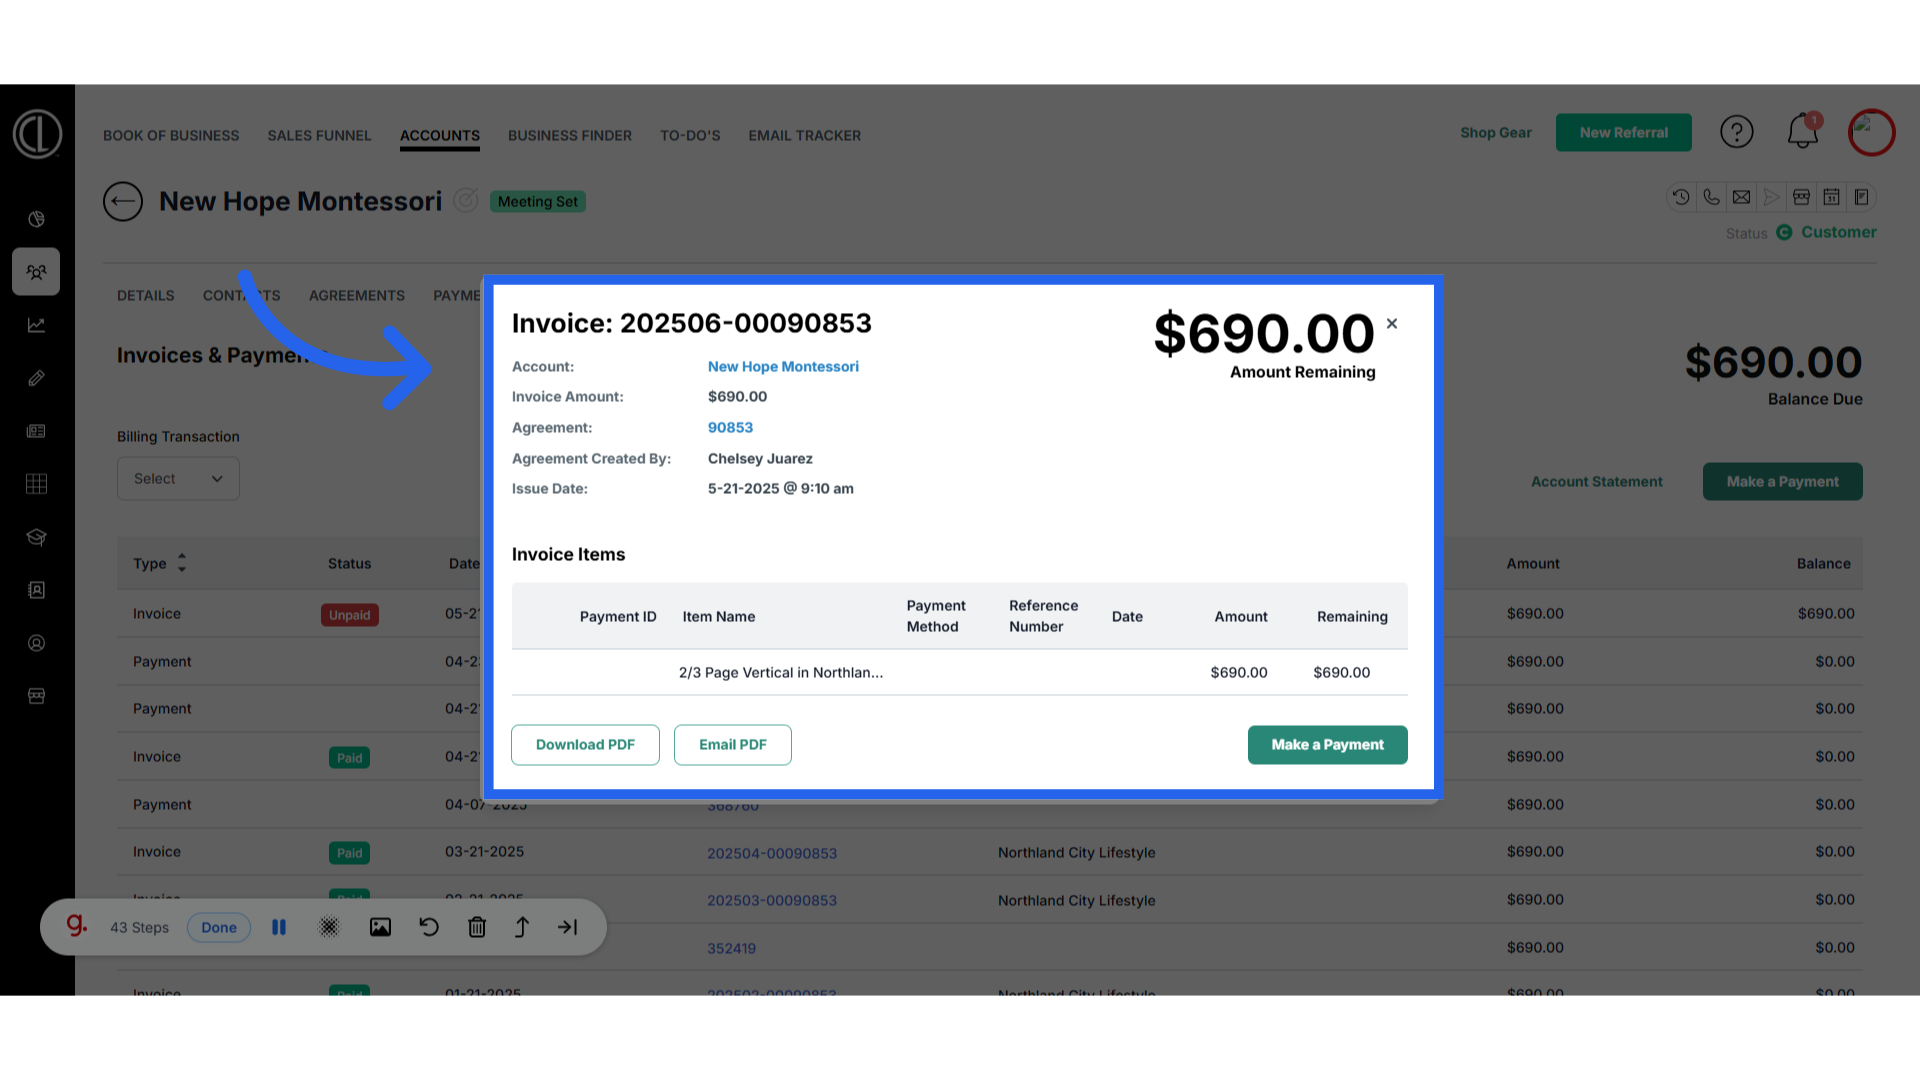
- Access a specific invoice by clicking on the ID number. You will see the invoice details here:
- The account associated
- Invoice amount
- The agreement the invoice is linked to
- The agreement manager
- The invoice date
- Invoice amount
- Payment amount if applicable
- Balance due.
- If the Invoice has been paid, it will show $0.00 under remaining.
- If there is an open balance, you can make a payment from this screen.
- To download a copy of the invoice, use the green Download PDF button on the left-hand side of the page.
- If an invoice is unpaid, the PDF will show the outstanding amount and say, “Payment is due upon receipt.”
- If the invoice has been paid, the PDF will show the payment method and say, “Thank you for your payment.”
- If a client would like an invoice emailed to them again, use the green Email PDF button.
- This button will send an invoice to the Primary and Billing contacts.
- You can make a payment from the main screen in the billing tab located on the right side or by clicking on an open balance invoice.
- In the Pay Towards section, select from the drop-down the open invoice that you are applying the payment towards
- Select a payment method Credit Card/eCheck
- Select from the payment profiles list which card is the form of payment to pay the invoice with.
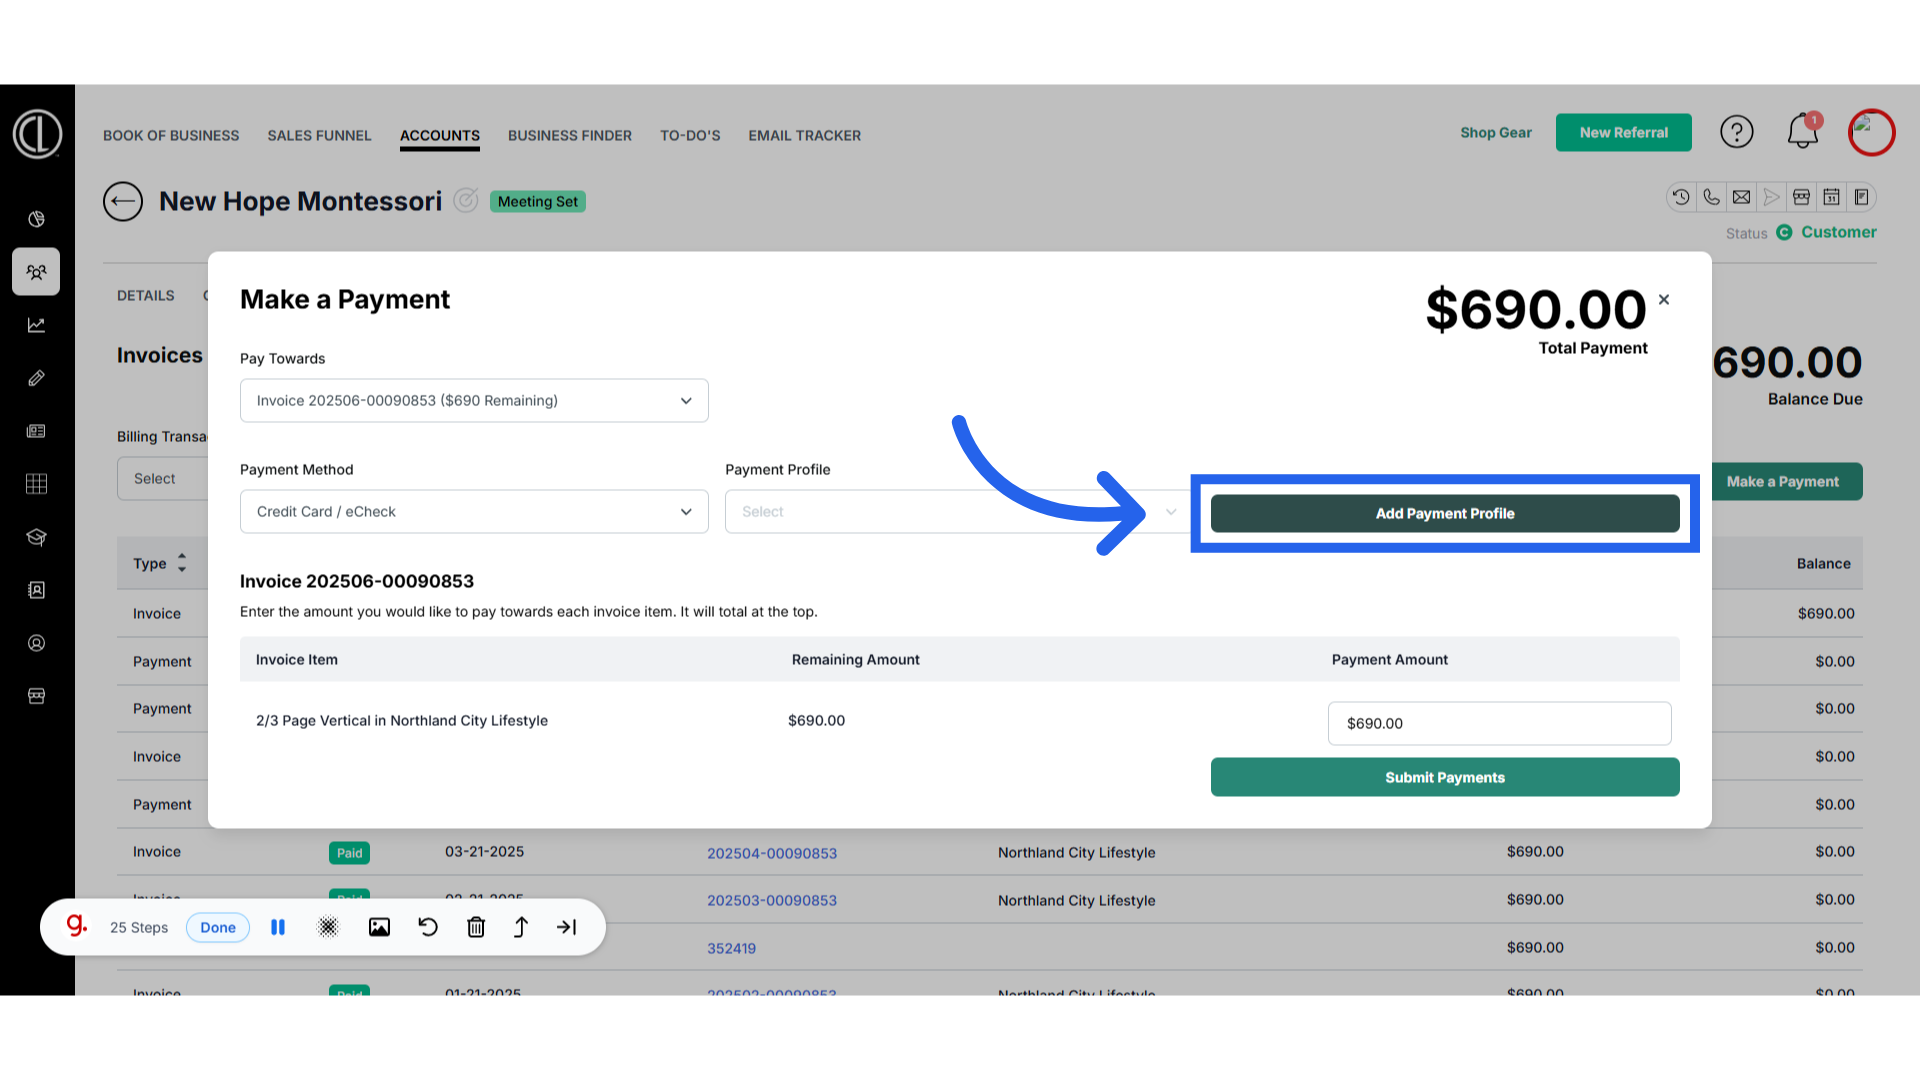
- If there is no payment profile on file, or you need to add a new payment profile, click Add Payment Profile.
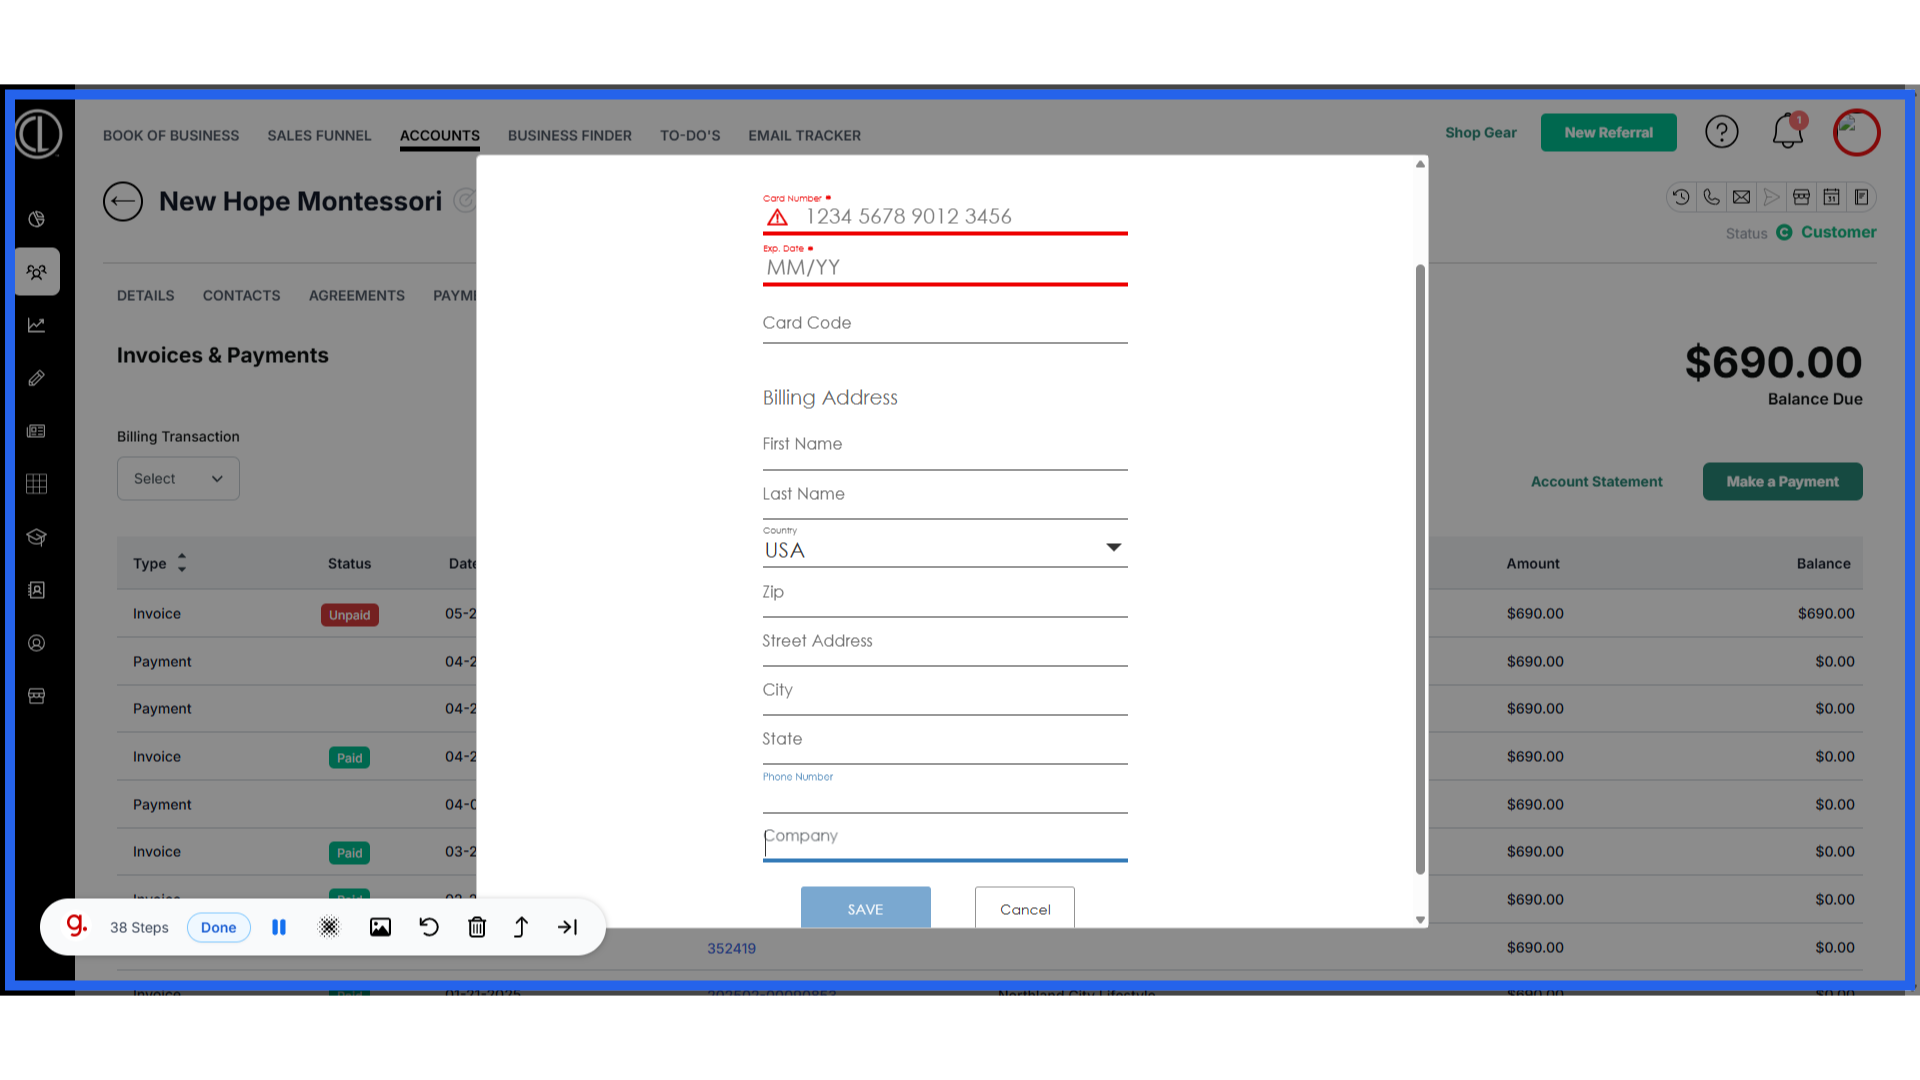
- Enter all of the Card details requested in this section and save the payment profile.
- Enter the payment amount that you want to apply towards the invoice.
- Select Submit Payment to take the payment.
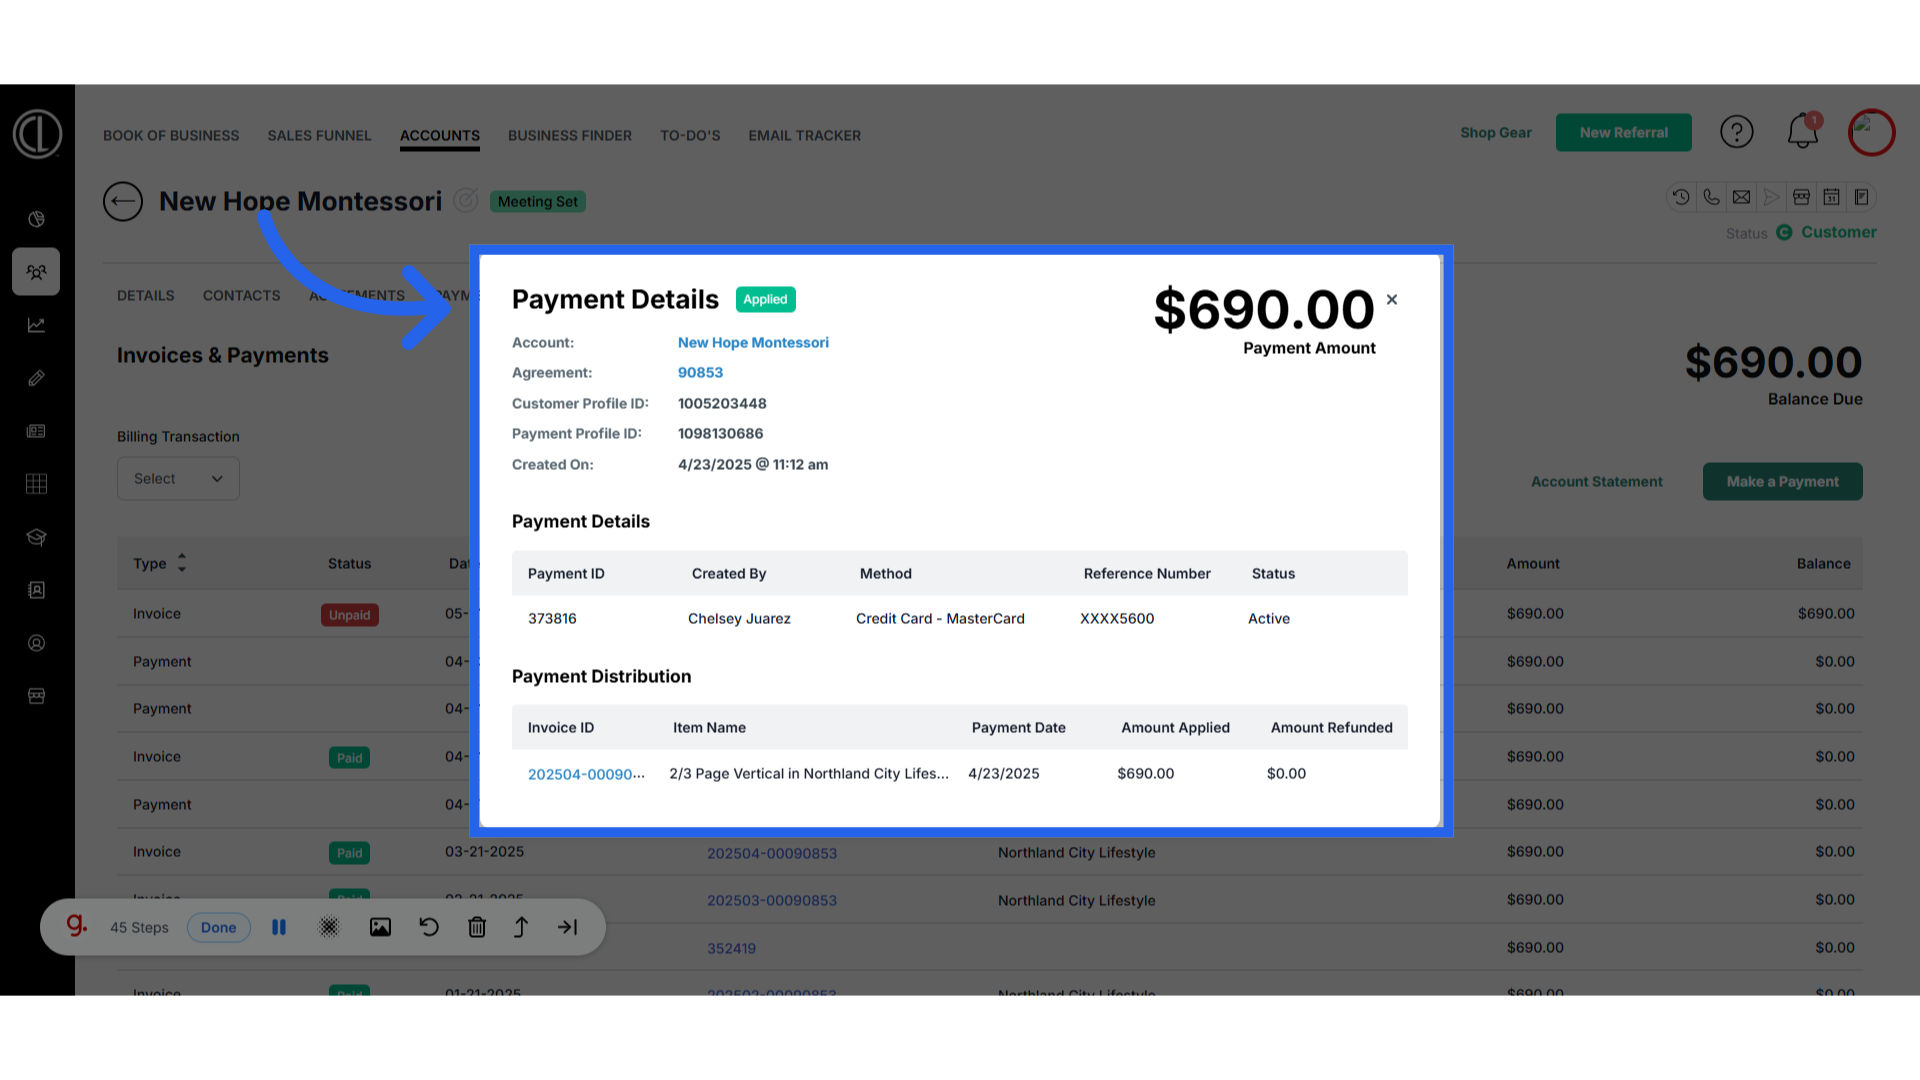
- To review a payment detail, click on the payment ID number in the billing tab’s main screen. Here you will be able to see the following payment details listed:
- Account and agreement number associated with the payment
- Payment ID number
- If there is a name under Created By, the payment was processed manually.
- Payment method and Reference number to the card used
- Link to the invoice that the payment was applied towards
How to Navigate the Billing Tab in an Account
This guide will walk you through efficiently navigating the Billing Tab in ARC, from accessing detailed billing information to initiating payments and managing payment profiles
Go to citylifestylehq.com
1. Billing Tab in an Account
The Billing tab provides a complete view of your account financials. Here, you can review invoices, track payments, manage balances, and download billing records—all in one place.

2. Click "Accounts"
In ARC click on the Accounts tab on the left hand side.
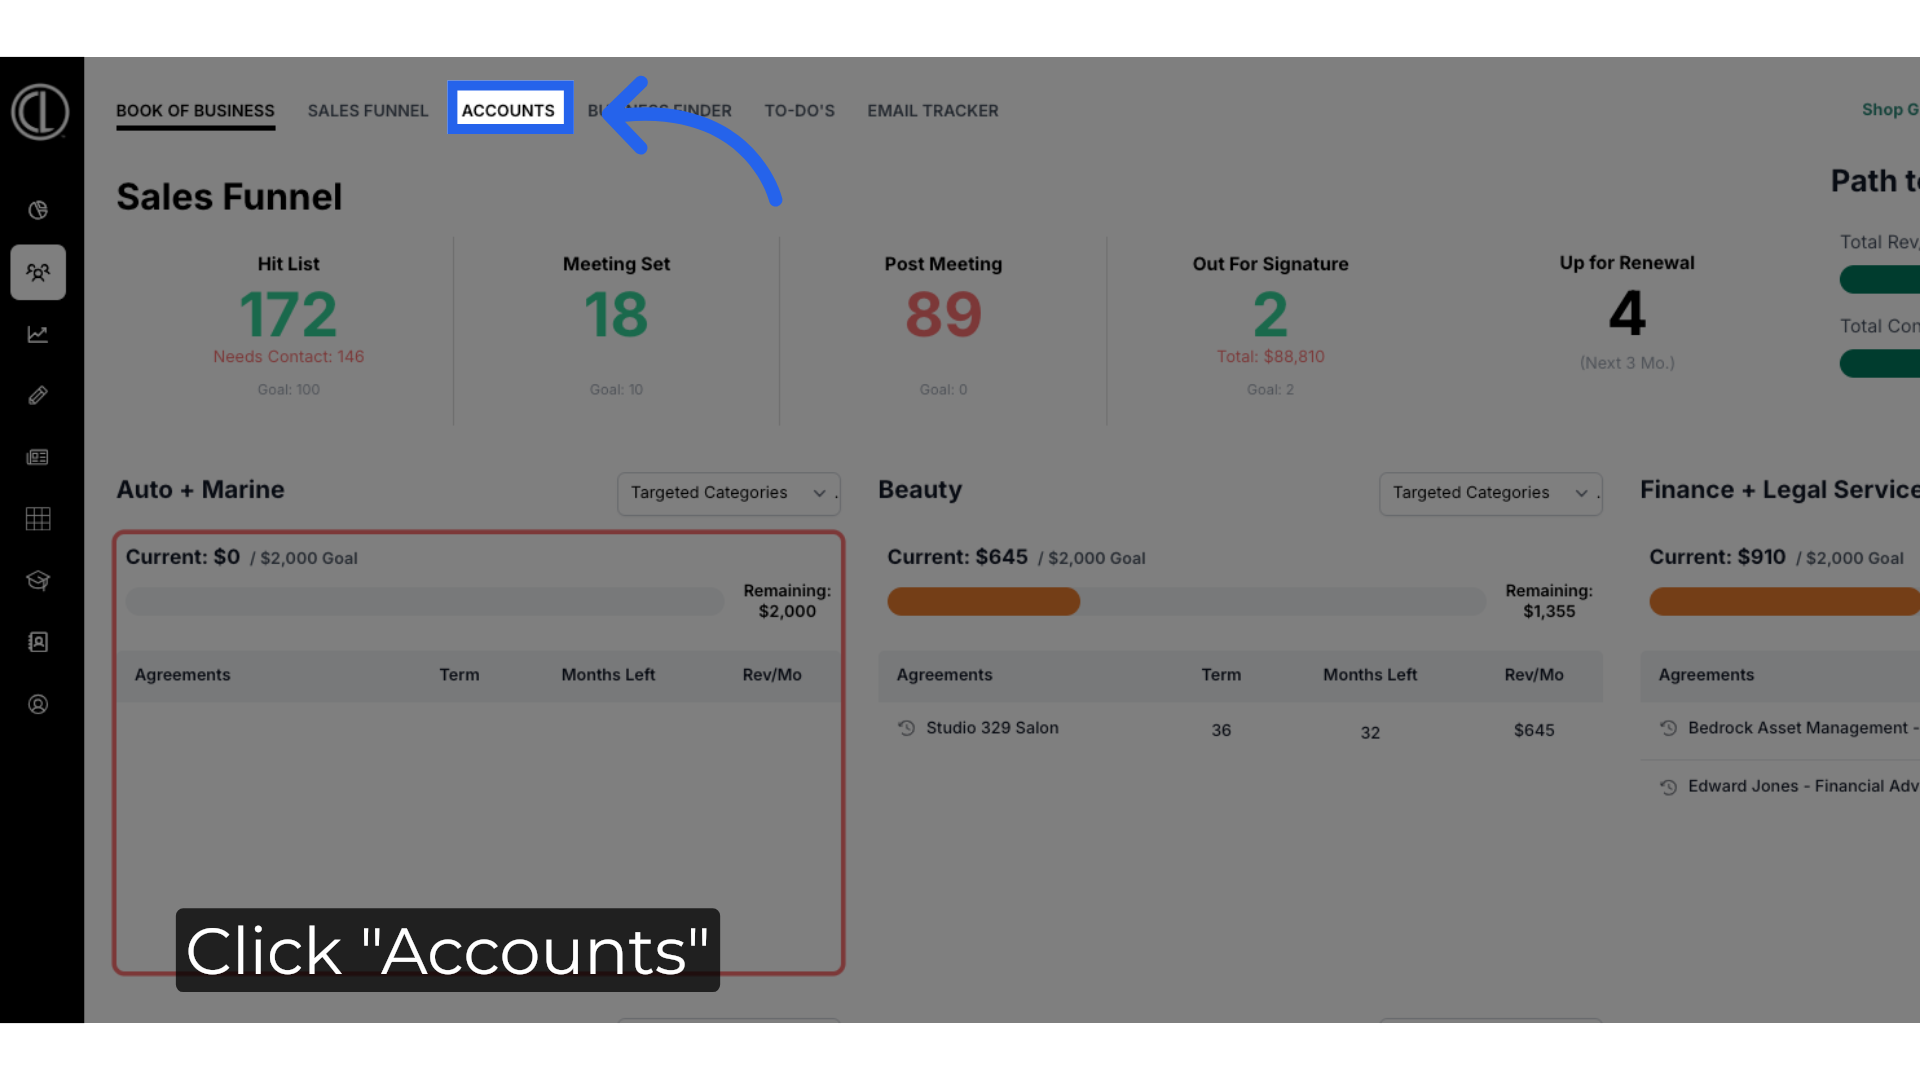
3. Click "Accounts"
Navigate to the "Accounts" section.
4. Click on Account Name
Search for the account using the search field and click on the Account Name to select.
5. Click "Billing"
In the Account click on the Billing section
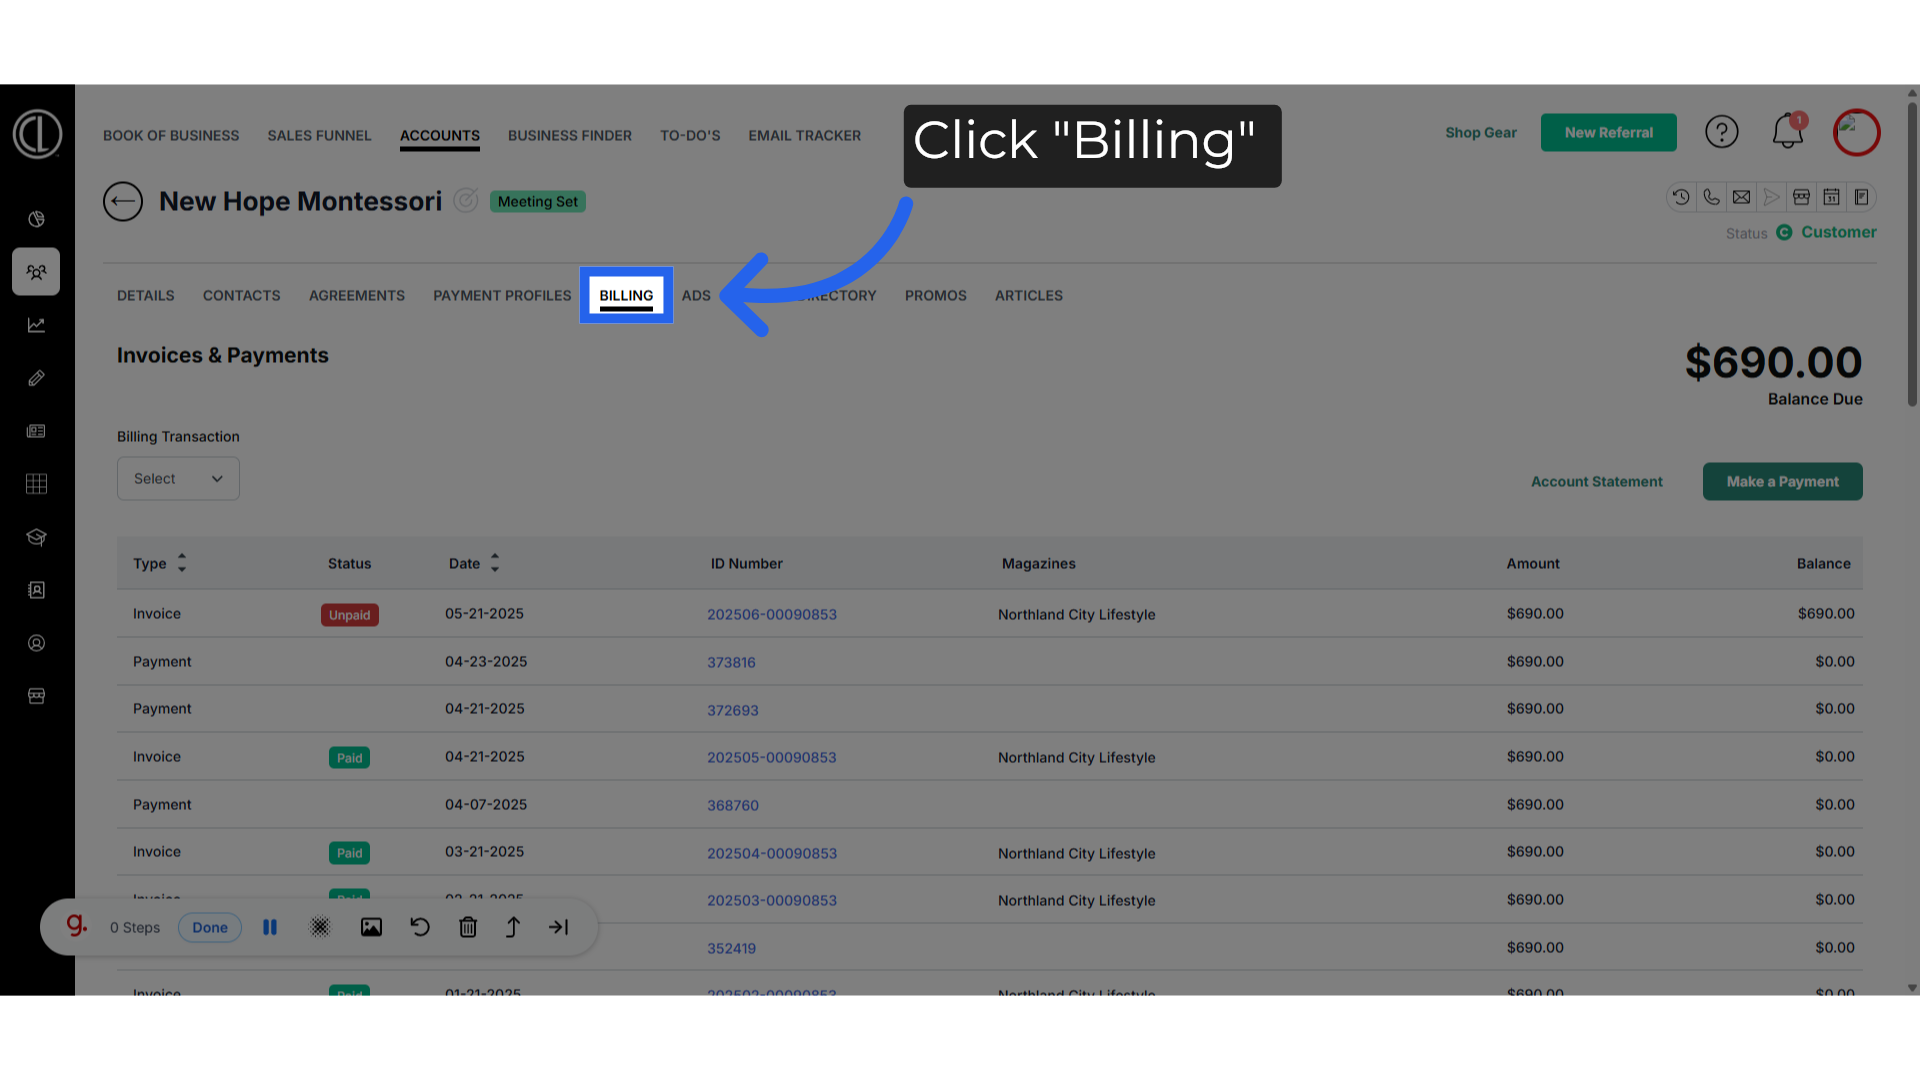
6. Balances Due
If there is an open balance on the account, the amount will appear on the top right of the screen.
7. Filter Results
You can filter your table results by payments, invoices, or refunds when clicking the billing transaction drop down.
8. Transation Type
The first column of the table will show your transaction type. By clicking the arrows next to it you can sort the order by type.
9. Invoice Status
The status column will show you the current status of an invoice. Paid or unpaid
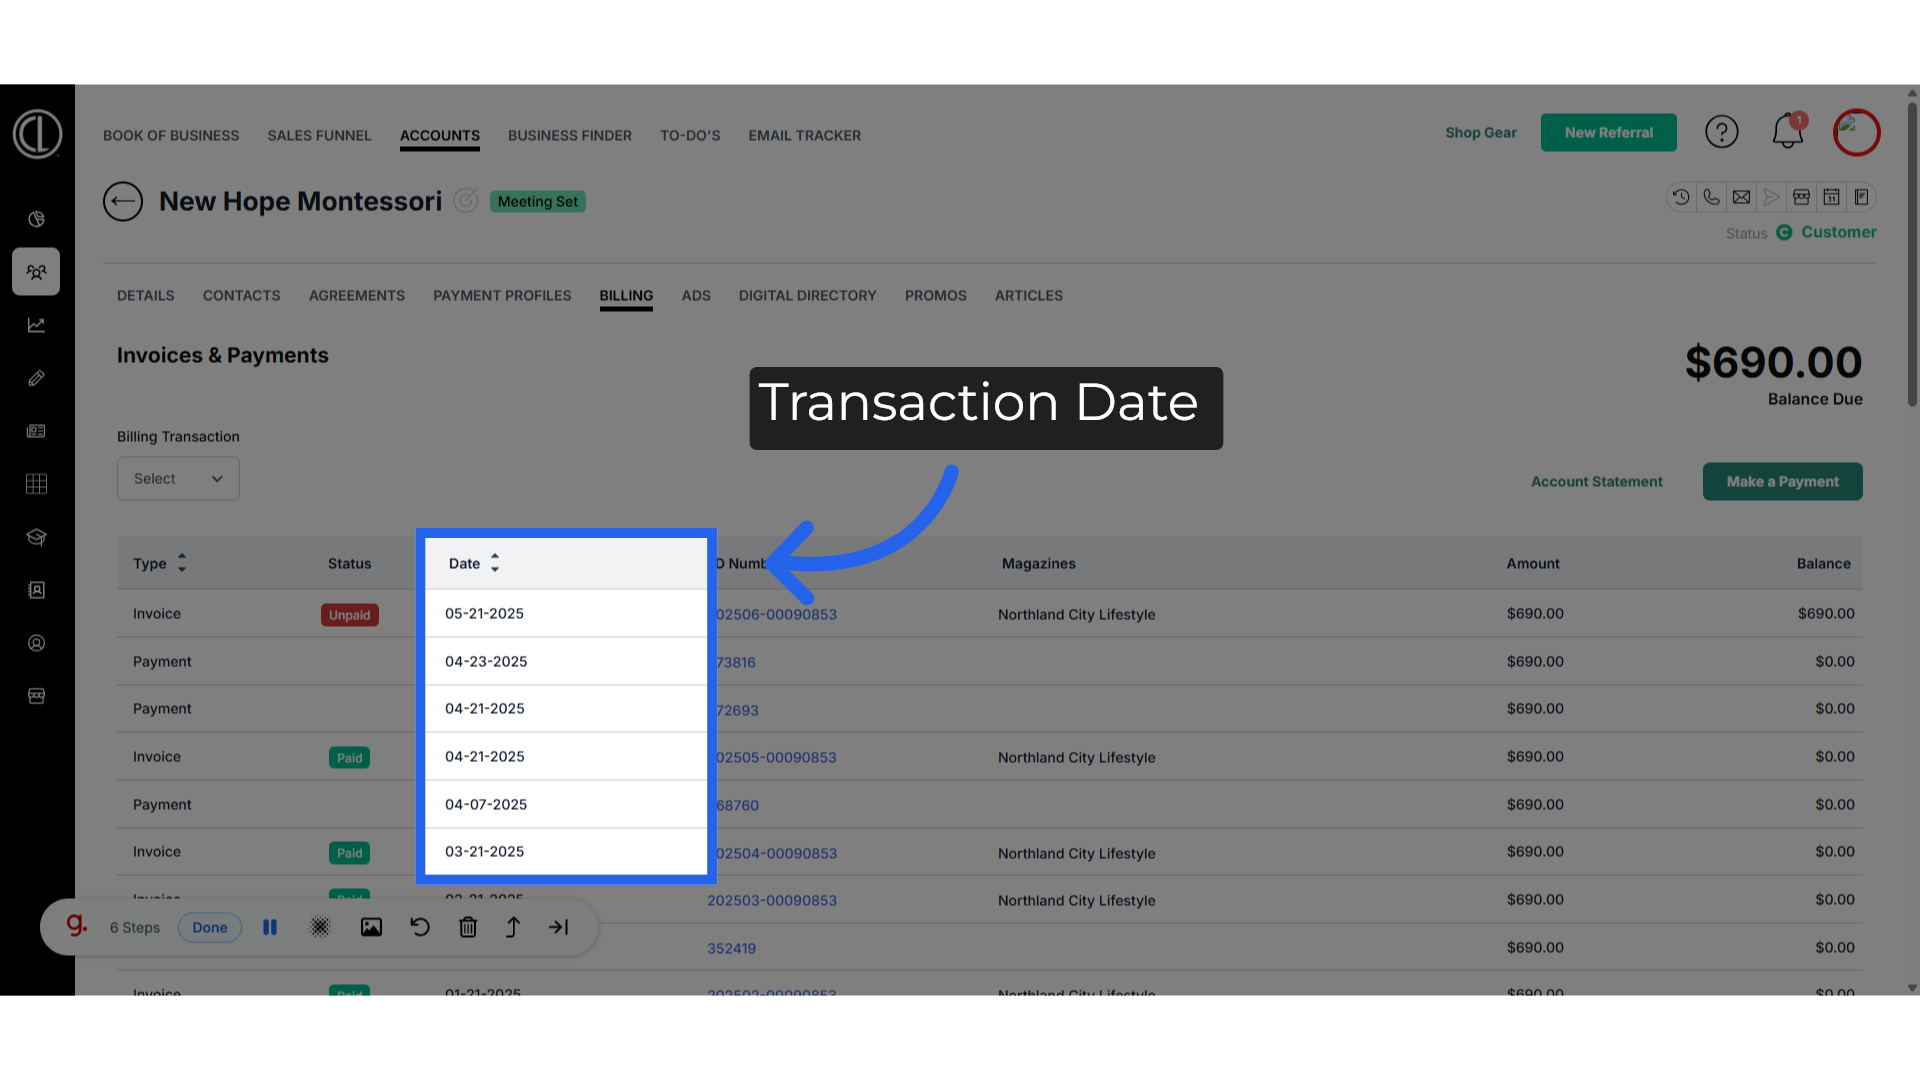
10. Transation Date
The date column will reflect the date the transaction was processed or invoiced. You can use the arrows to filter the table by date
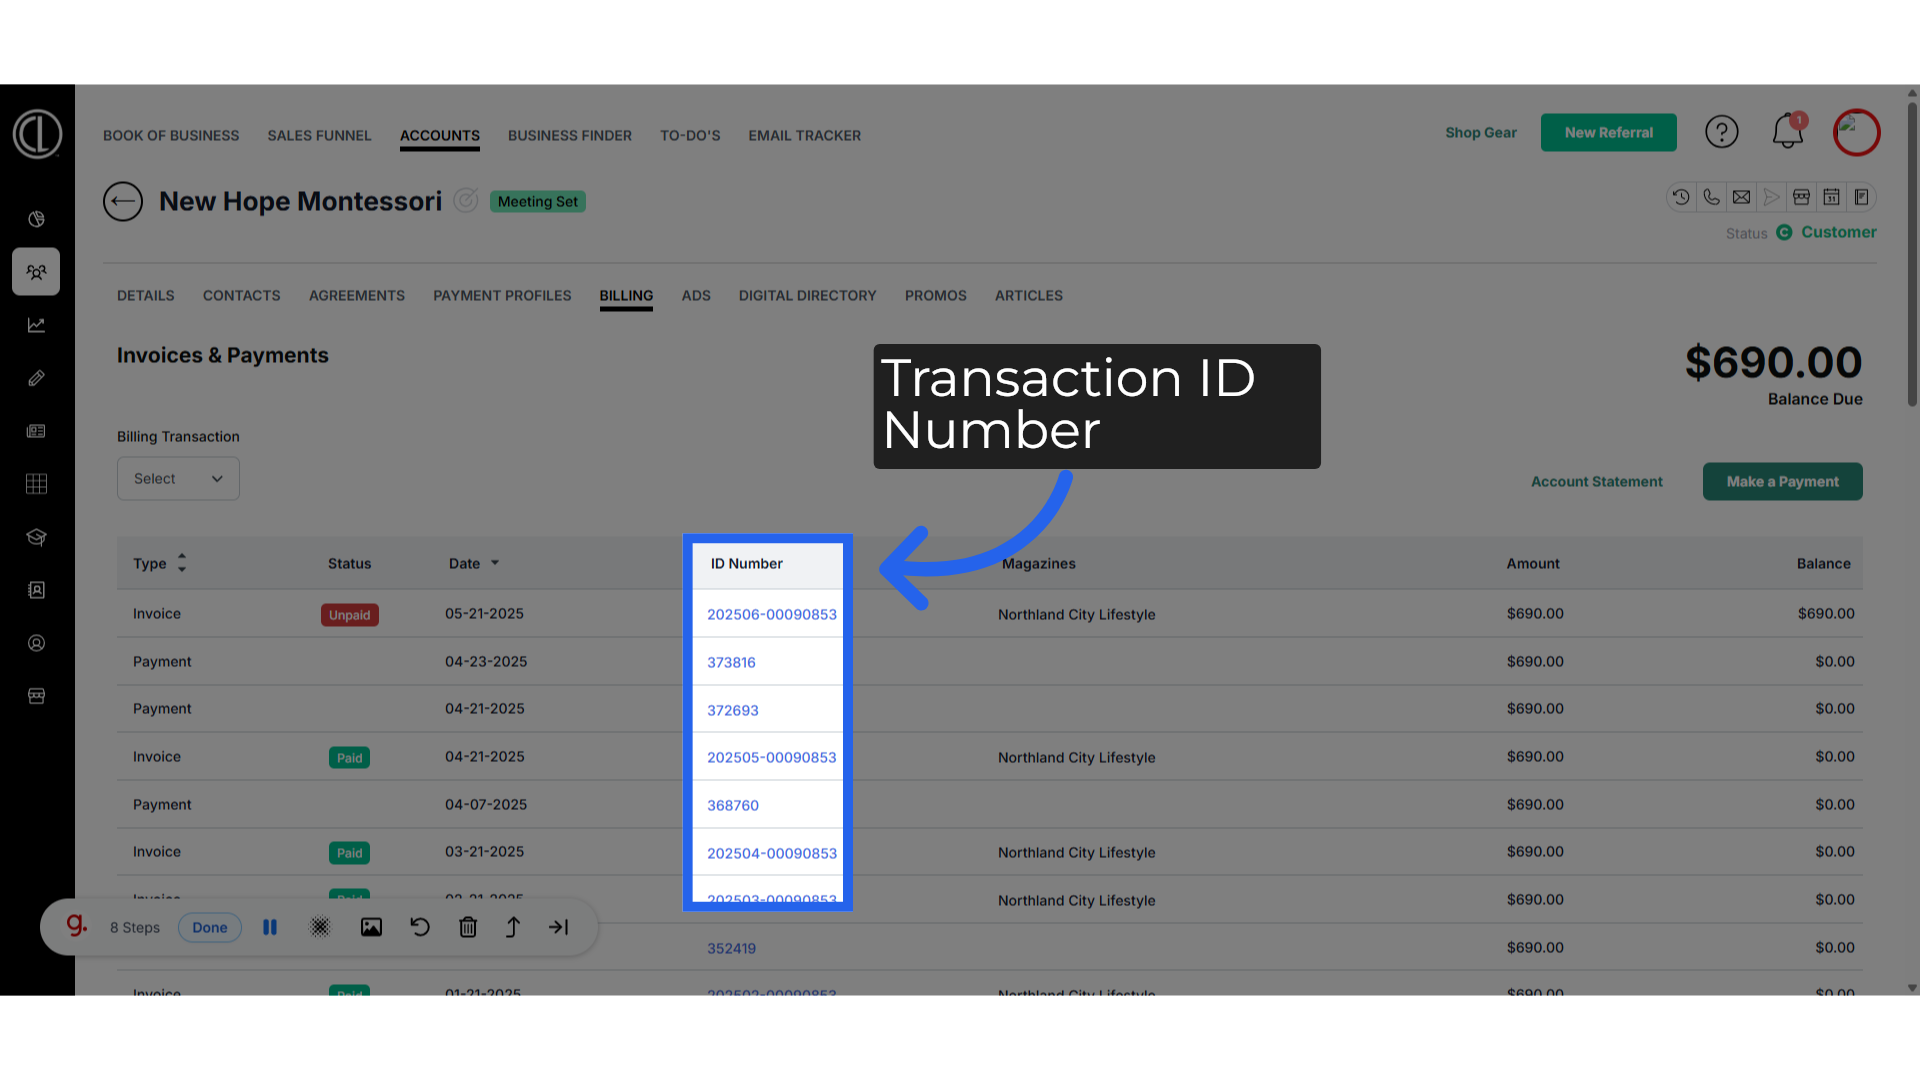
11. Transaction ID Number
The ID number is the payment, refund reference or invoice number associated with the transaction. Invoice numbers are a combination of the year and month the invoice is associated with and the agreement number preceded by zeros to make it 8 digits long.
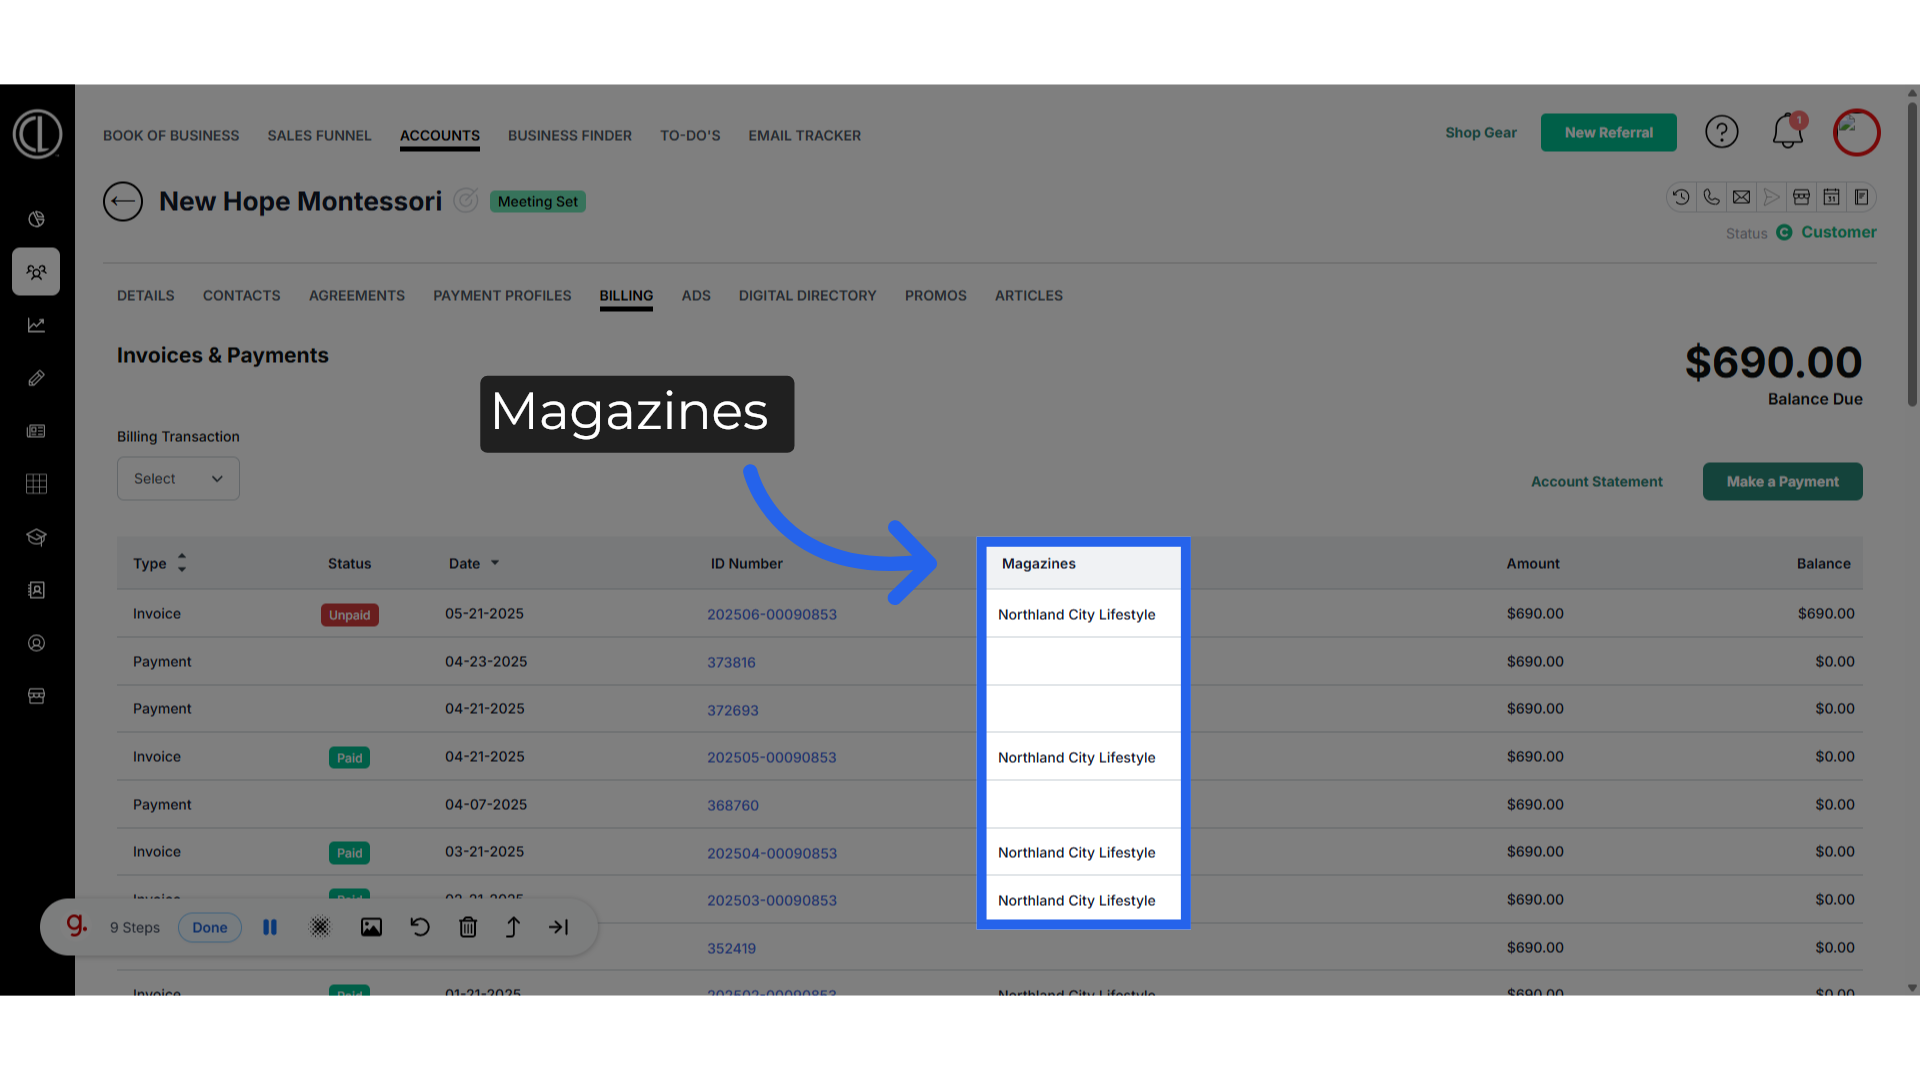
12. Magazines
The publication name listed under the Magazines column is the publication that the transaction applied to.
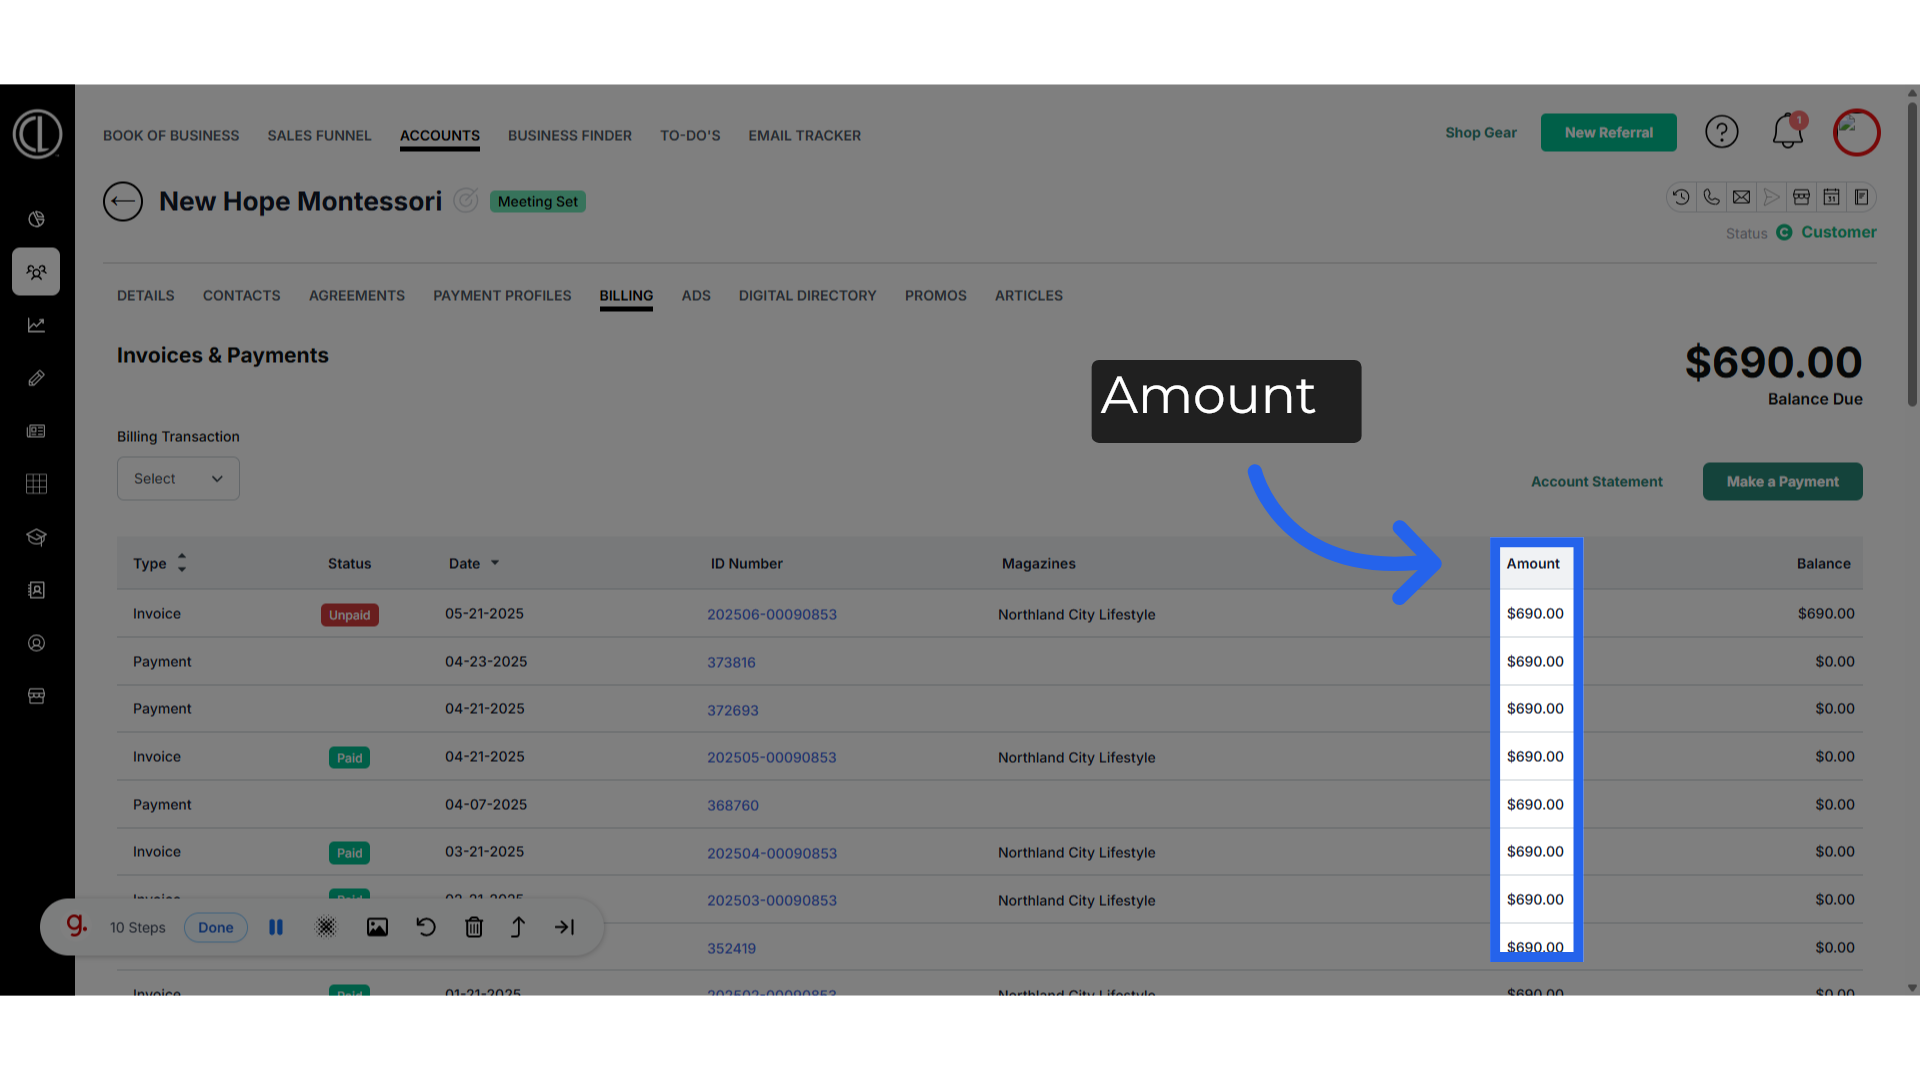
13. Amount
The amount column shows how much the invoice or payment is for.
14. Balance
The balance column will reflect the amount currently not paid on an invoice
15. Click "Account Statement"
Click "Account Statement" to generate a PDF with a complete summary of invoices, payments, and account details you can share with the client.
16. Click "Select a Date"
Choose a specific date range you want the account statement to pull details for.
17. Click "Download PDF"
Download the invoice as a PDF
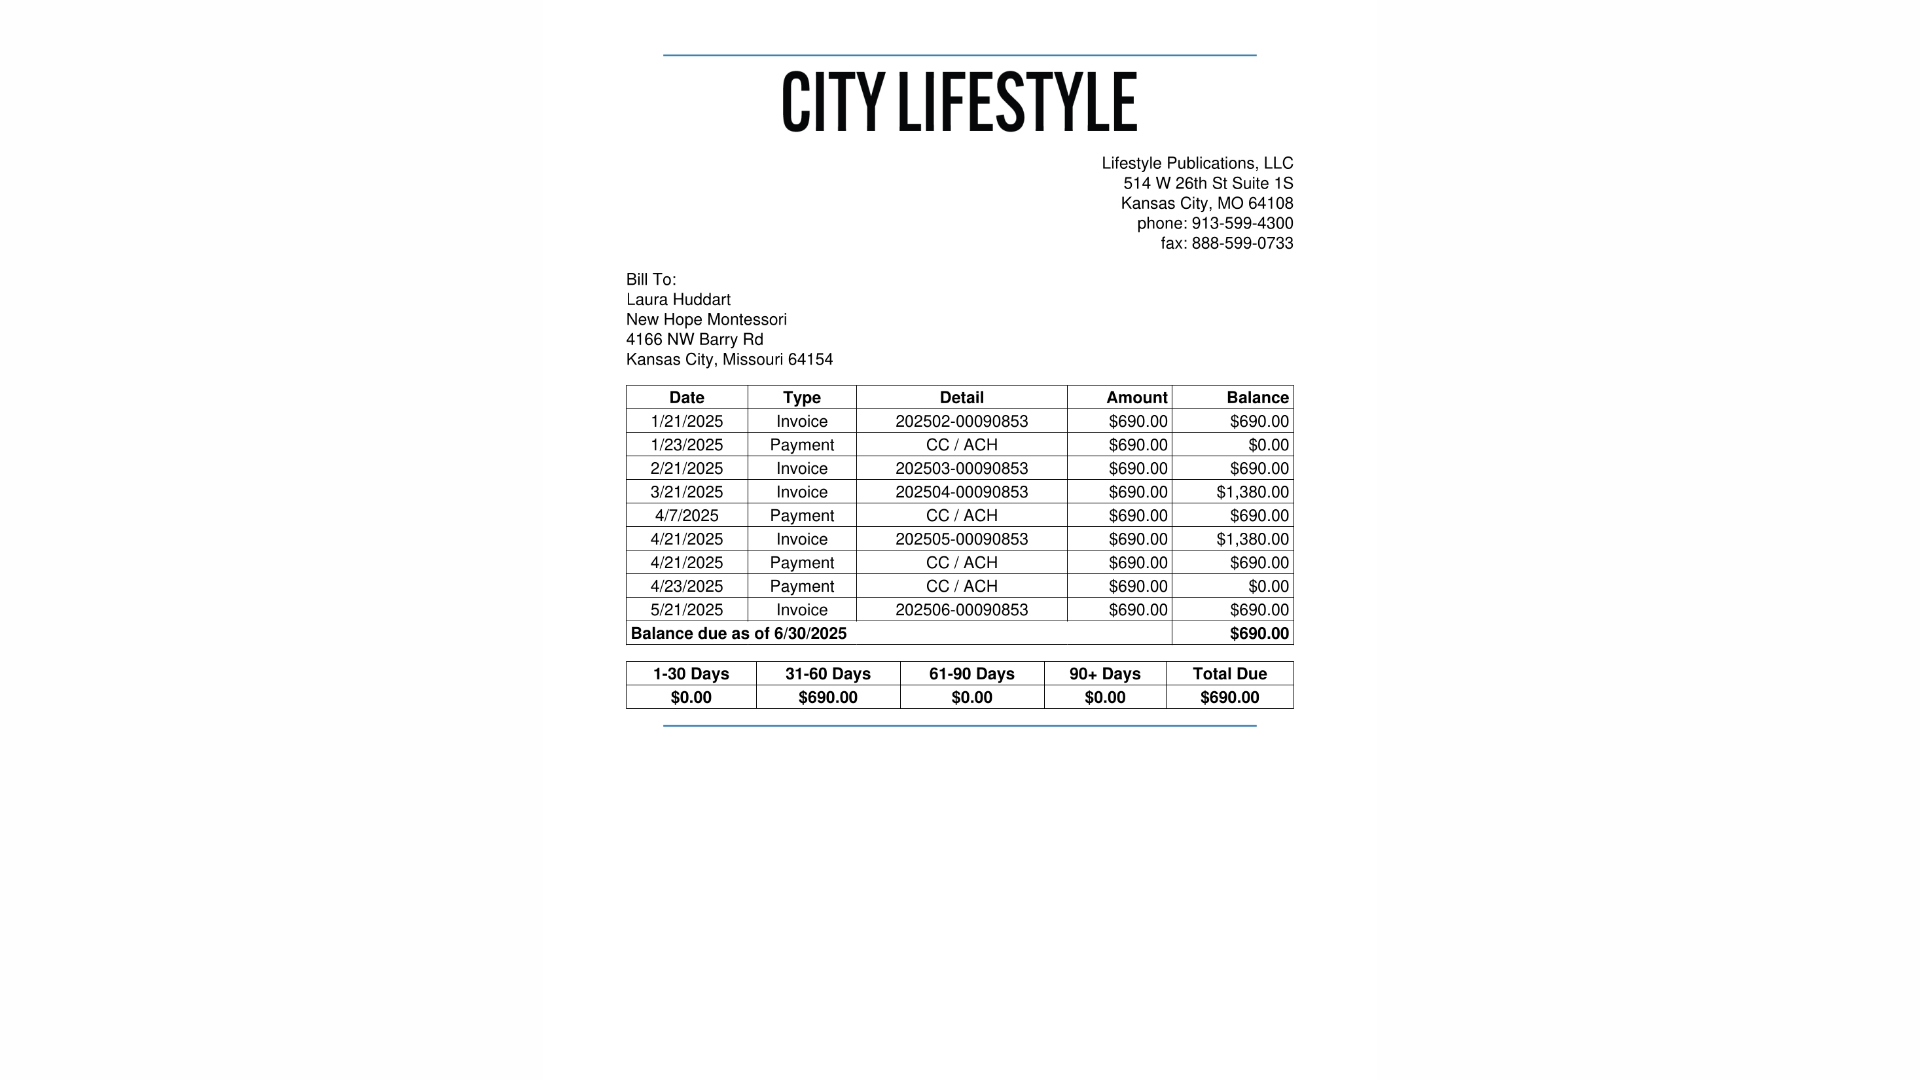
18. Account Statement PDF
Here is an example of the account statement PDF.
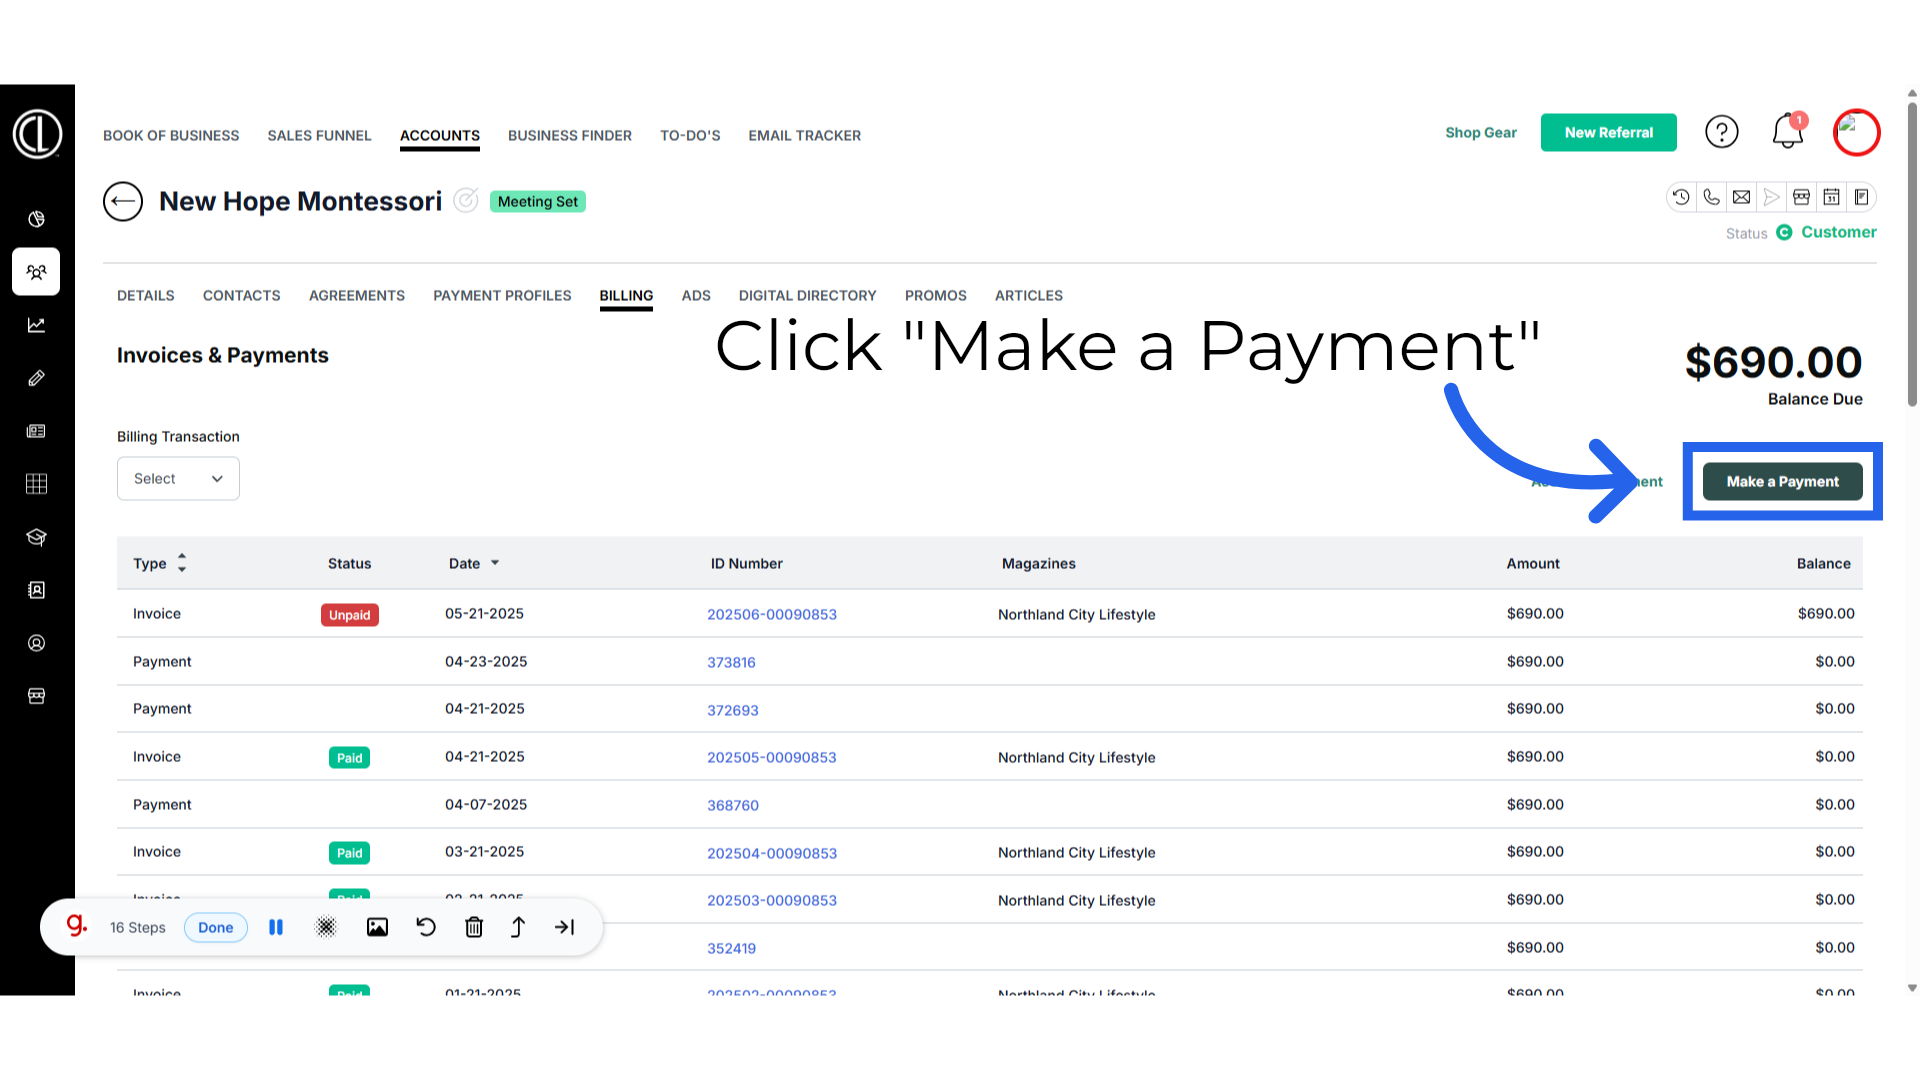
19. Click "Make a Payment"
Back in the billing tab, click on make a payment on located on the top right of the screen for one of the ways you can take a payment.
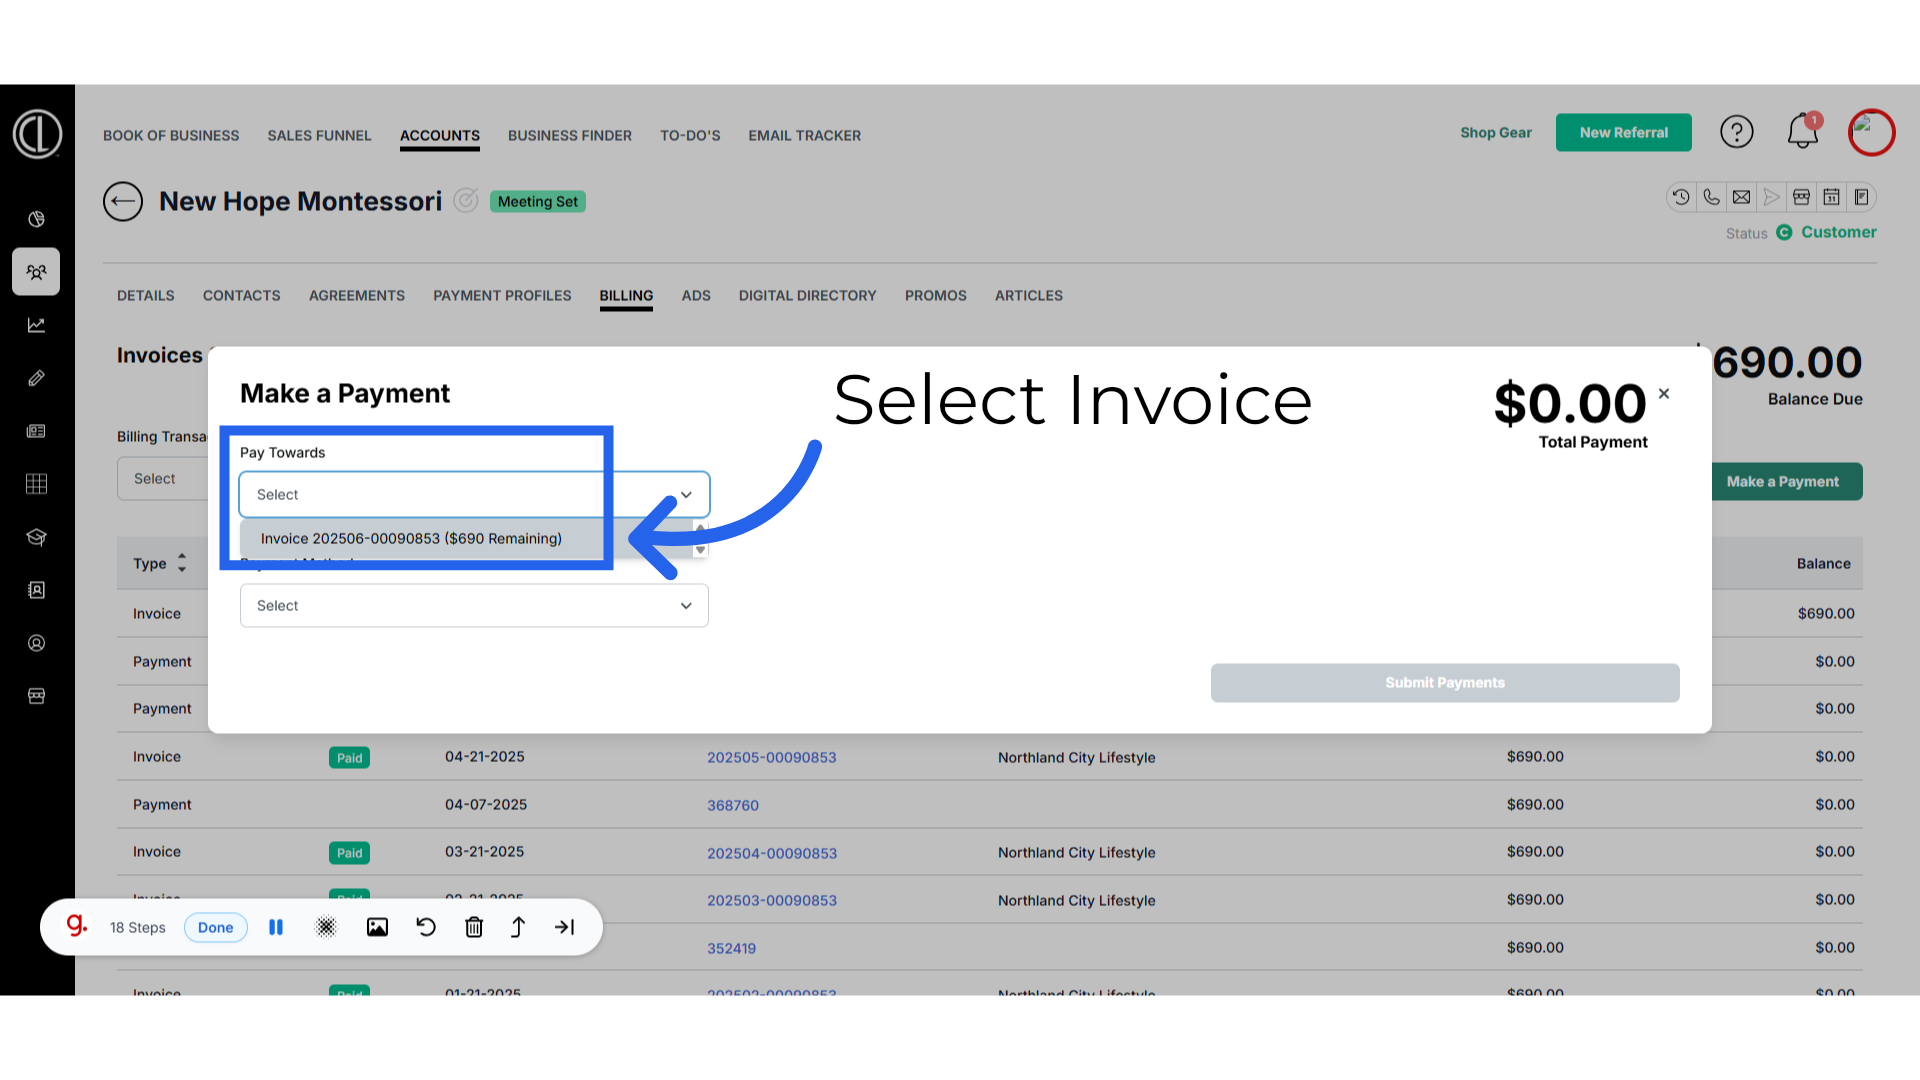
20. Pay Towards
In the Pay towards section, select from the drop down the open invoice that you are applying the payment towards
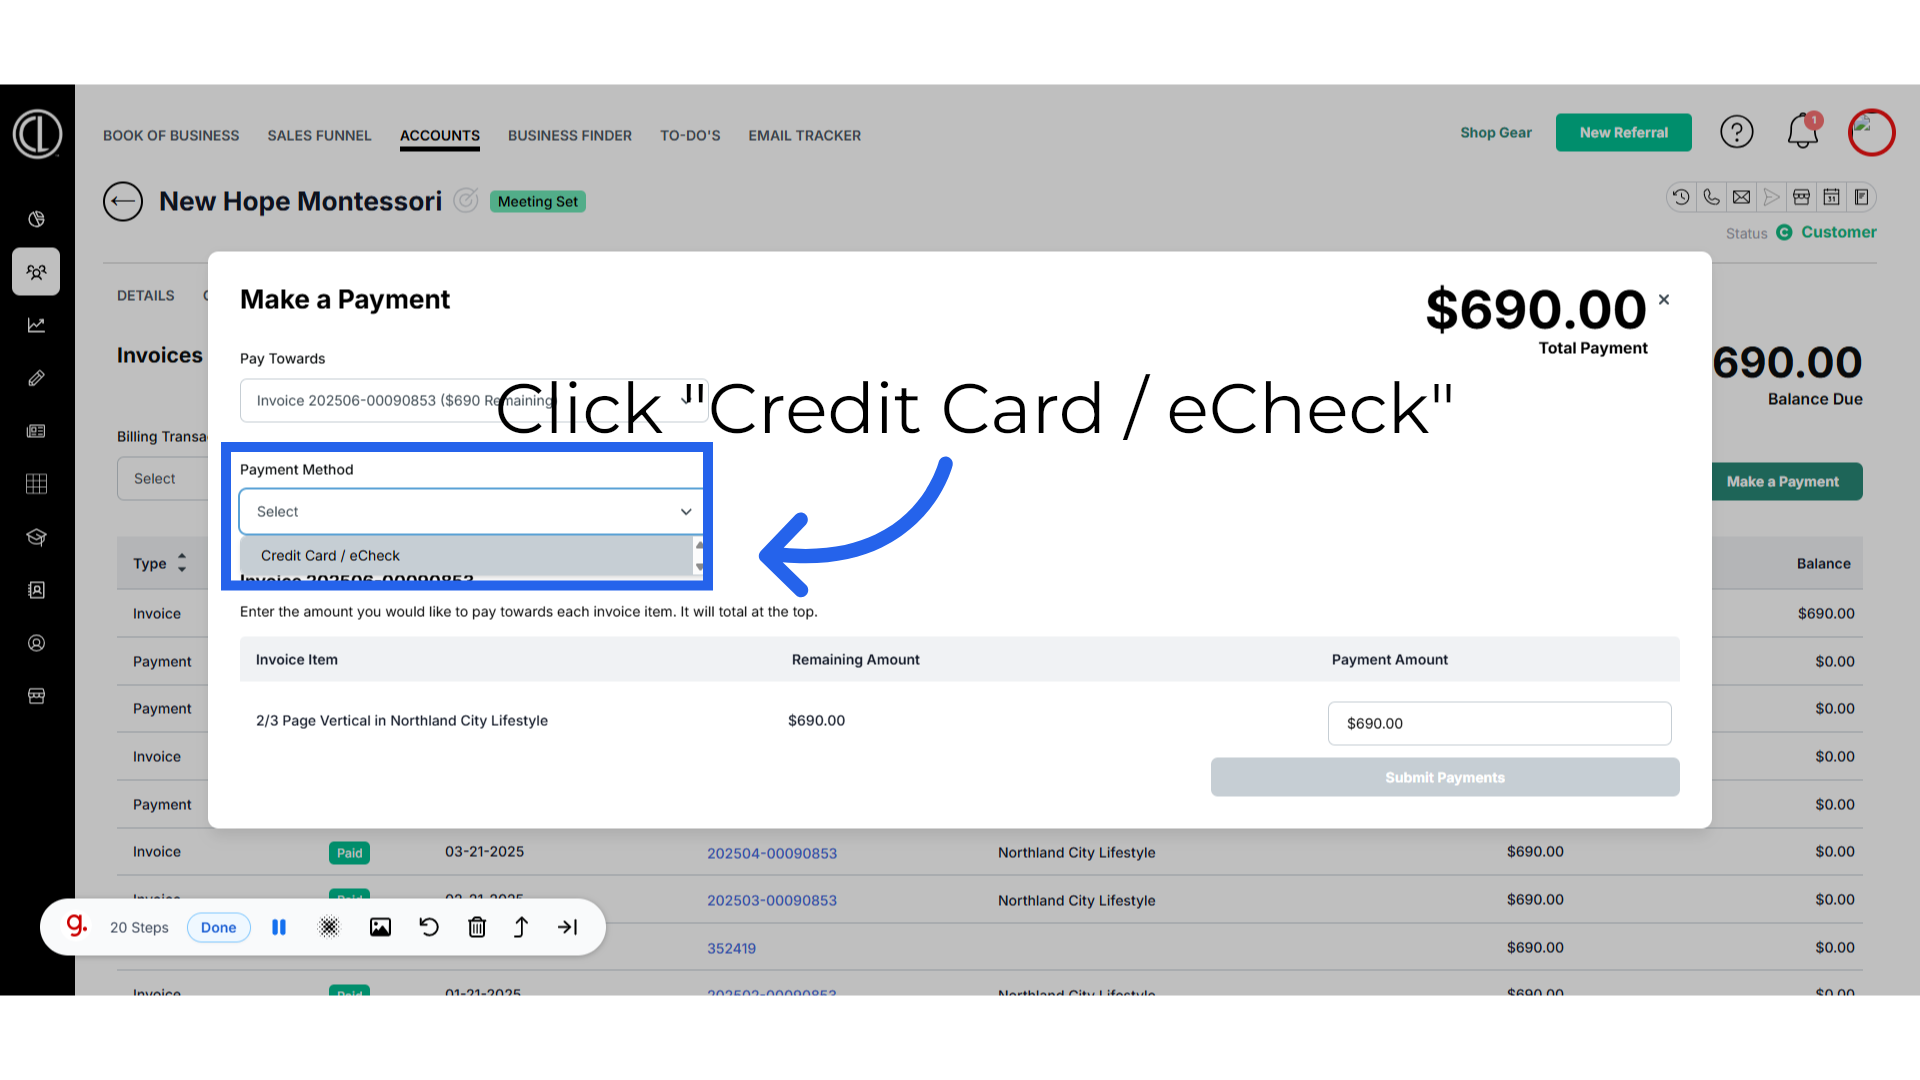
21. Click "Credit Card / eCheck"
Select payment method Credit Card/eChec
22. Payment Profile
Select from the payment profiles list which card is the form of payment to pay the invoice with.

23. Add Payment Profile
If there is not a payment profile on file, or you need to add a new payment profile click add payment profile.
24. Enter Card Details
Enter all of the Card details requested in this section and Save the payment profile.
25. Payment Amount
Enter the payment amount that you want to apply towards the invoice.
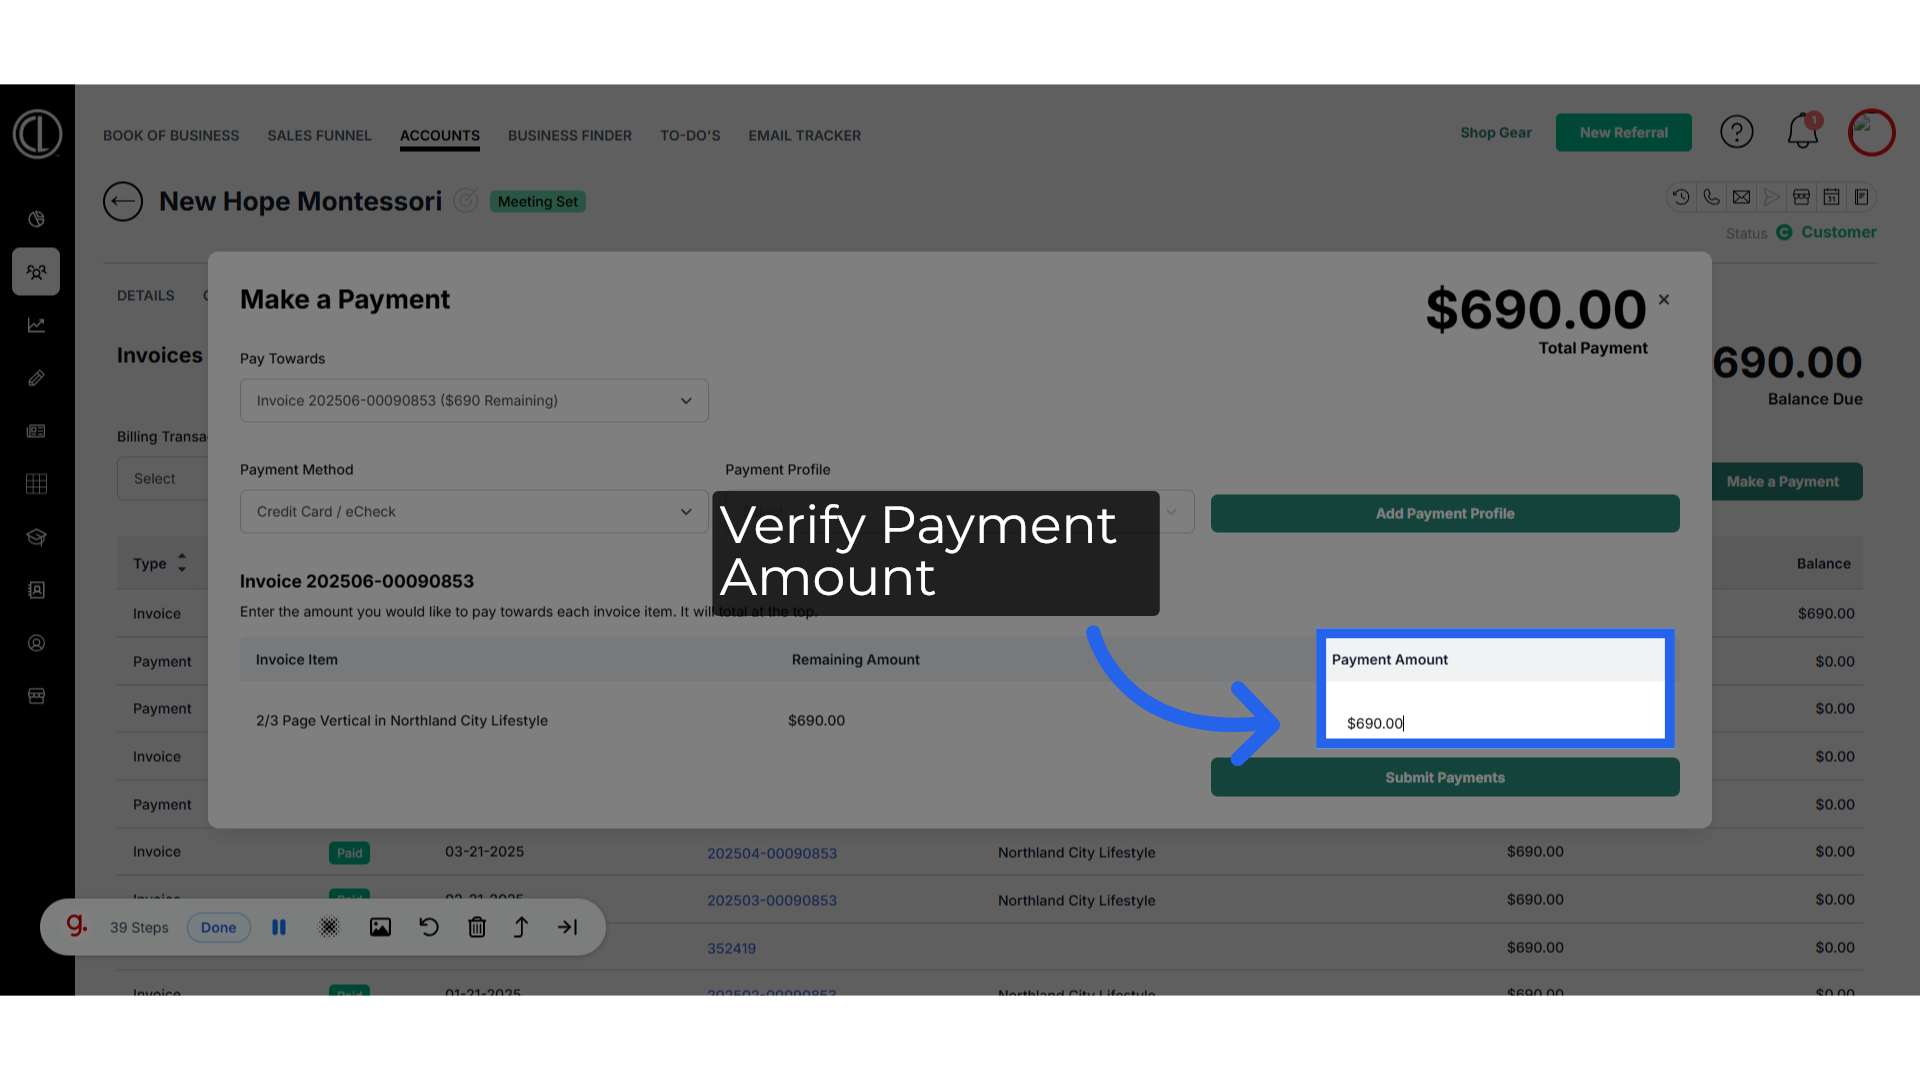
26. Submit Payment
Select Submit Payment to take the payment.

27. Click the Invoice ID number
Access a specific invoice by clicking on the ID number.
28. Invoice Details
You will see the invoice details here. The account associated, Invoice amount, the agreement the invoice is linked to, the agreement manager, the invoice date. Invoice amount, payment amount if applicable, and balance due. You can download a pdf of the invoice or email the client directly. You will be able to make a payment from this screen as well.
29. Payment ID number
To review a payment detail click on the payment ID number.
30. Payment Details
Here you will be able to see the payment details listed.
This guide covered accessing detailed billing information, selecting payment options, adding a payment profile, entering payment details, and managing invoices efficiently in the Citylifestylehq application. Master the Billing Tab in ARC with ease following these step-by-step instructions.