How to Upload a Print Ready Ad for a Client
While it’s not ideal and best practice is for the client to upload their ad directly through the customer portal, there are instances where the publisher may need to step in. As a last resort, the publisher may upload the ad to ensure it is submitted and approved before the deadline, avoiding delays in production. However, this should only be done in exceptional cases, as having the client upload the ad themselves ensures they have full control over the submission and approval process.
- In ARC, navigate to the Reporting page on the left hand side.
- Select Ads List report from the drop down menu.
- Select the correct month at the top of the page that you are working on.
- Click Display
- Find the account from the client list you are wanting to place the Ad for.
- To the right under the “Status” column, click Submit Ad for that account.
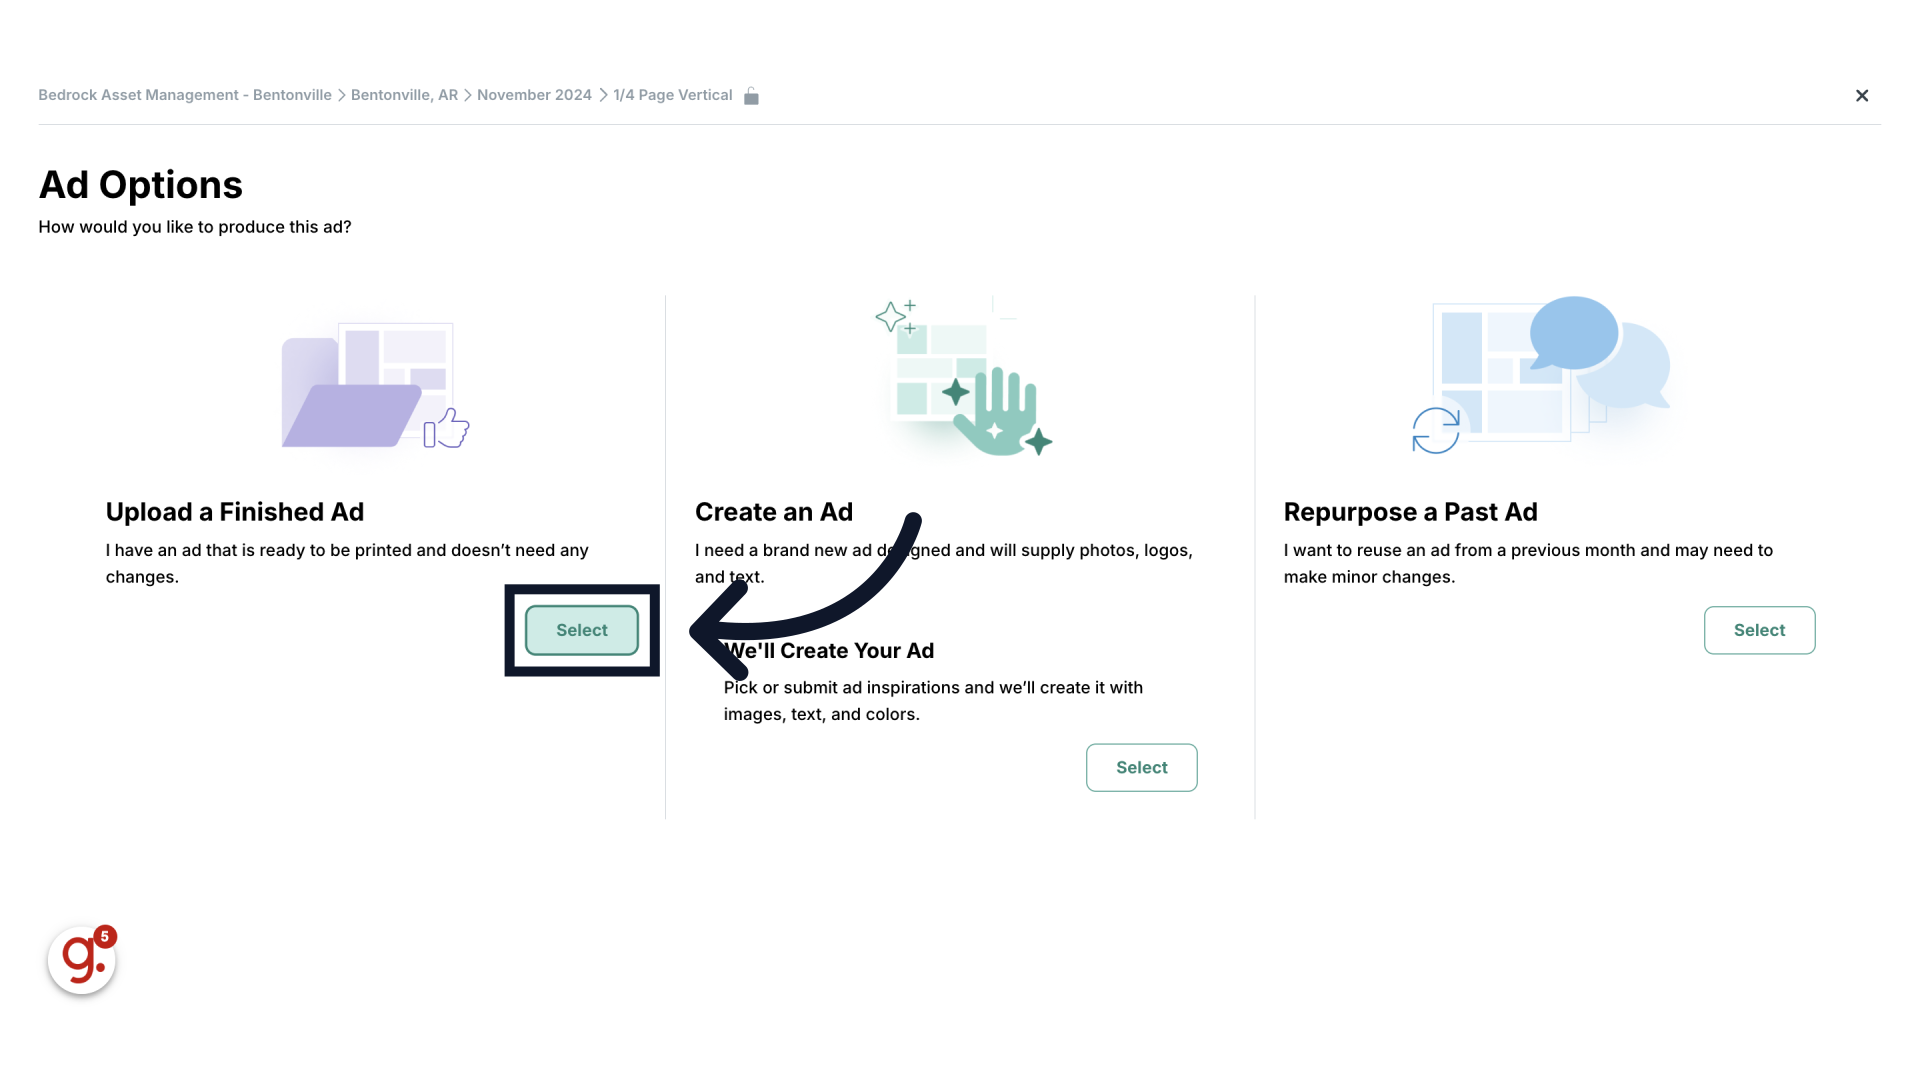
- In the screen that populates, select “Upload a Finished Ad”
- Select the purple ad option “Upload a Finish Ad”
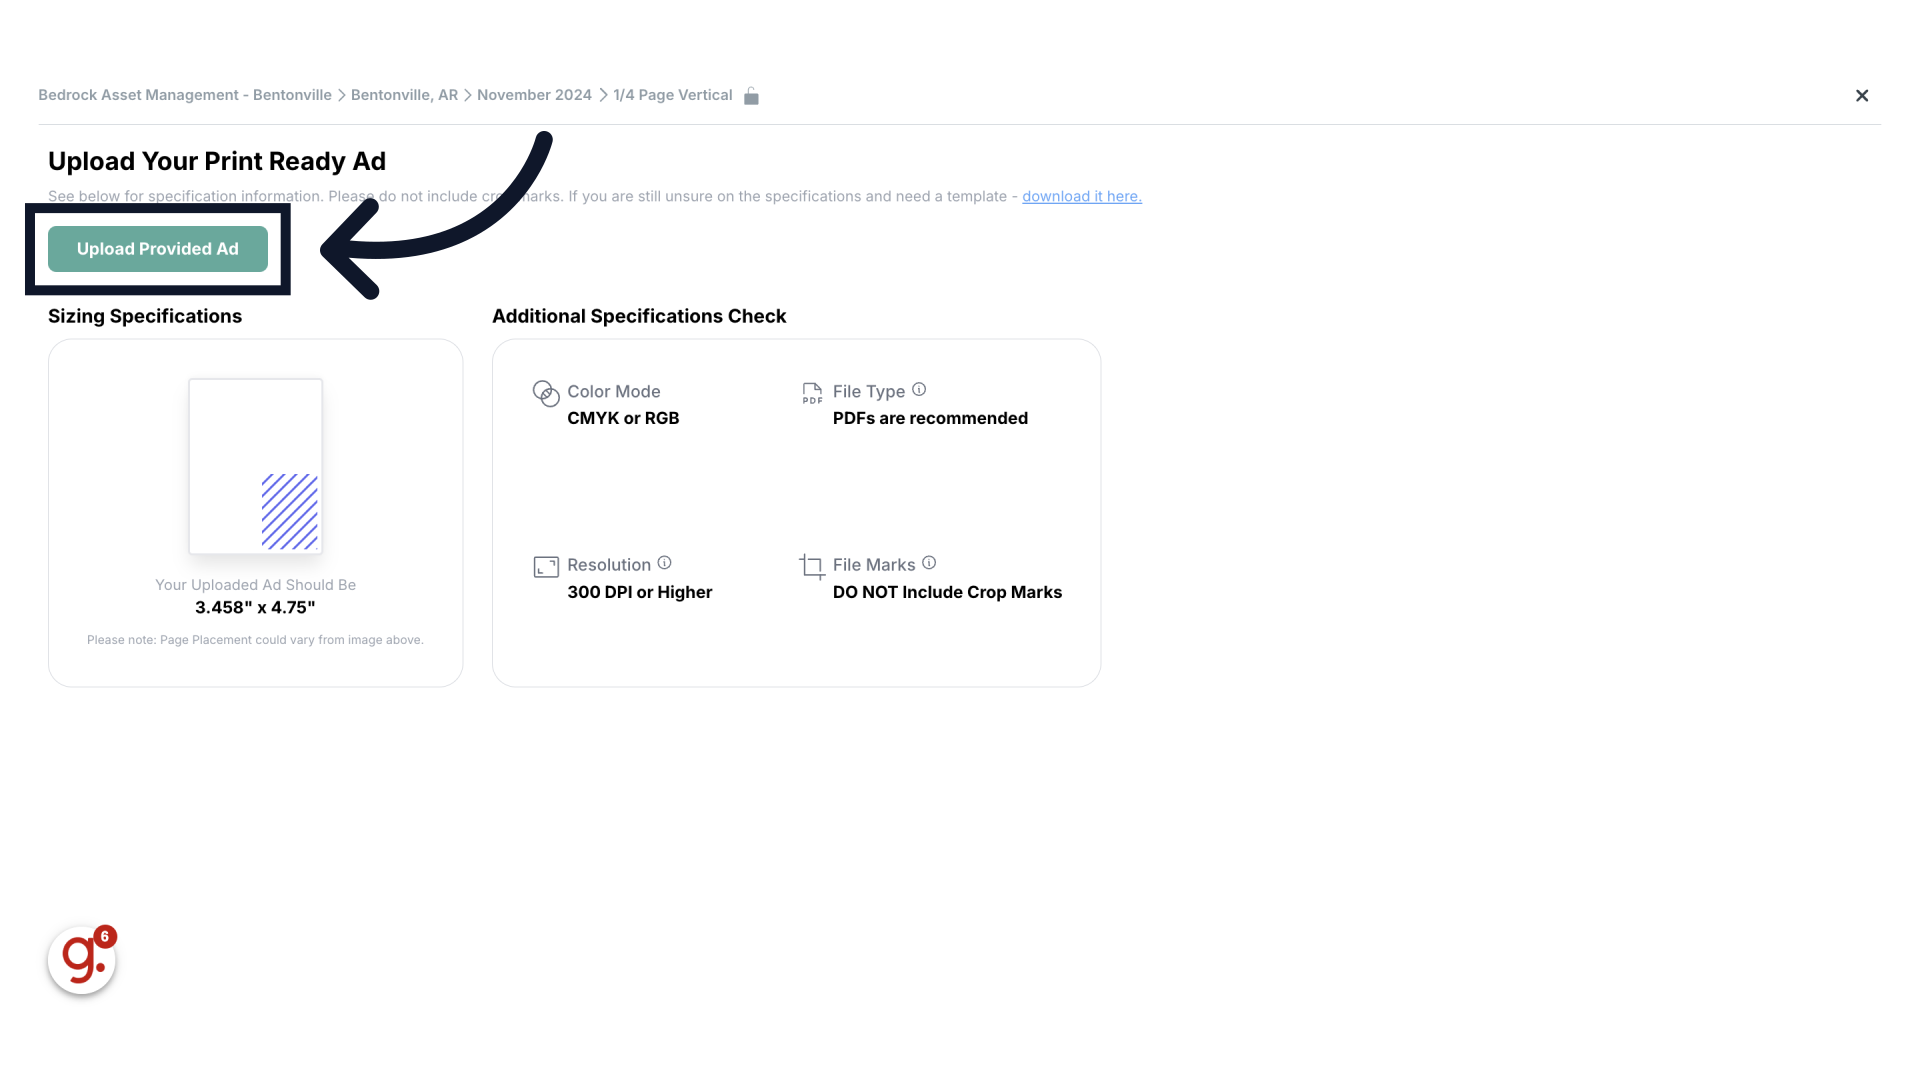
- Click the green “Upload Provided Ad” button location towards the top left side
- Select and open from your files the Print Ready Ad PDF file you are wanting to upload.
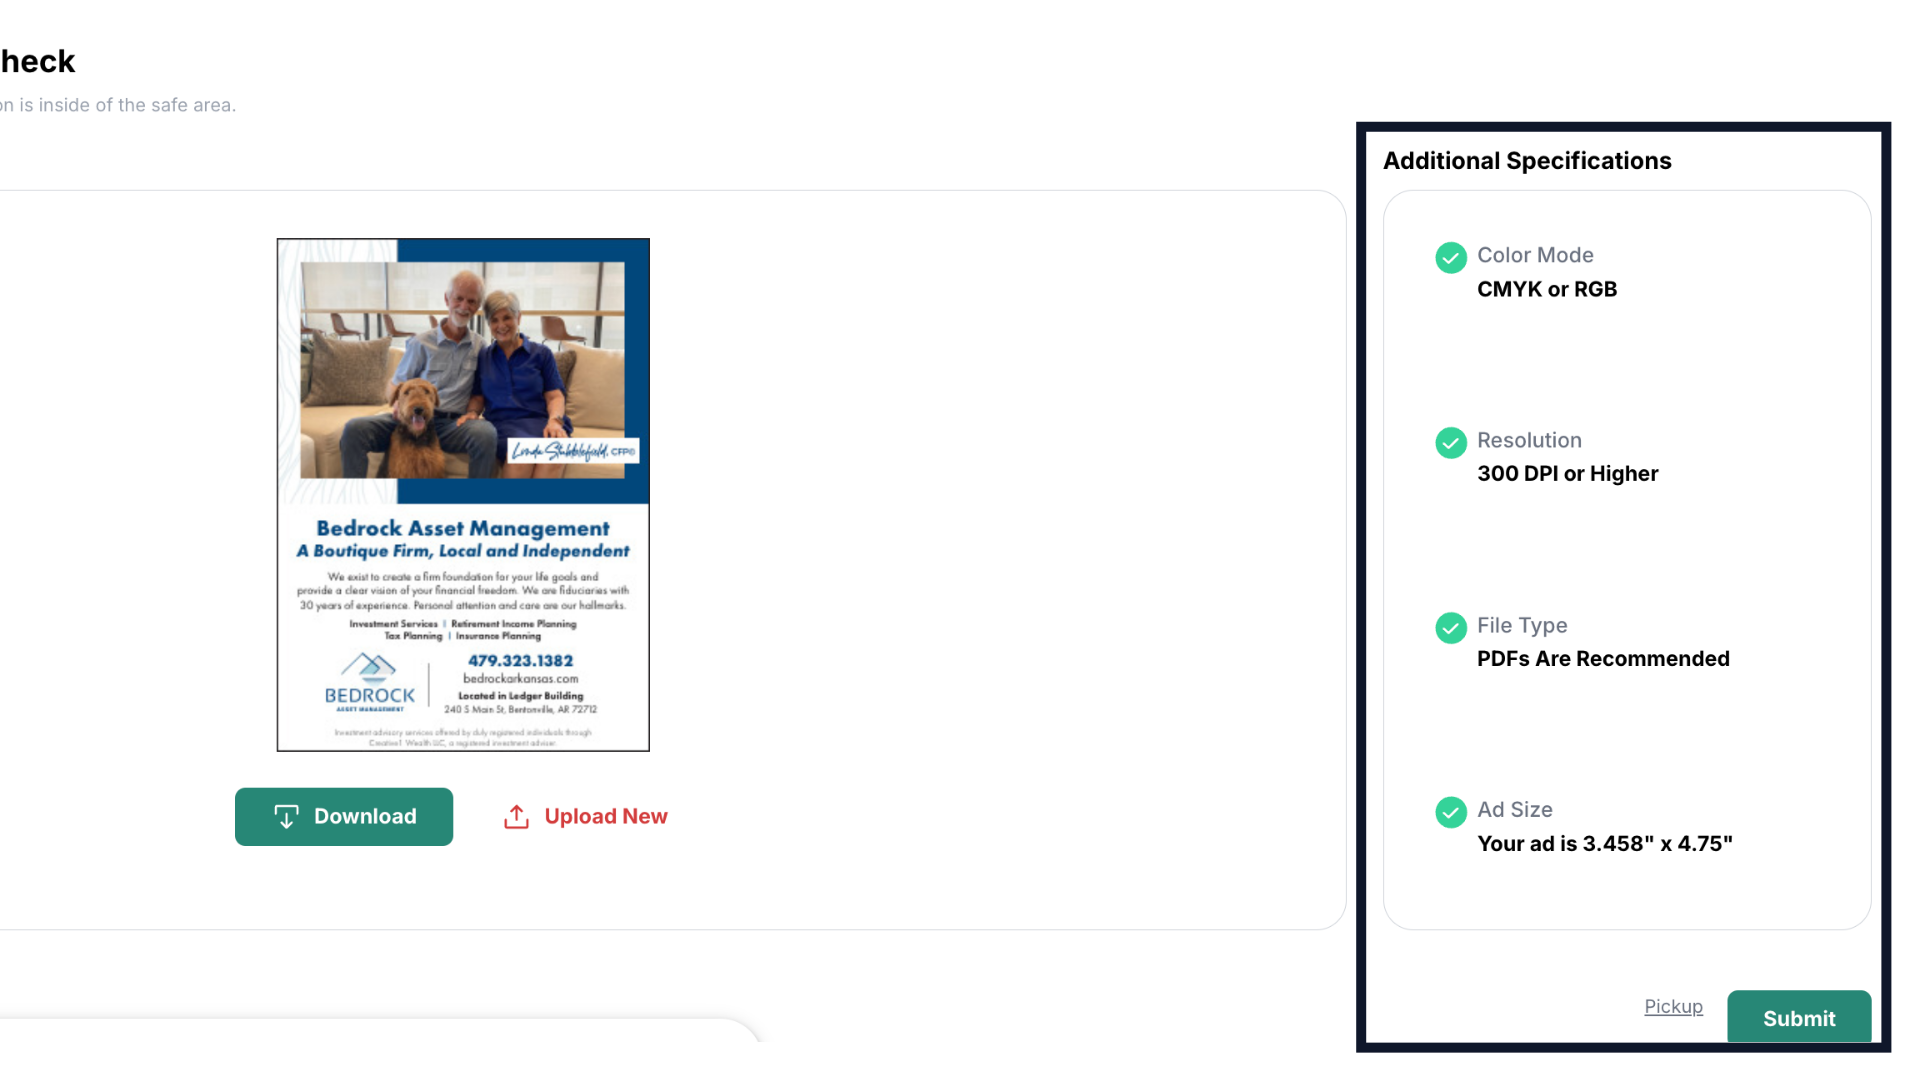
- Once the ad has been uploaded, review the Additional Specifications on the right-hand side have green check marks:
- Green checkmarks next to the specs indicate the file meets the guidelines for that specification.
- A red X next to any of the specifications indicates there is an issue with that spec and the client must make the necessary revisions to the file before proceeding with the submission.
- Color Mode: Ensure the color mode is CMYK or RGB (accepted formats).
- Resolution: The resolution should be 300 DPI or higher.
- File Type: PDF is the recommended file type.
- Ad Size: This section will show if the ad size is correct or indicate how the dimensions differ from what ARC requires.
- Click Submit when all specifications are met with a green checkmark next to it.
Fixing Issues
- If there are any red Xs next to the ad specifications, the client must adjust the file before proceeding.
- If unable to fix, you can use the "Fix My Ad" button in an attempt for the corporate design team to attempt to fix the issue.
- The corporate design team can only make minor adjustments, such as:
- Removing crop marks
- Fixing minor sizing issues
Note: Submitting with the "Fix My Ad" button does not guarantee that all issues will be resolved. The ad may still require revisions.
How to Upload a Print Ready Ad (Publisher POV)
This guide will walk you through the process of uploading a print-ready ad in ARC.
Go to citylifestylehq.com
1. Uploading a Print-Ready Ad for a Client
While it’s not ideal and best practice is for the client to upload their ad directly through the customer portal, there are instances where the publisher may need to step in. As a last resort, the publisher may upload the ad to ensure it is submitted and approved before the deadline, avoiding delays in production. However, this should only be done in exceptional cases, as having the client upload the ad themselves ensures they have full control over the submission and approval process.

2. Reporting Page
In ARC, navigate to the Reporting page on the left hand side.

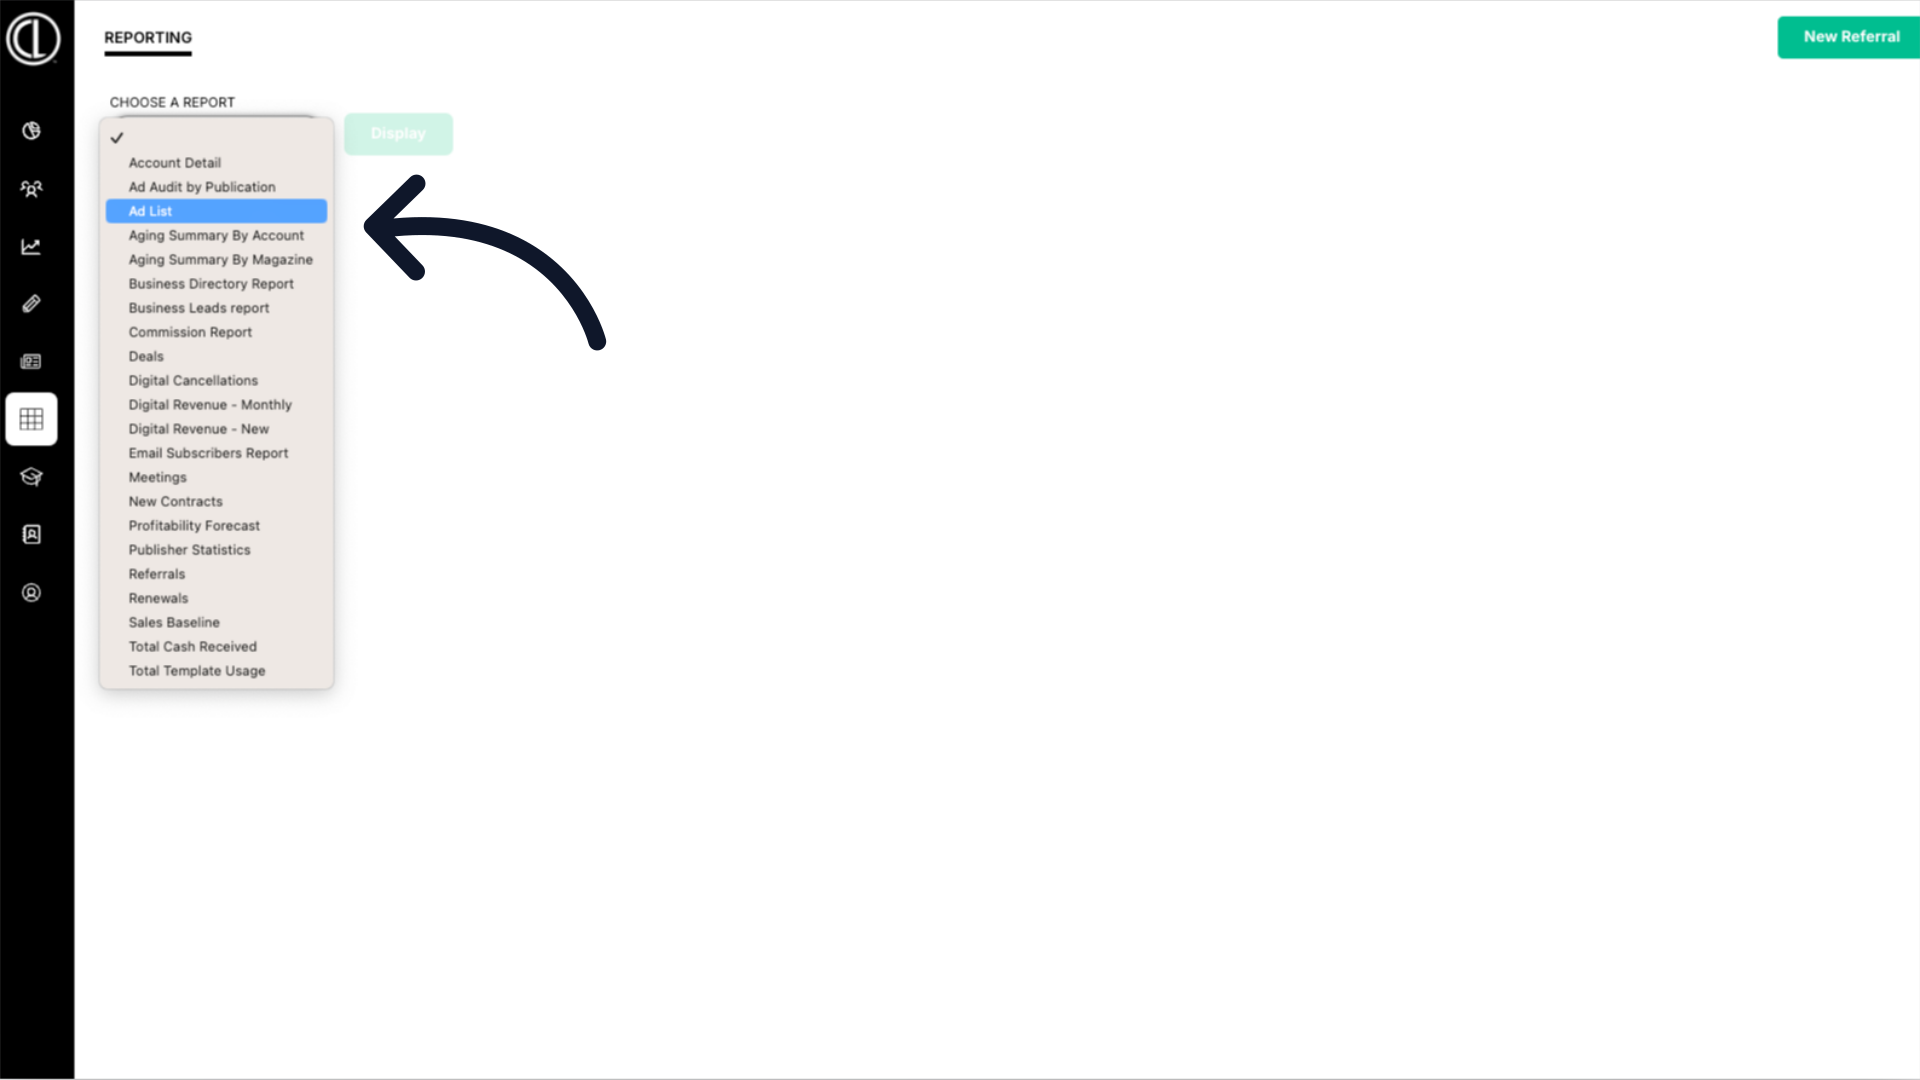
3. Select Ad List report
Select the Ad List report from the drop down menu.
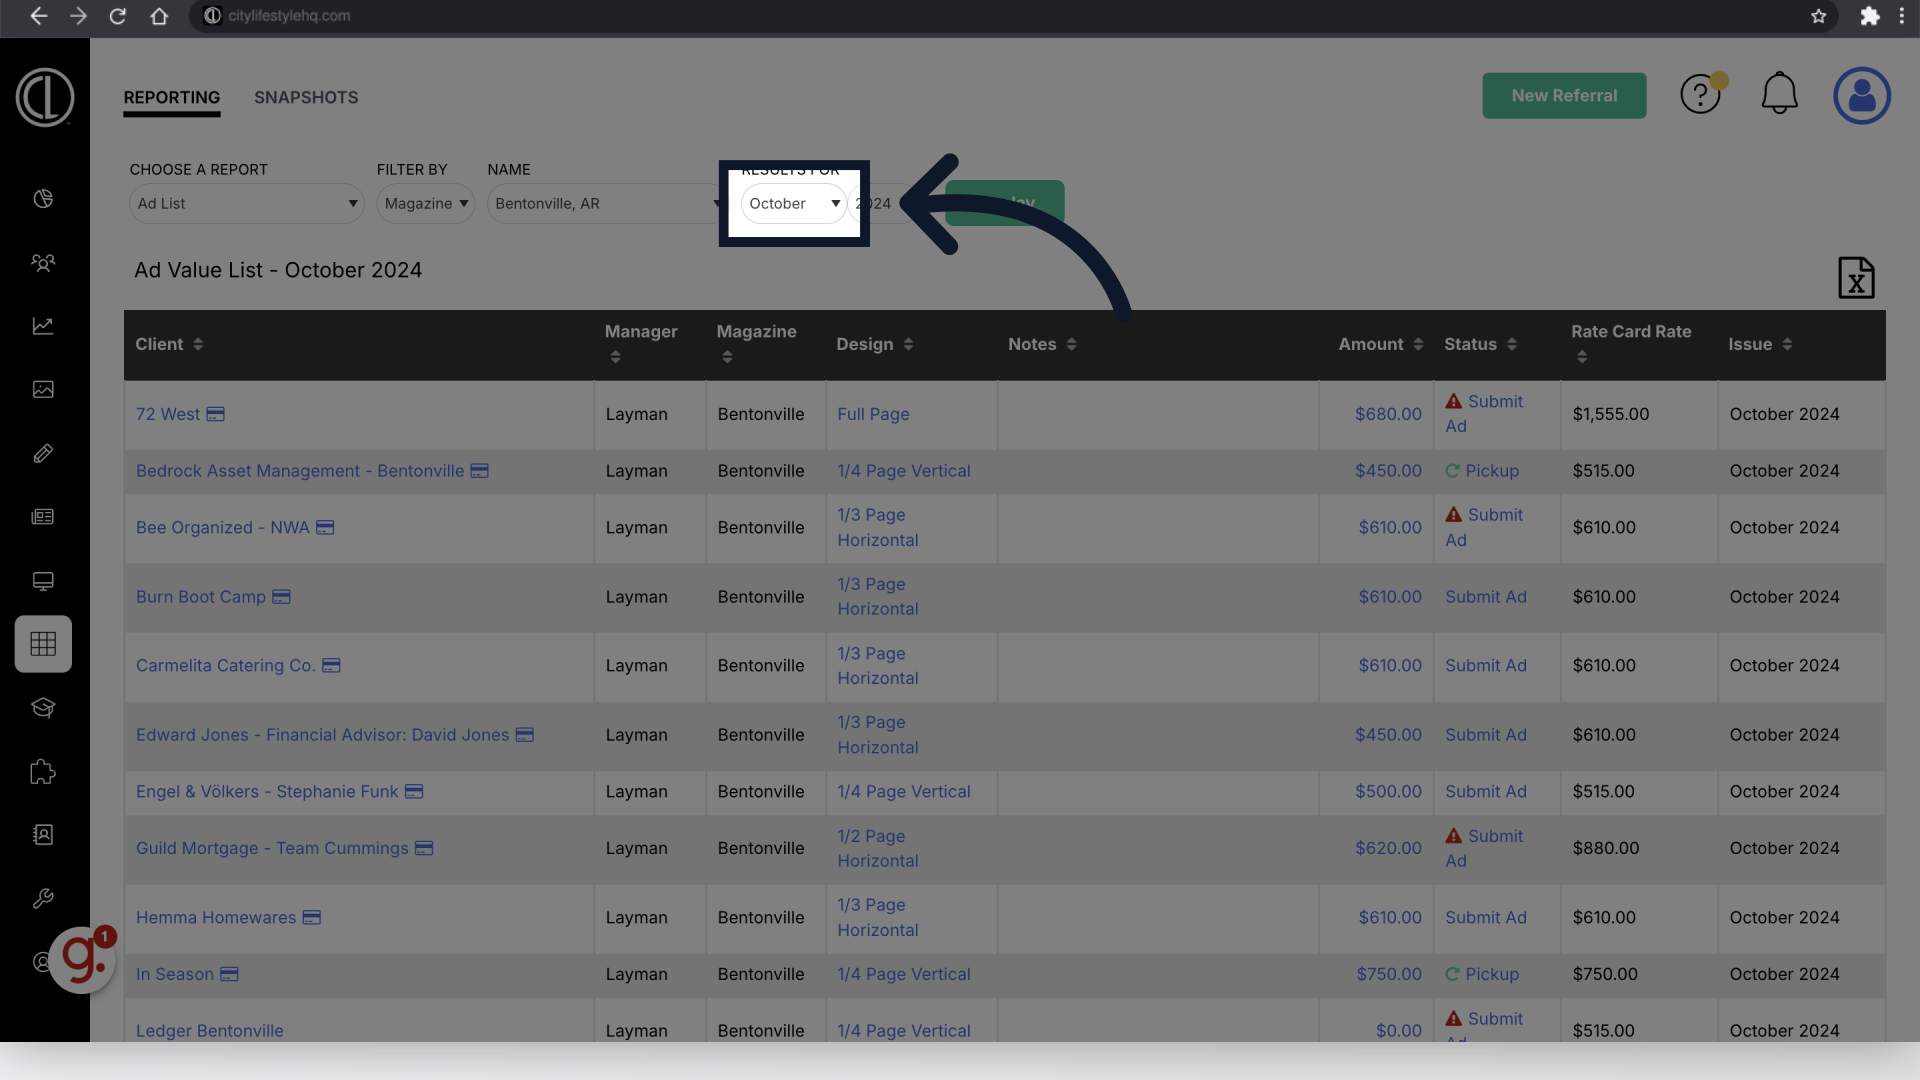
4. Select the month
Select the desired month.
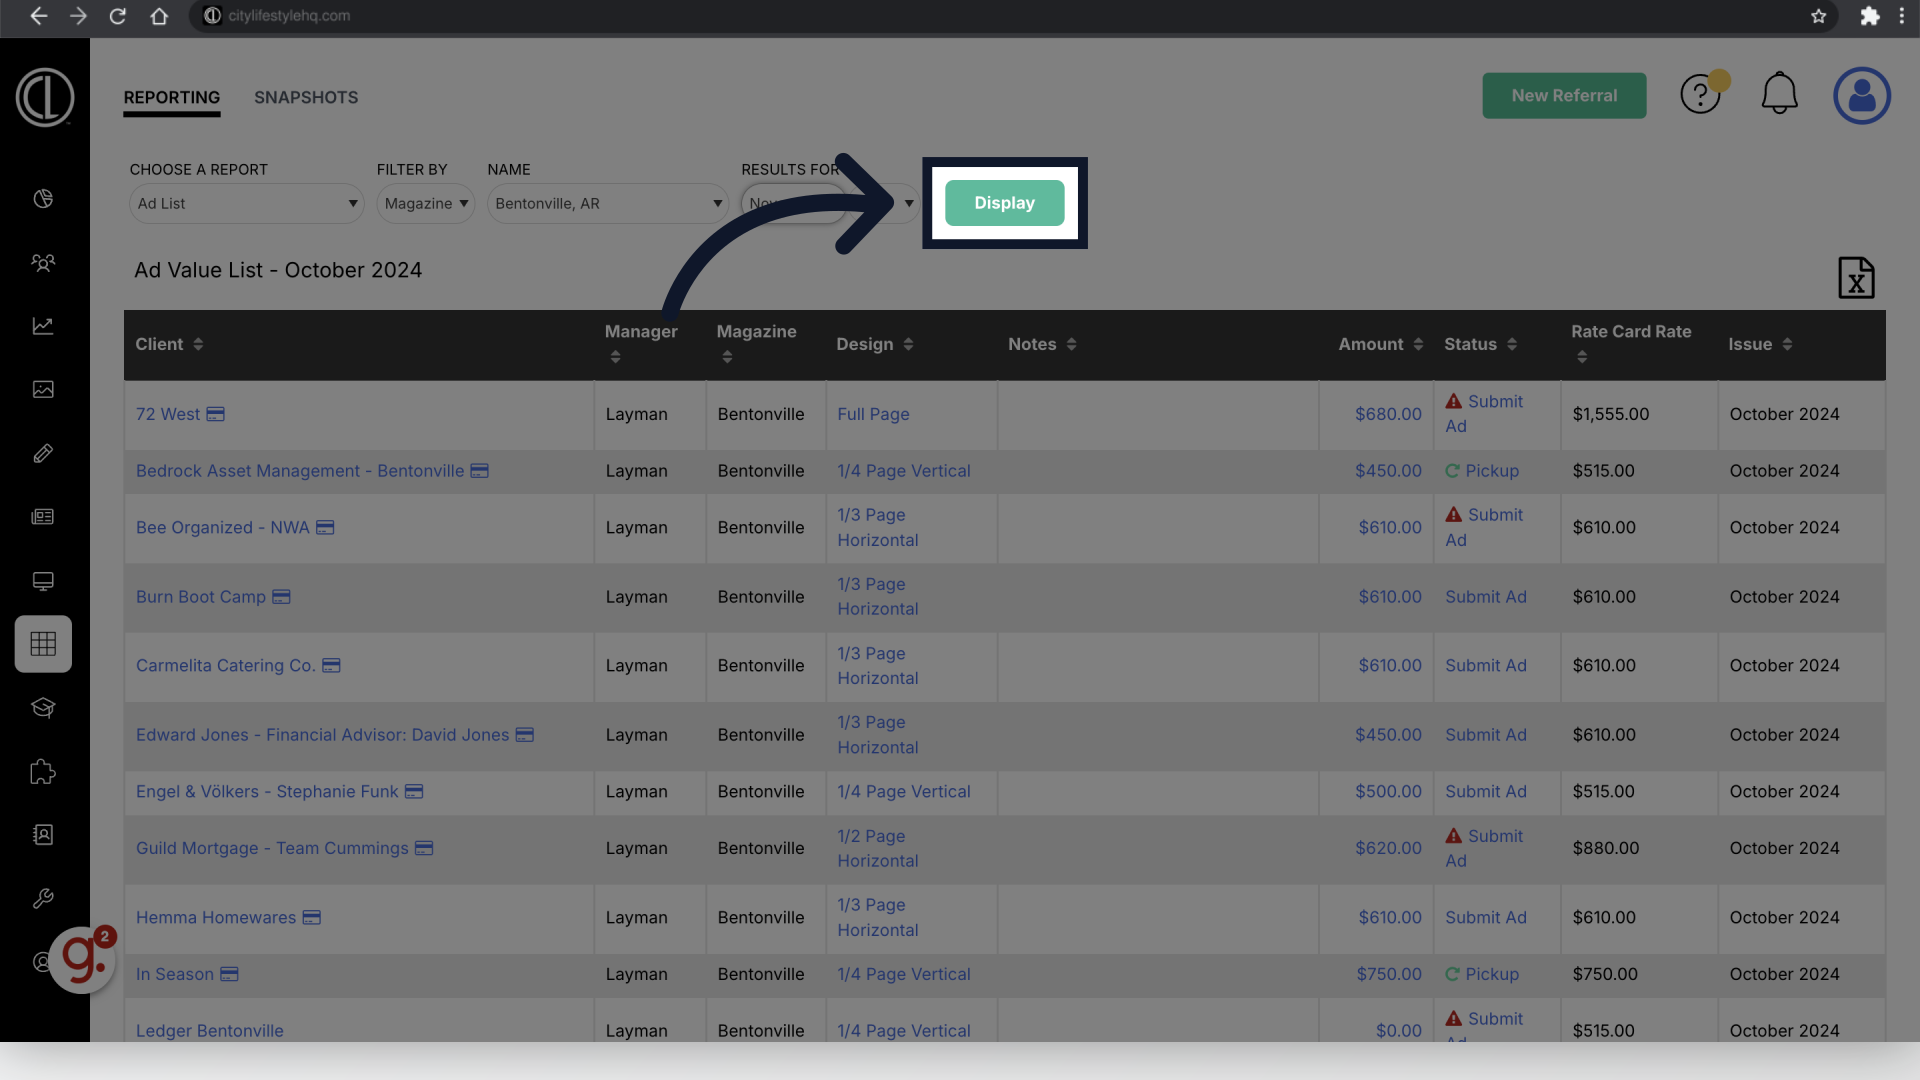
5. Click "Display"
Click Display
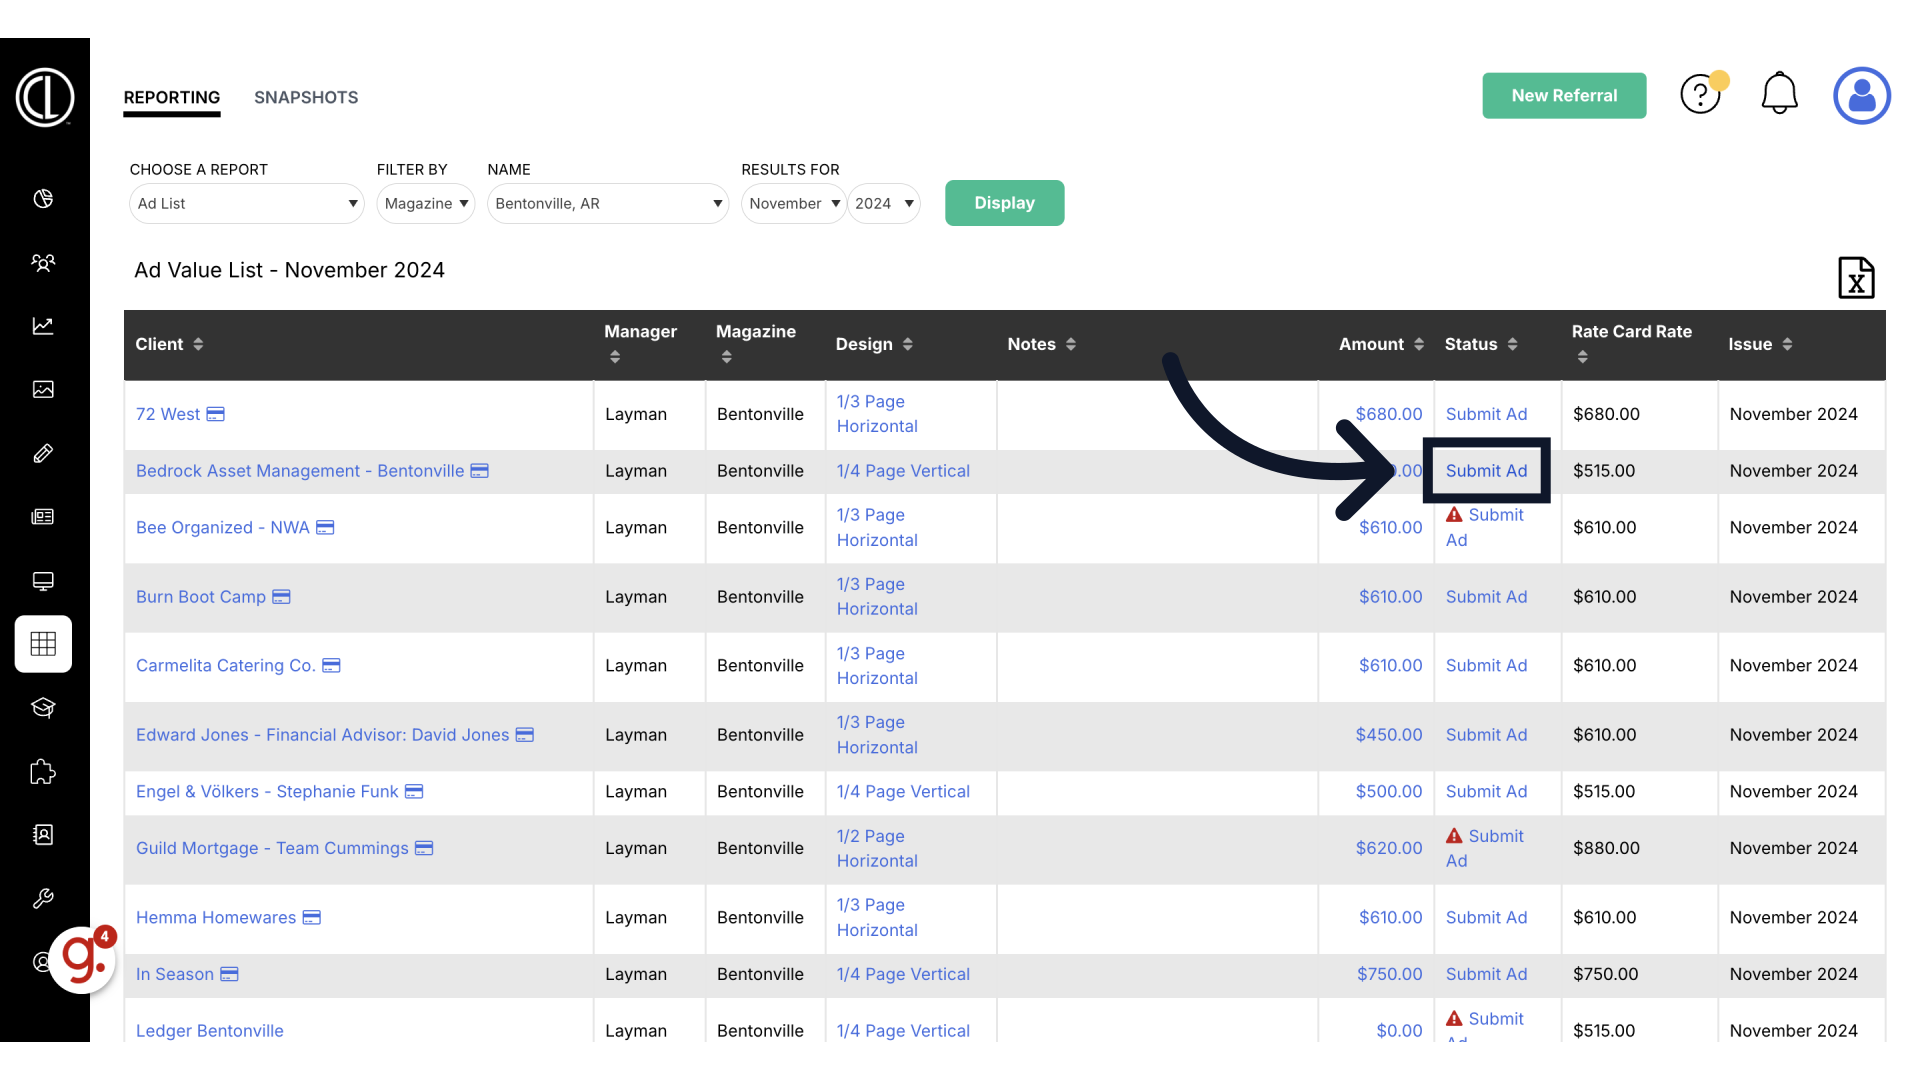
6. Click "Submit Ad"
Find the account from the client list you are wanting to place the Ad for. To the right under the Status column, click Submit Ad for that account.
7. Upload a Finished Ad
In the screen that populates, select "Upload a Finished Ad"
8. Click "Upload Provided Ad"
Click the green "Upload Provided Ad" button located towards the top left side to upload the Print Ready Ad PDF file.
9. Review Ad and Submit
Once the ad has been uploaded, verify the Additional Specifications on the right-hand side have green check marks. Green checkmarks indicate the file meets that guideline. If there is a red X this indicates an issue with one of the guidelines and will need necessary revisions to the file before proceeding with the submission. Click Submit when all specifications are met.
The guide covered how to upload a print ready ad in ARC for a client.